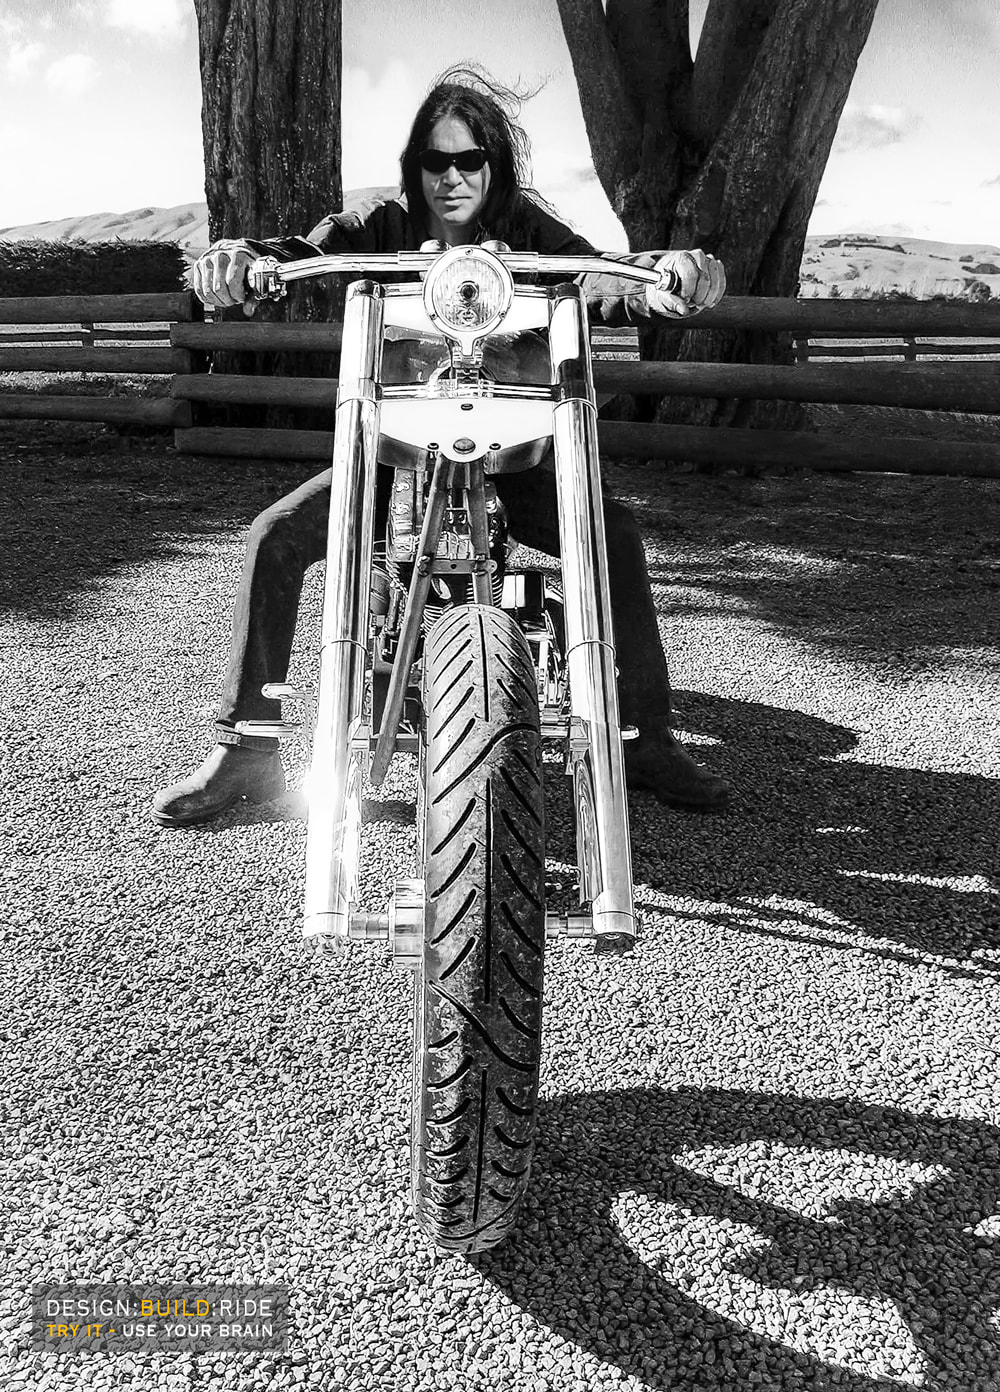


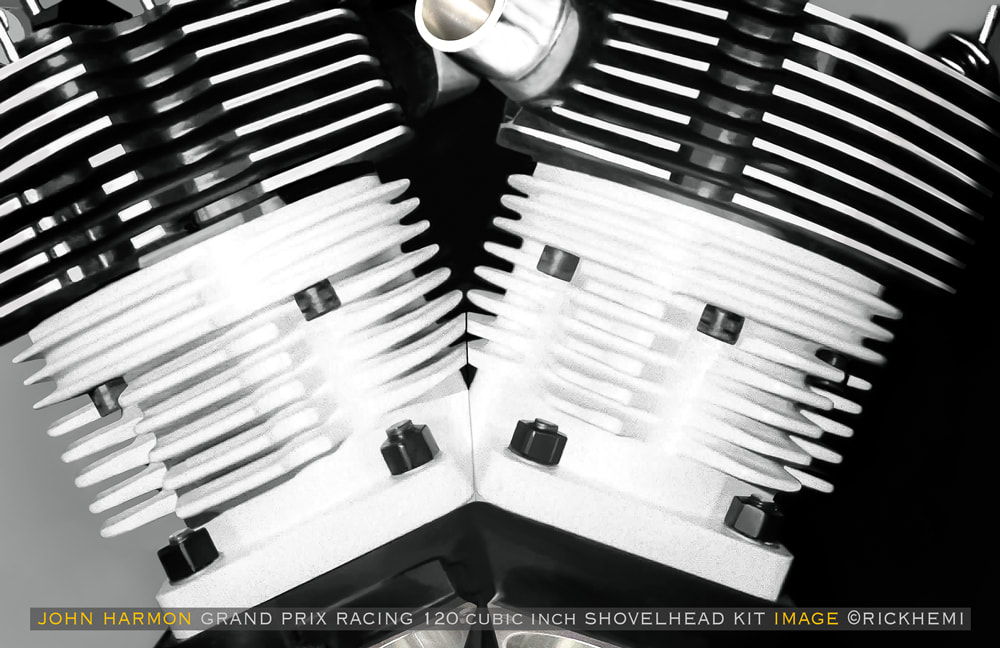
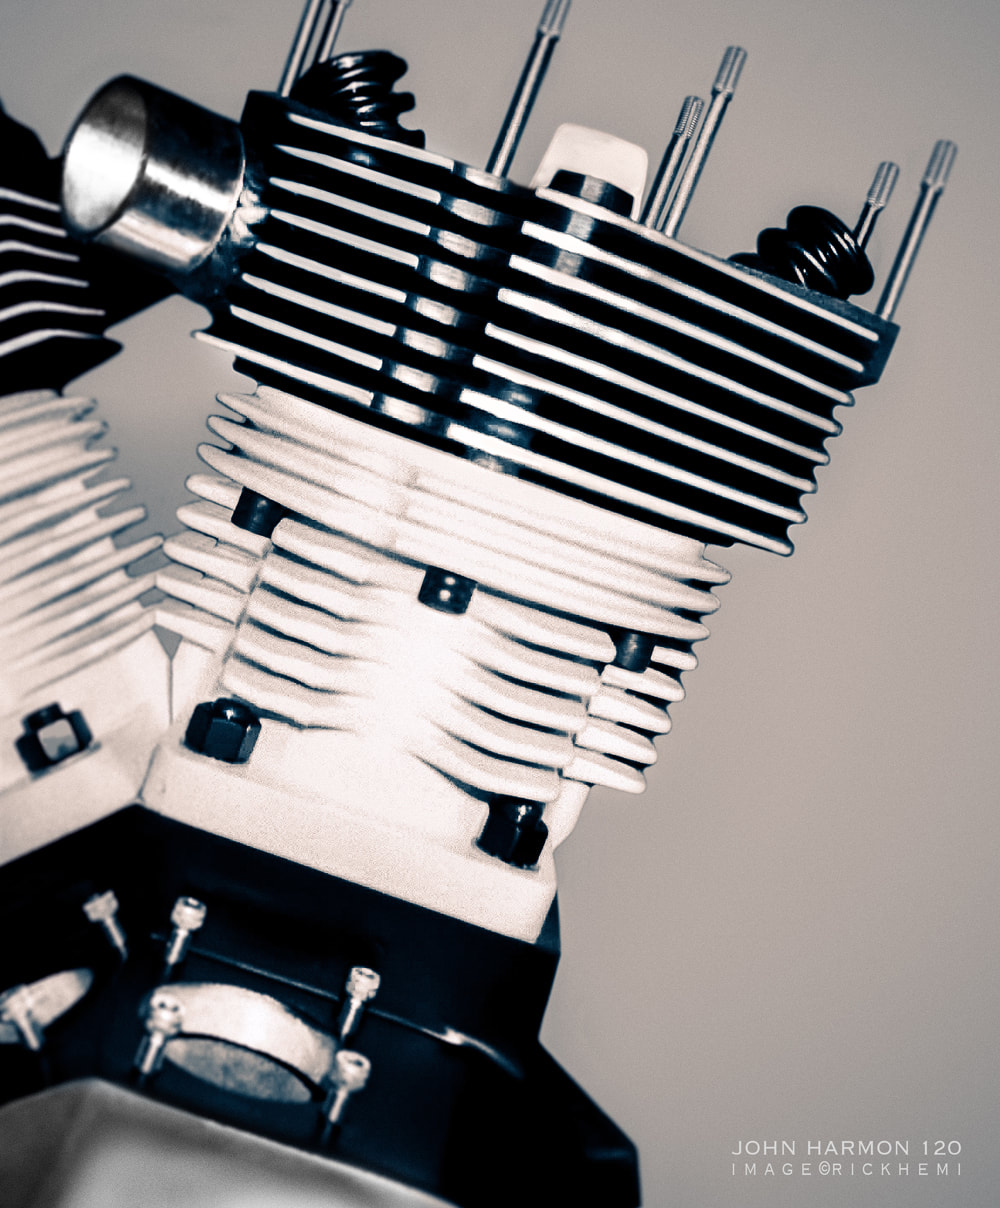
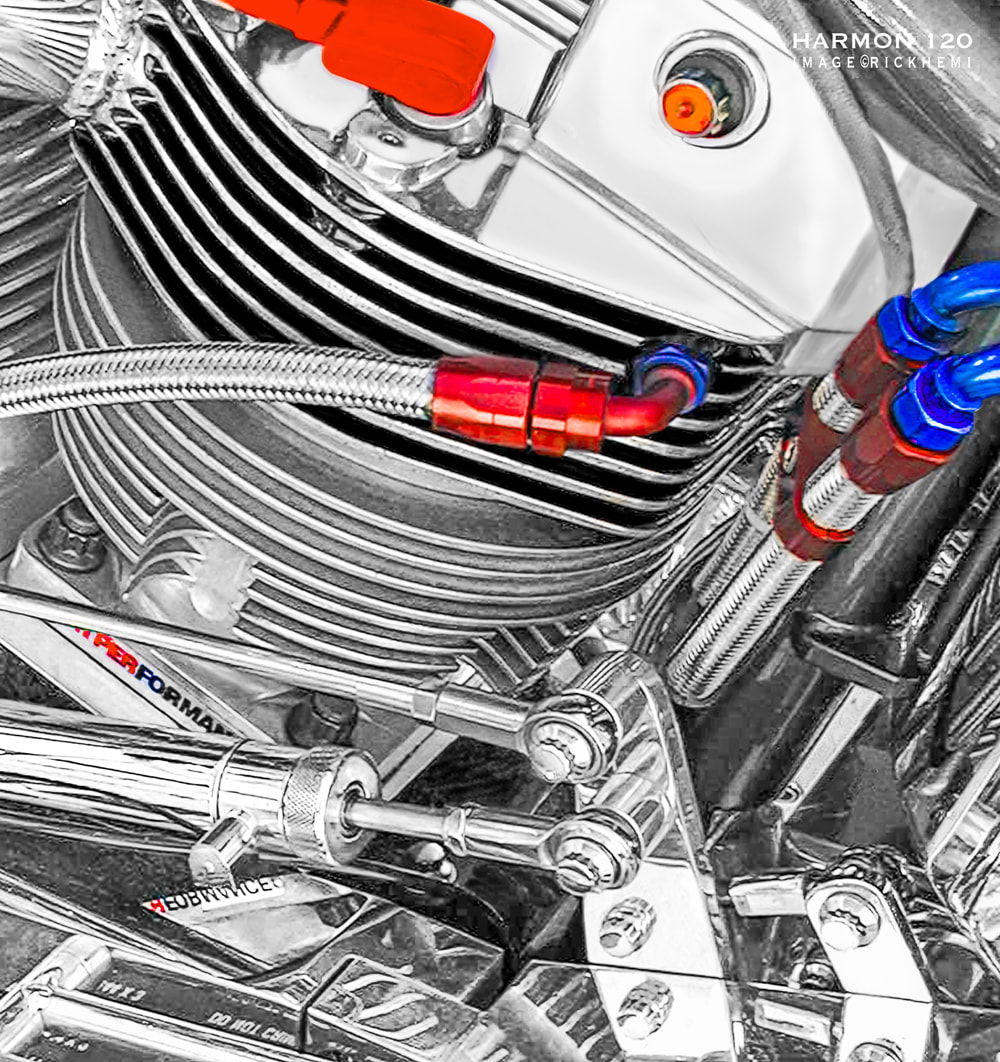
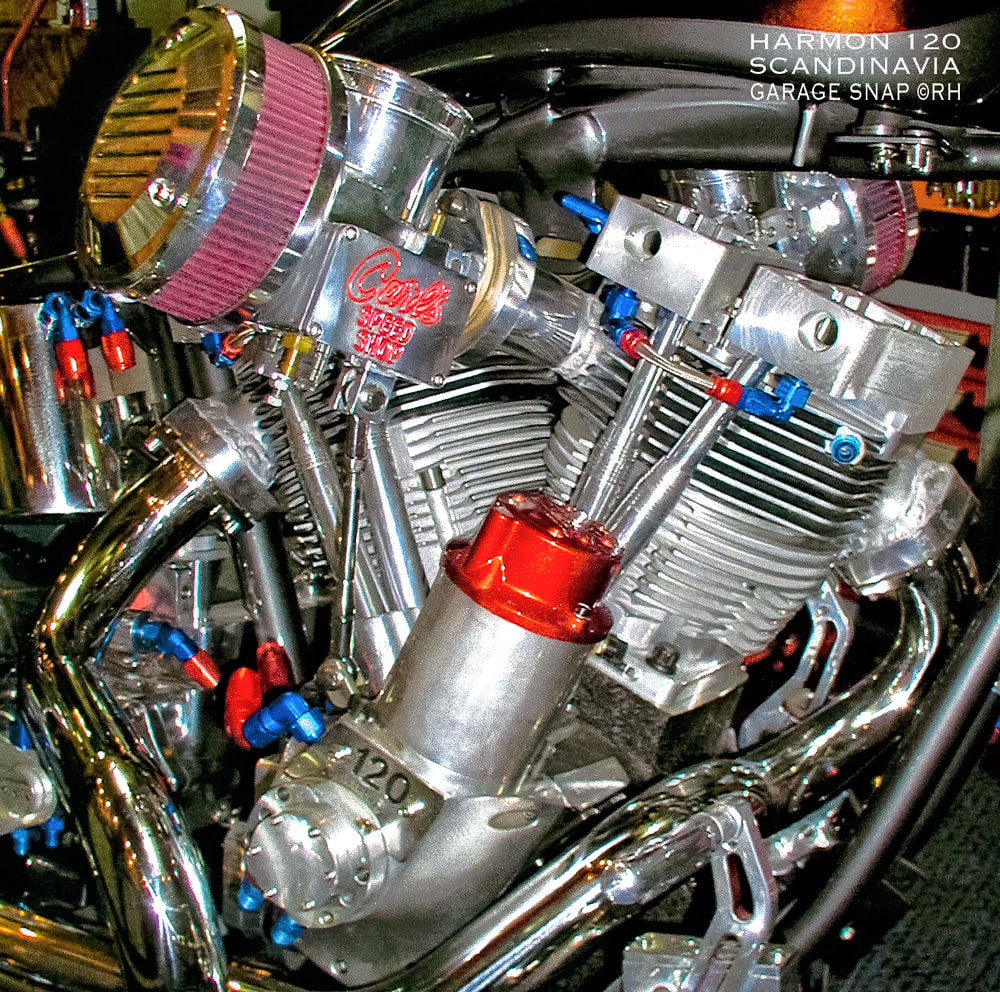
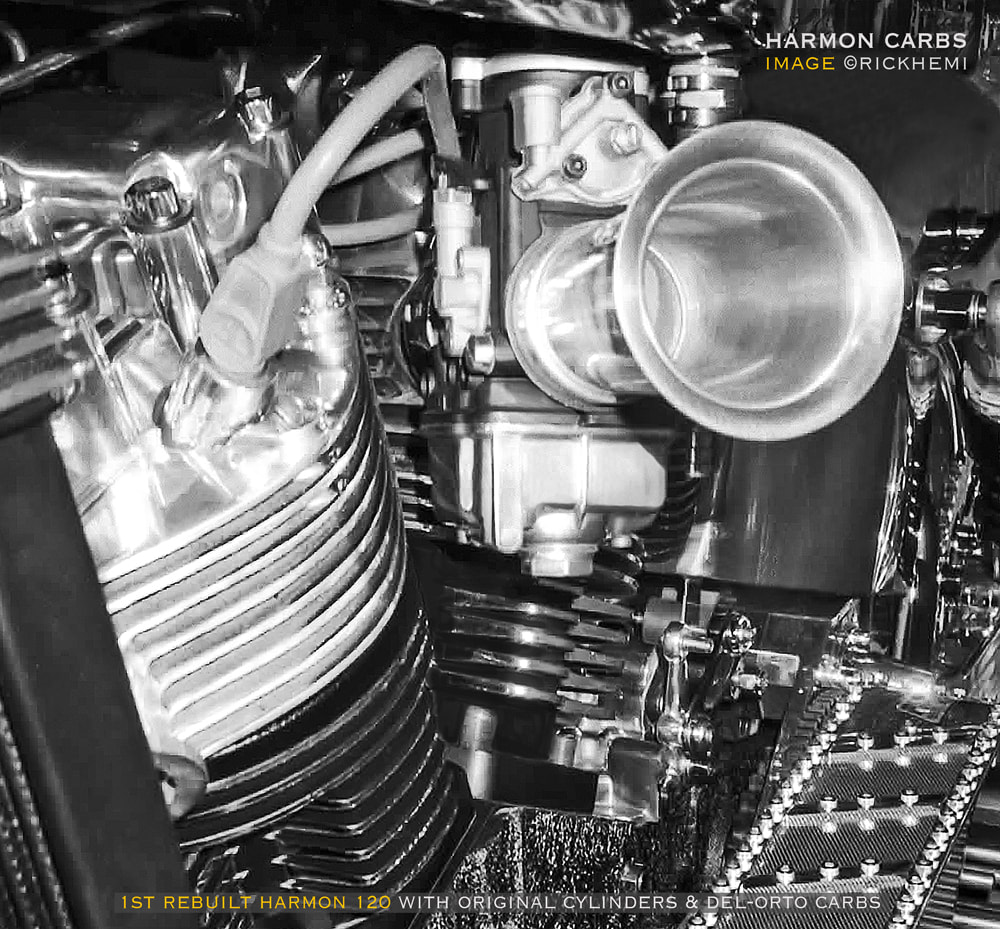
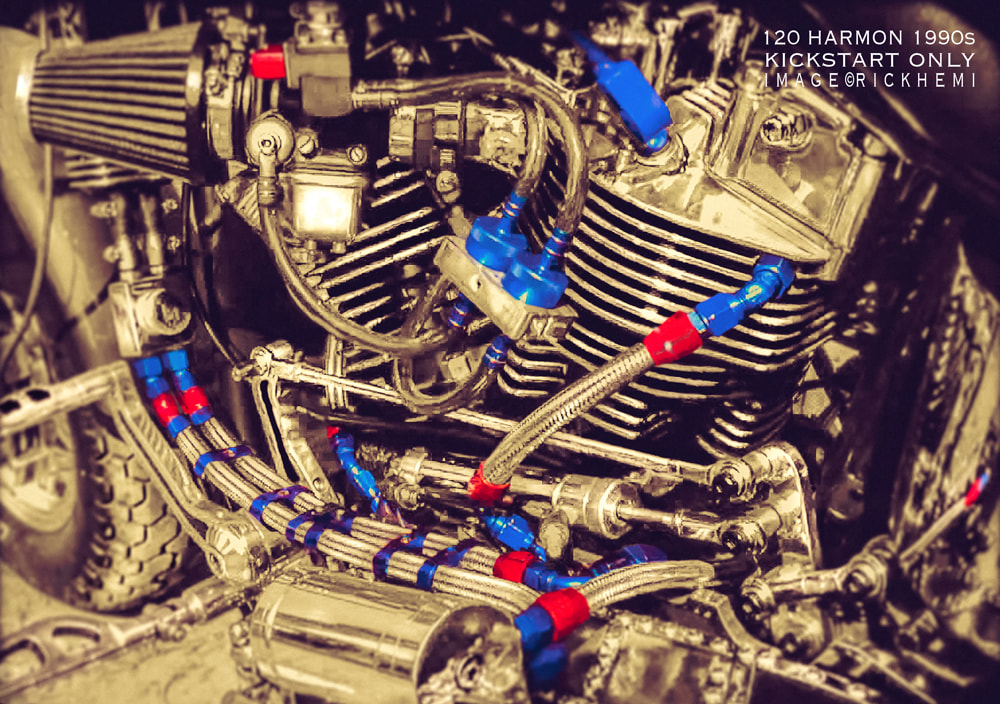
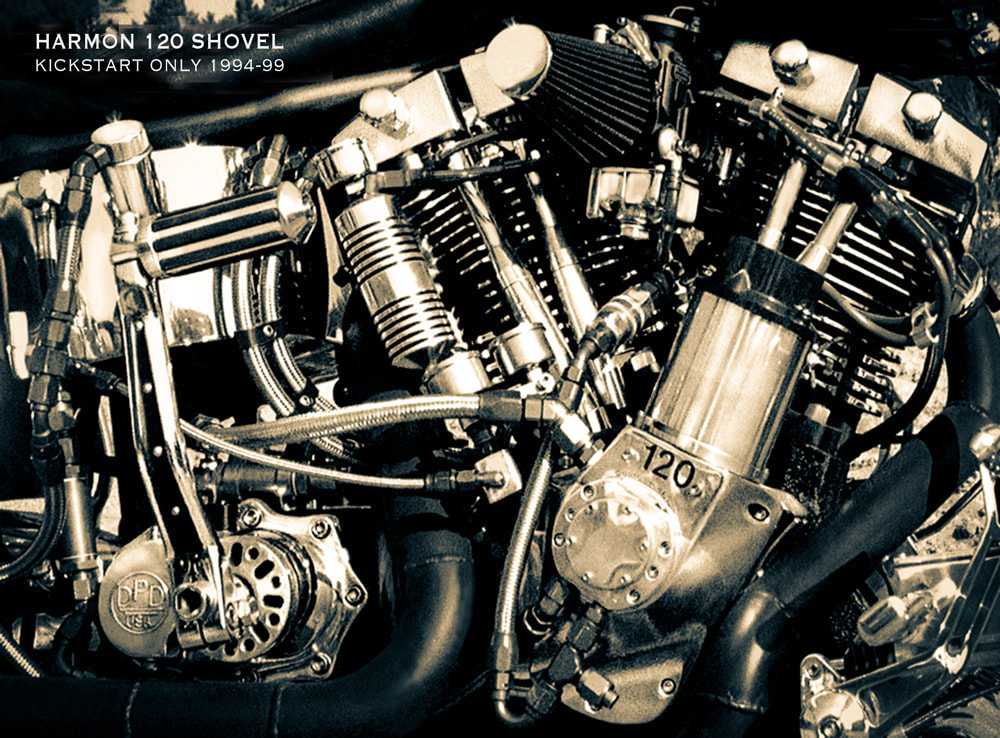
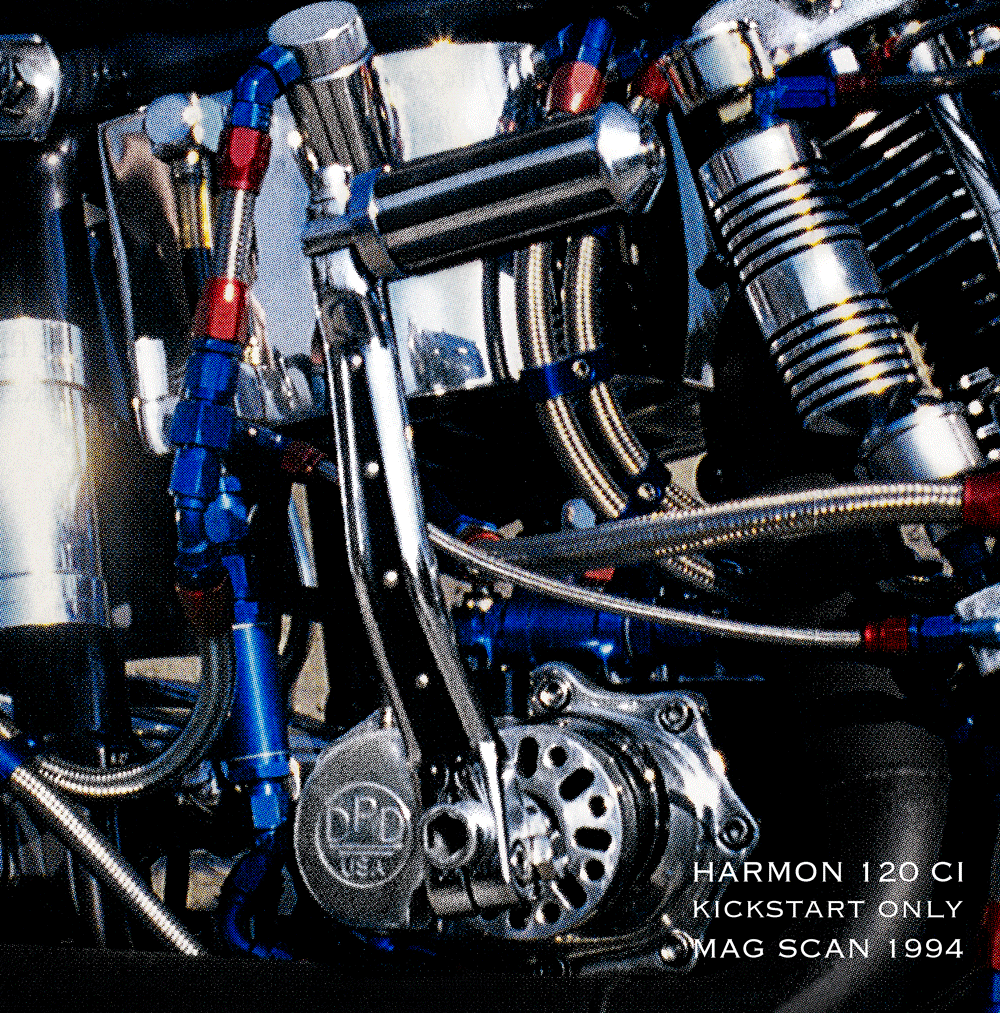
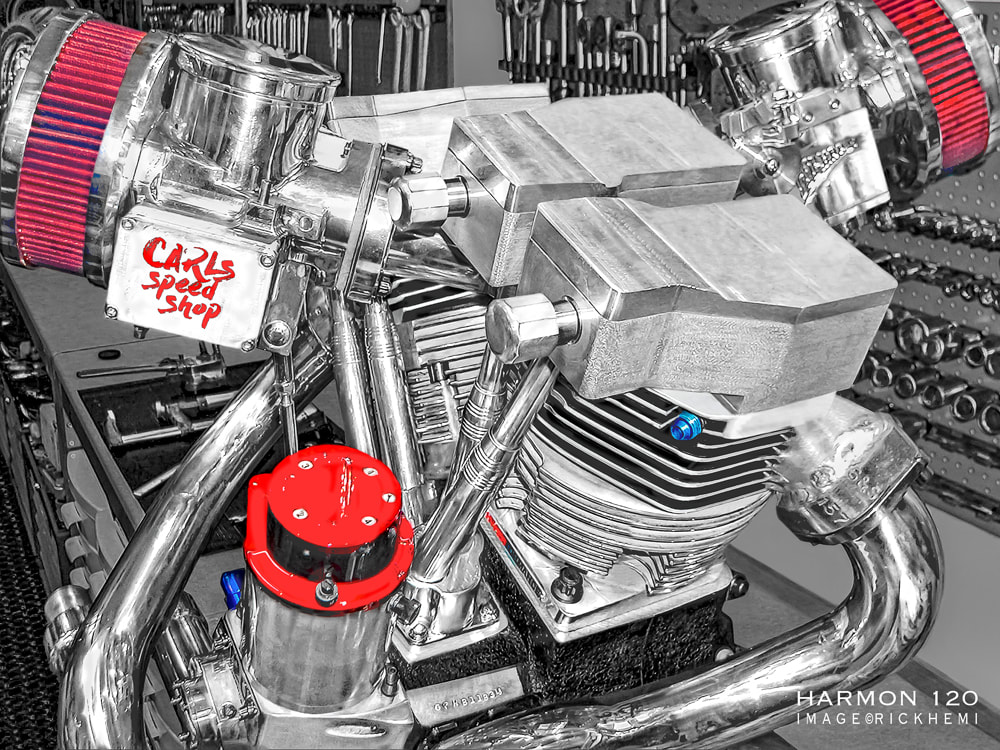
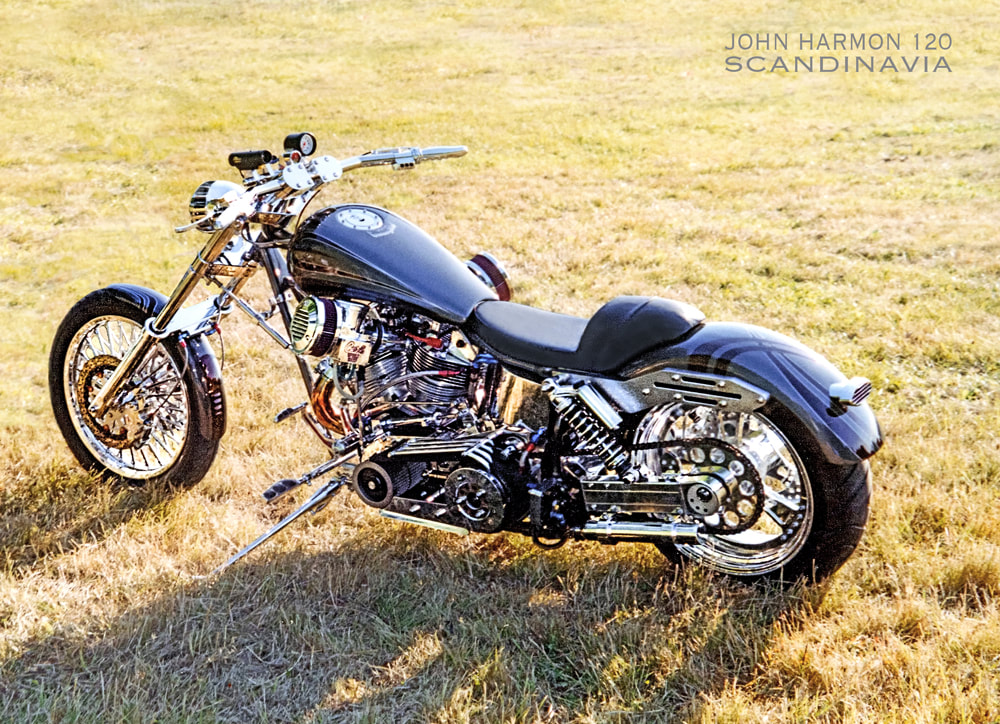
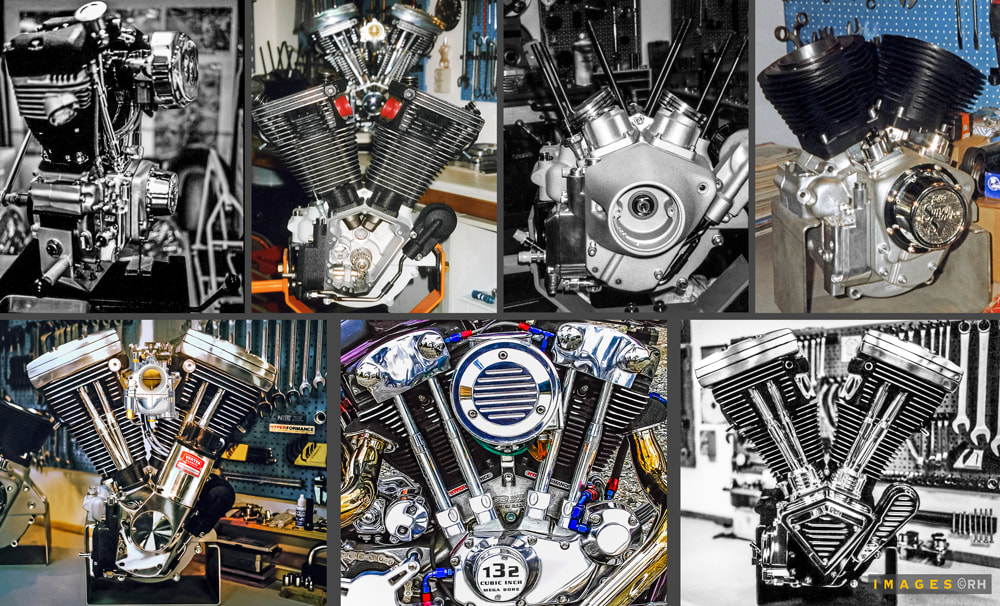
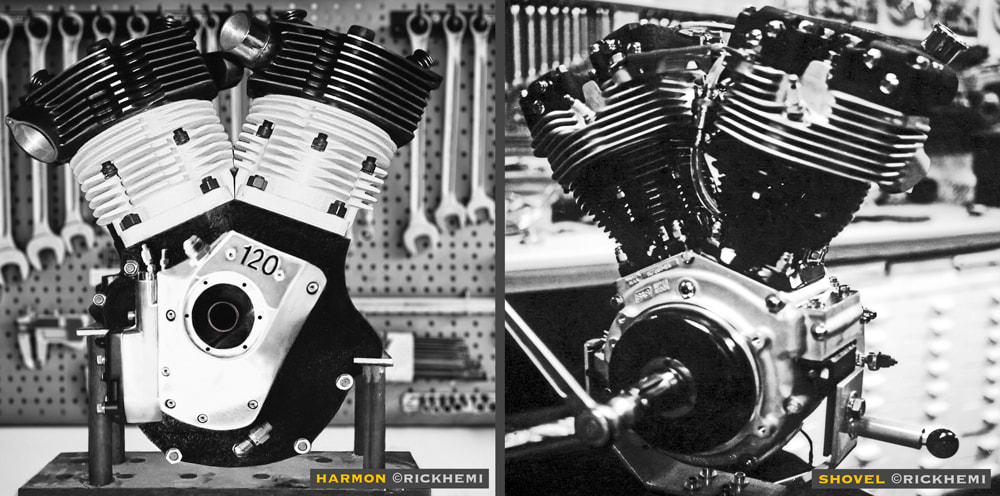
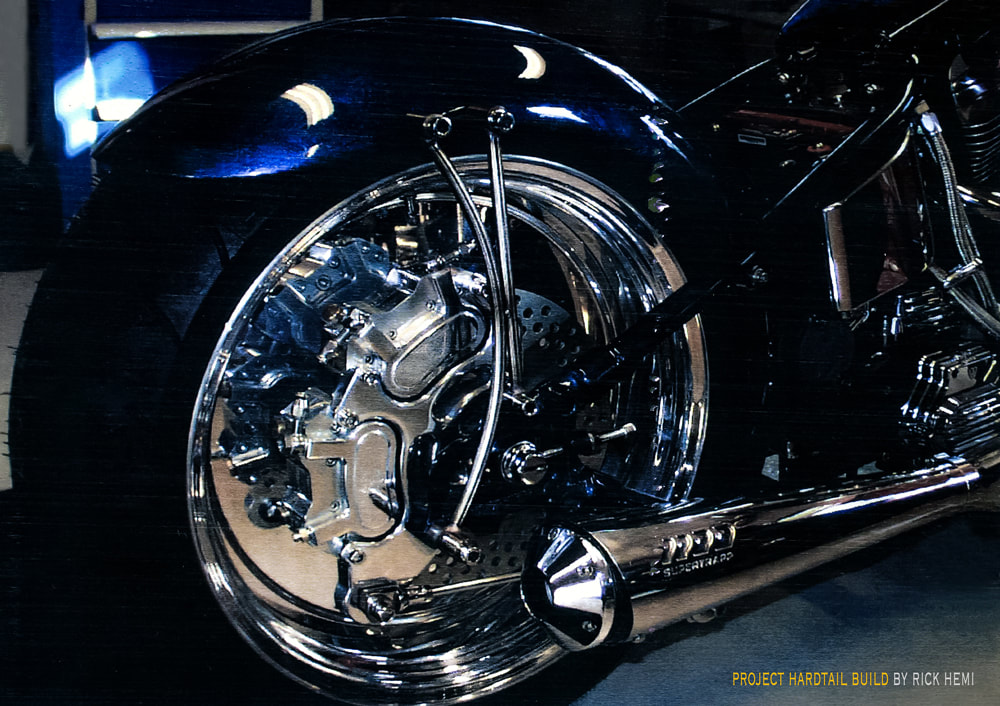
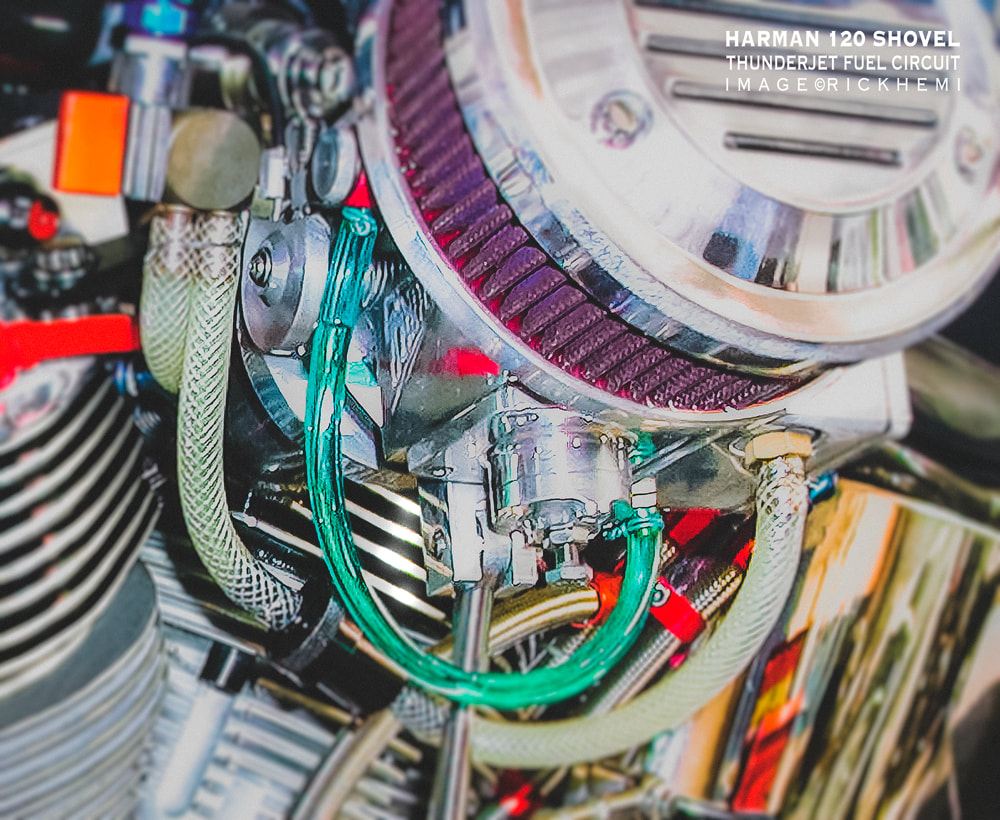
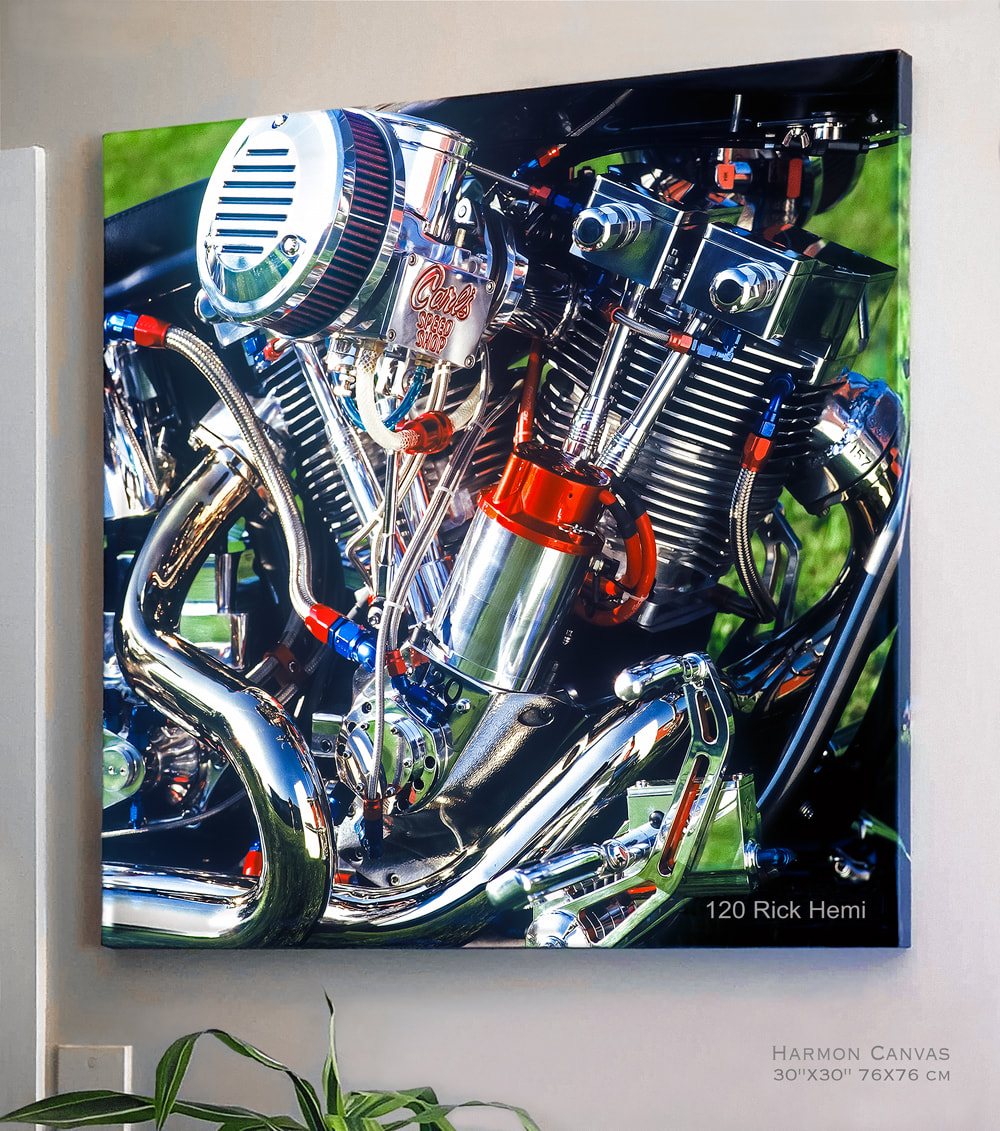
John Harmon 120 c.i. Shovelhead Engine
Rebuild by Rick Hemi
All Images By Rick Hemi
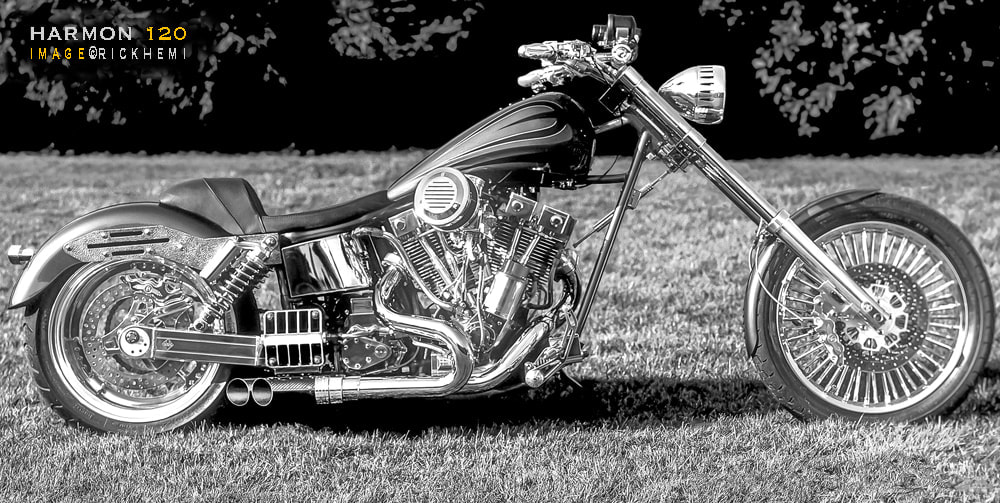
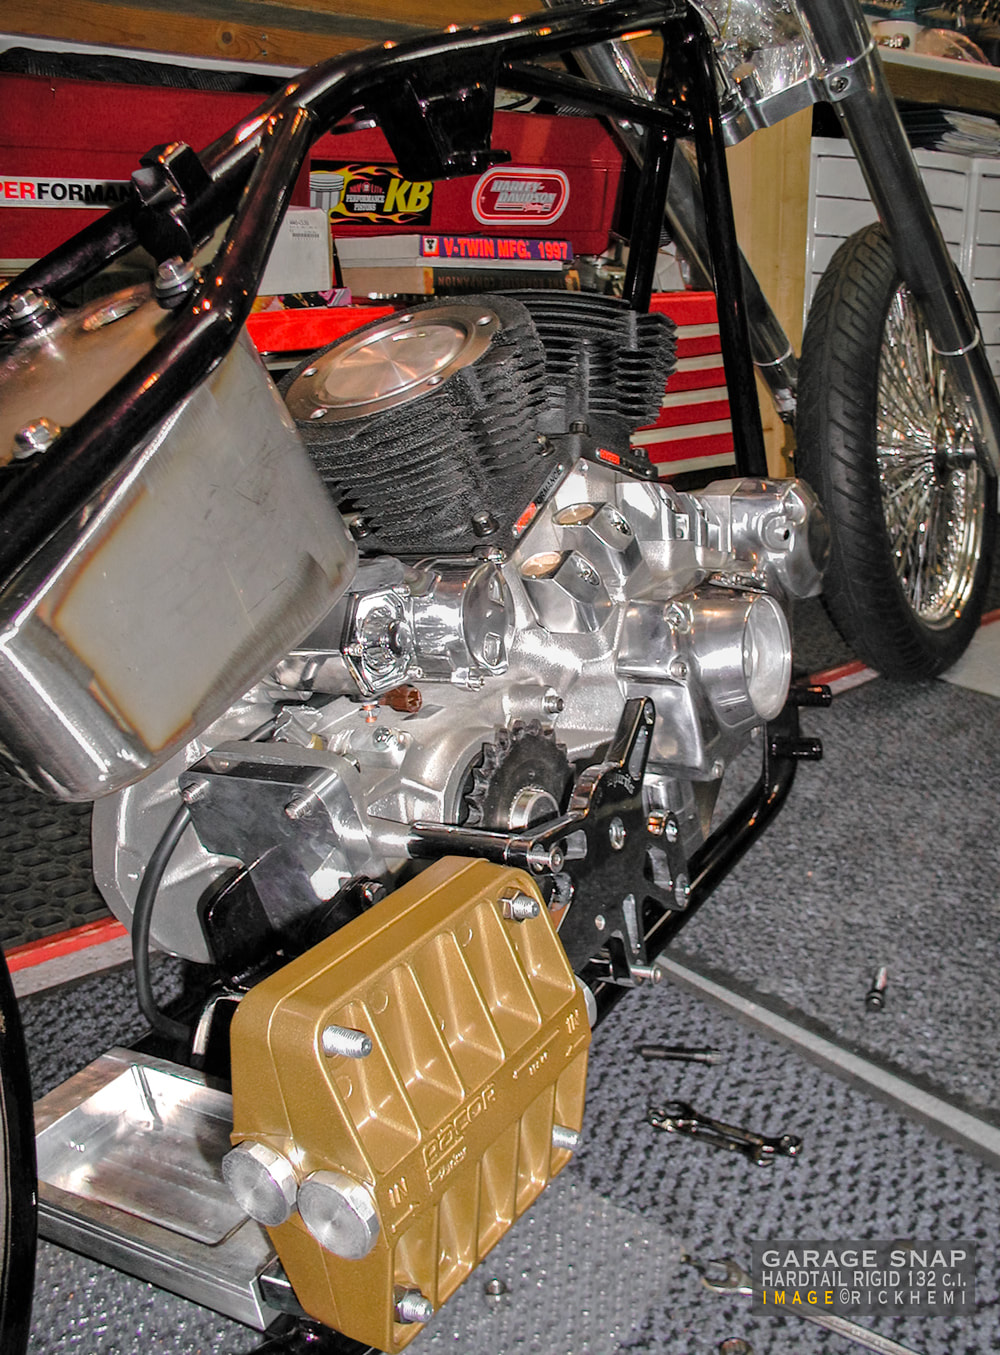
Old school big twin shovelhead : Engine - John Harmon : Transmission - Andrews : Frame - modified 1967 FL : Build year - 1994

History & Rebuild
Biker magazine - John Harmon 120 Shovelhead - Rebuild & construction, photography & text by Rick Hemi
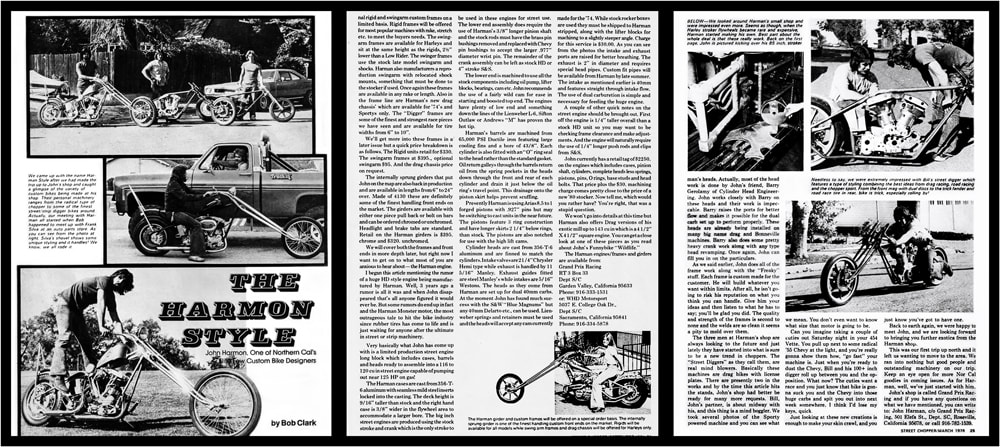
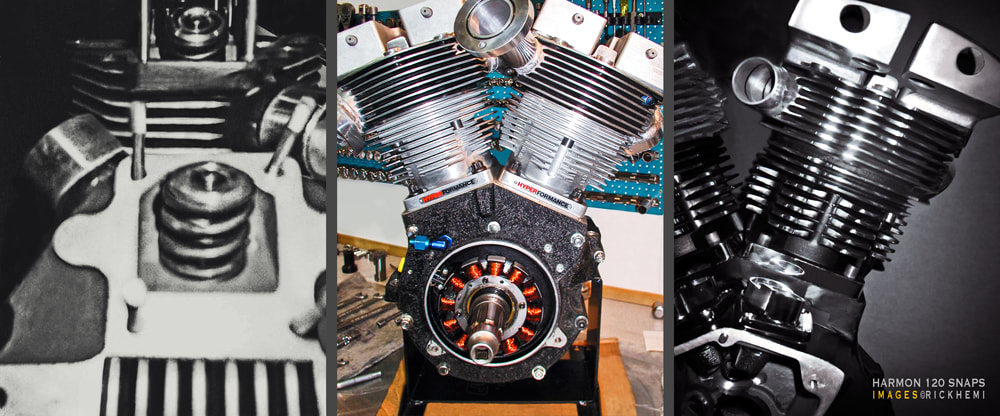
Classic editorials were many through the 1980s covering John Harmon projects. Street Chopper magazine had printed various full page spreads on Harmon engines - above article by Bob Clark, images from Street Chopper Magazine 1981 - Hot Bike John Harmon archives

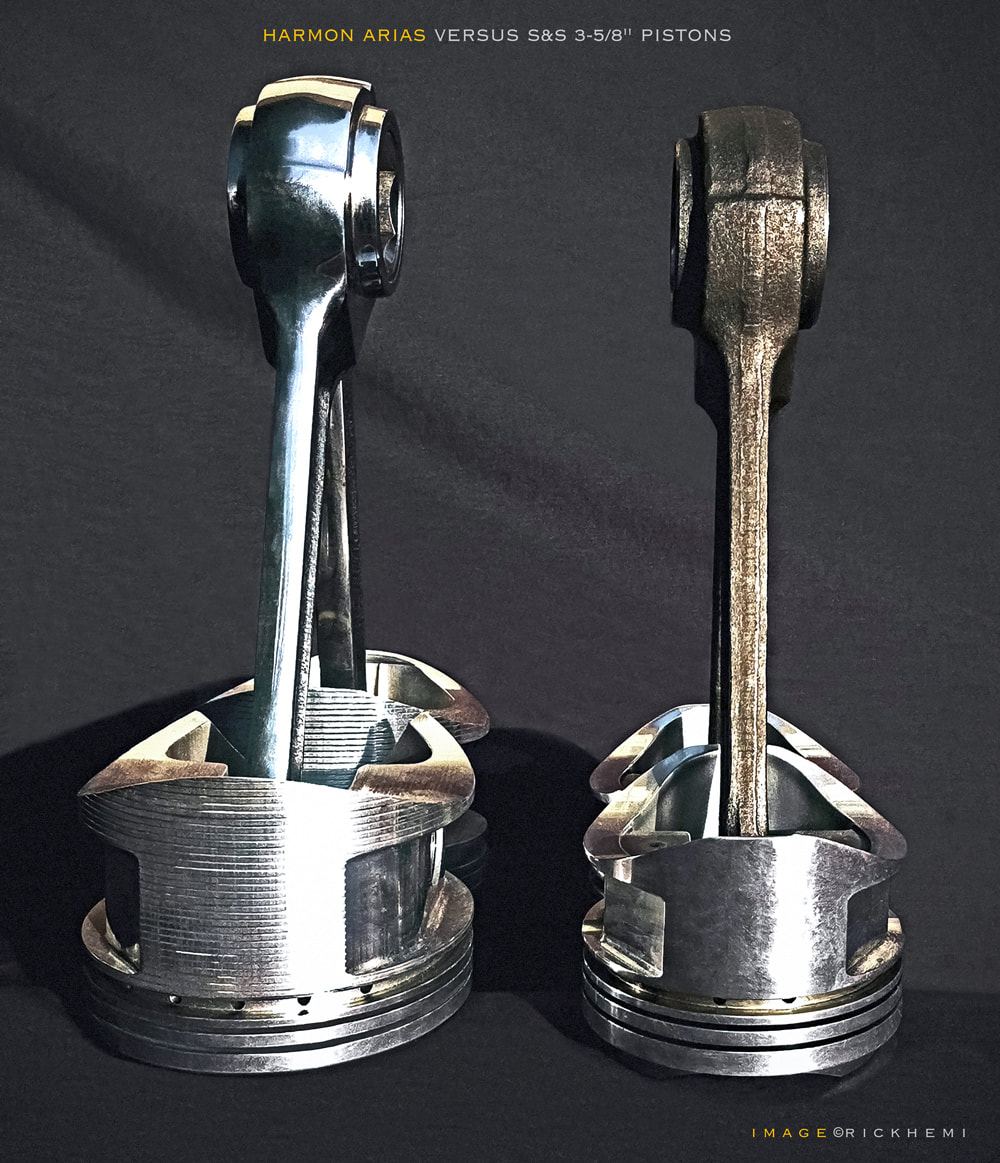
Size does matter - above, John Harmon flat top 4-300" Venolia pistons were used for 3 years with no issues, below image of Harmon Arias pistons that came with Harmon kits.
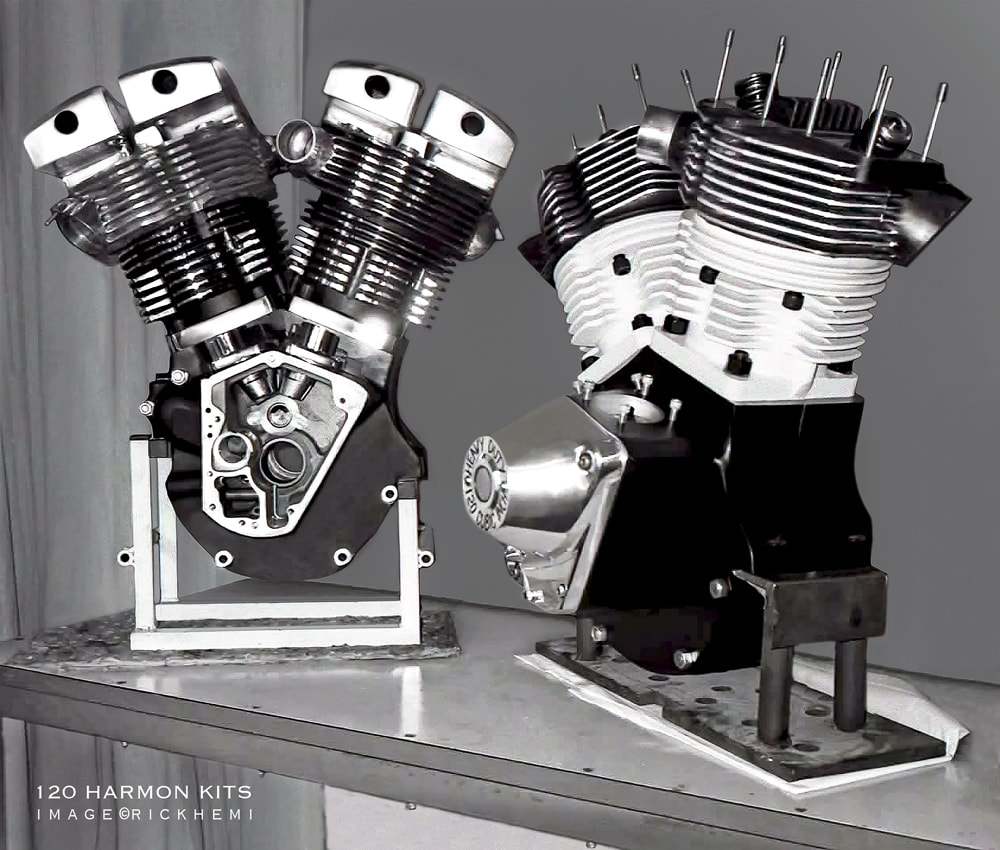
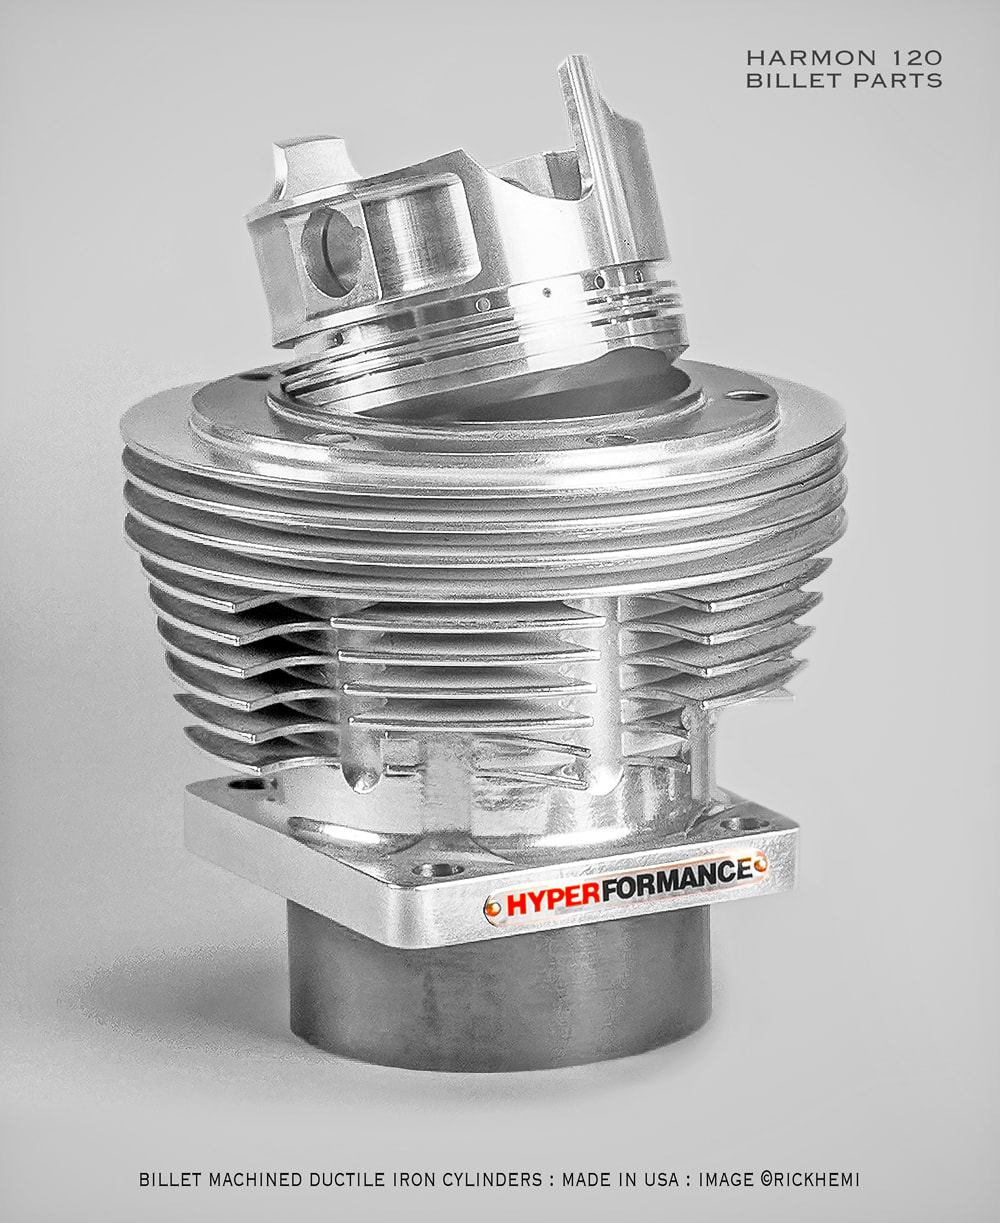
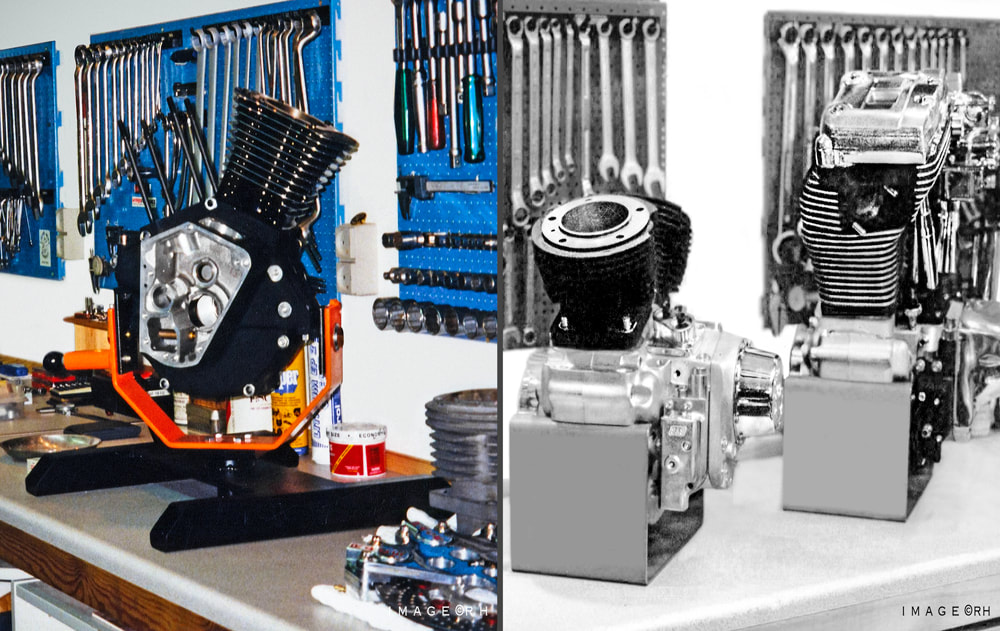
Below, a new unused Harmon 120 cubic inch street kit. This one was sitting under a workshop bench in Sweden for over a decade untouched, It was one of two Harmon engines I had managed to purchase in Scandinavia.
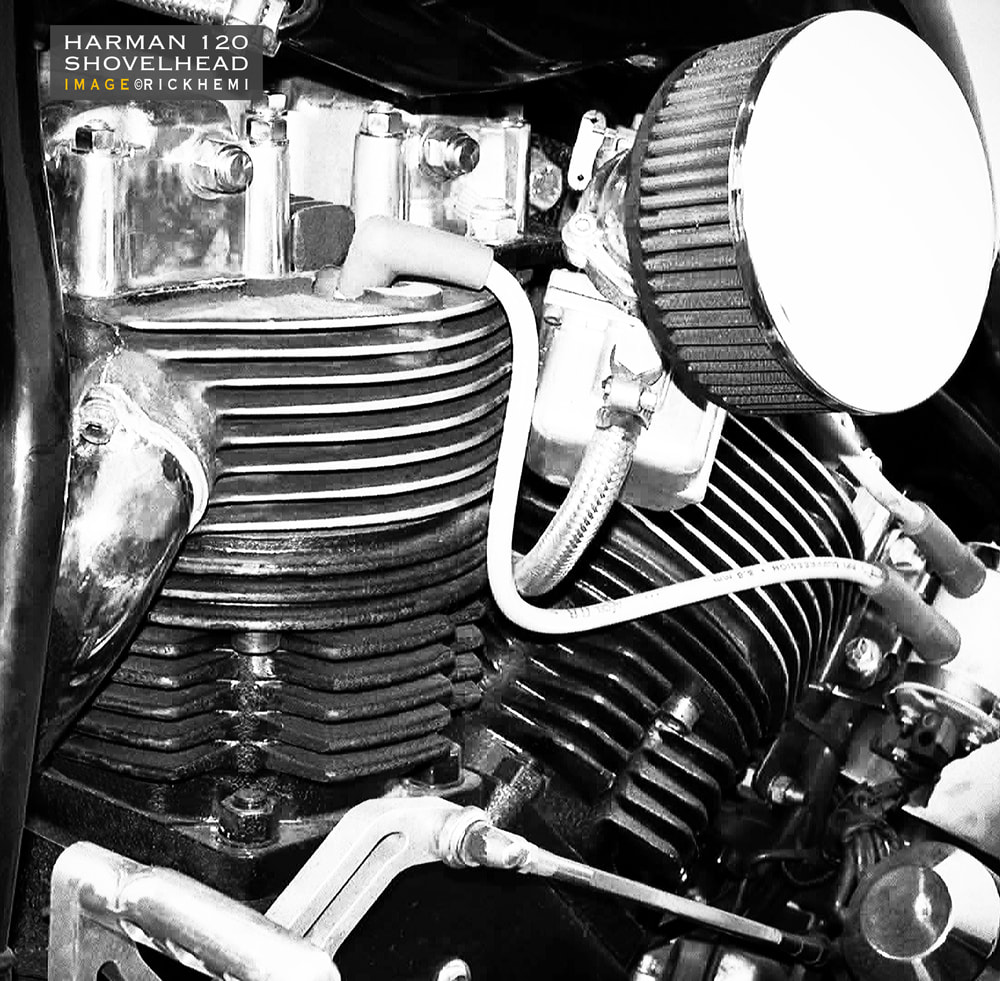
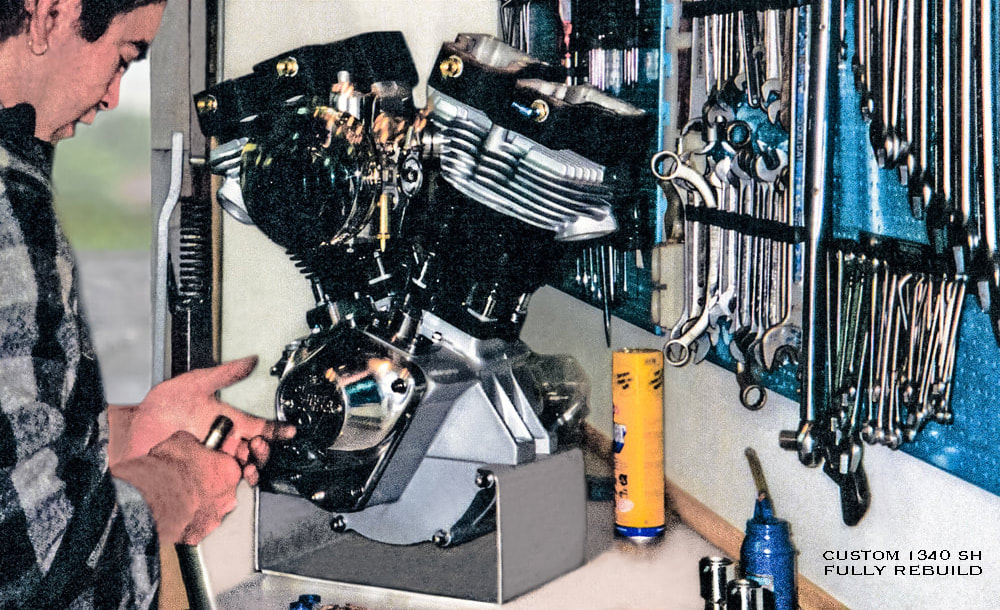
Below, an early snap of the Harmon engine with the top end disassembled. Every 12 months or so, the engine received new inlet valve lash caps, head/cylinder viton o-rings and a thorough inspection of internal engine wear and tear. The engine clocked up 1000's of kilometers every summer throughout Scandinavia without any major issues a part from the odd head o-ring letting go. The engine was a cold dragon to kick start for 5+ years until it was finally up-graded with an electric starter. The Harmon's top speed (using a 45 tooth rear sprocket) was clocked @270 kph. Around town, a 58 tooth sprocket was used in junction with an air shift as a teaser blowing off Jap bikes.
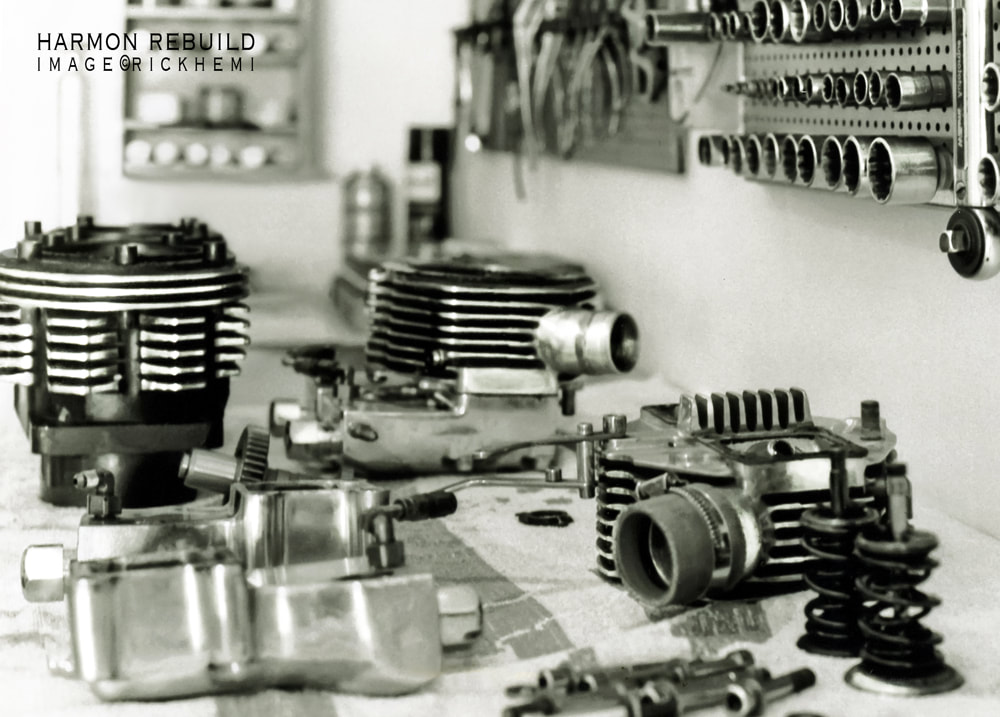
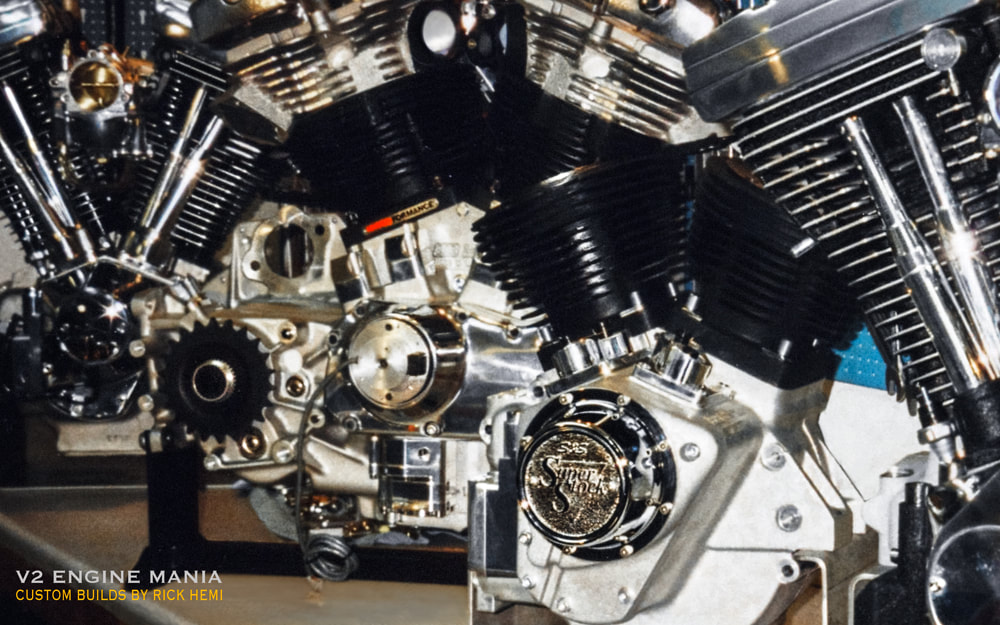
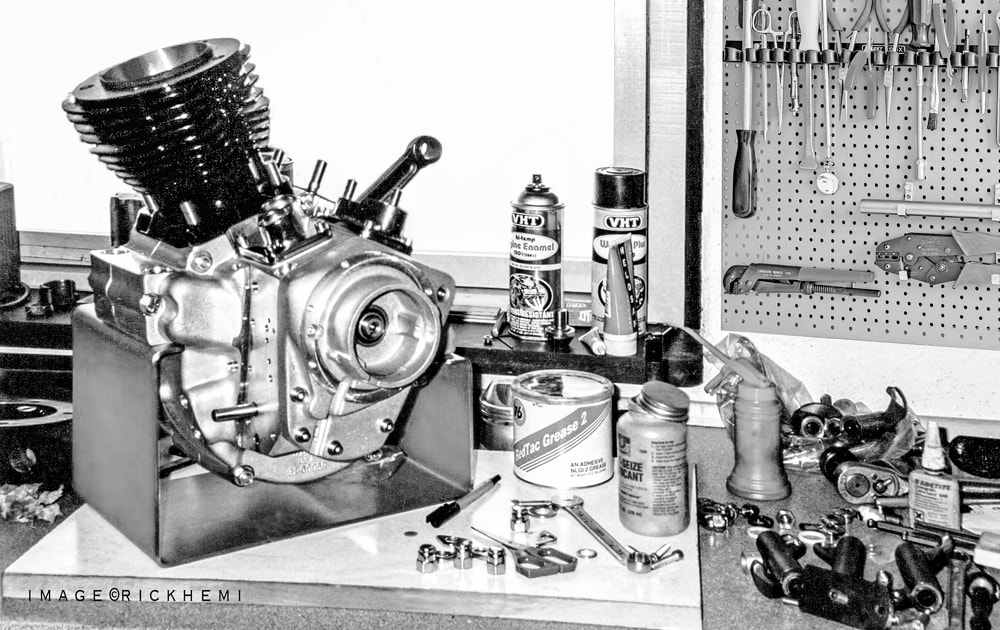
Owning two Harmon engines was a bonus. I've also done modifications and work on other Harmon engines from Norway and Denmark. The below image was one of my own Harmon 120 engines during a second major rebuild in late 1999. The engine had ran well since its first rebuild in early 1994. As usual, like most Harmon engines, they require more attention and maintenance than other Big Twin engines. When they run - they run good, if slack haphazard short-cuts and cheap parts are avoided.

The first replacement engine part I hunted down in '93 was a Jims machine pinion shaft. Calling directly to Jim for a shaft was positive. He replied " Yeaps, no problem, I'm looking at a shelf full of Harmon shafts". The Harmon ended up using Jims pinion and crankpin, Jims lifter block assemblies, and up-graded Evo block assemblies. All Jims parts survived through the years with almost zero wear and tear - Thats Quality!
Largest Harmon 120 Engine - 183 Cubic Inches
The largest Harmon ever built I've personally seen and heard that ran like a rocket was Jim Tinndahn's custom 3 liter engine in Denmark. An original Harmon crankcase was used with one-off billet CNC machined cylinders and heads. The 3000cc (180 c.i.) engine displacement was a kick start only. Image - Harley Davidson Magazine - Denmark.
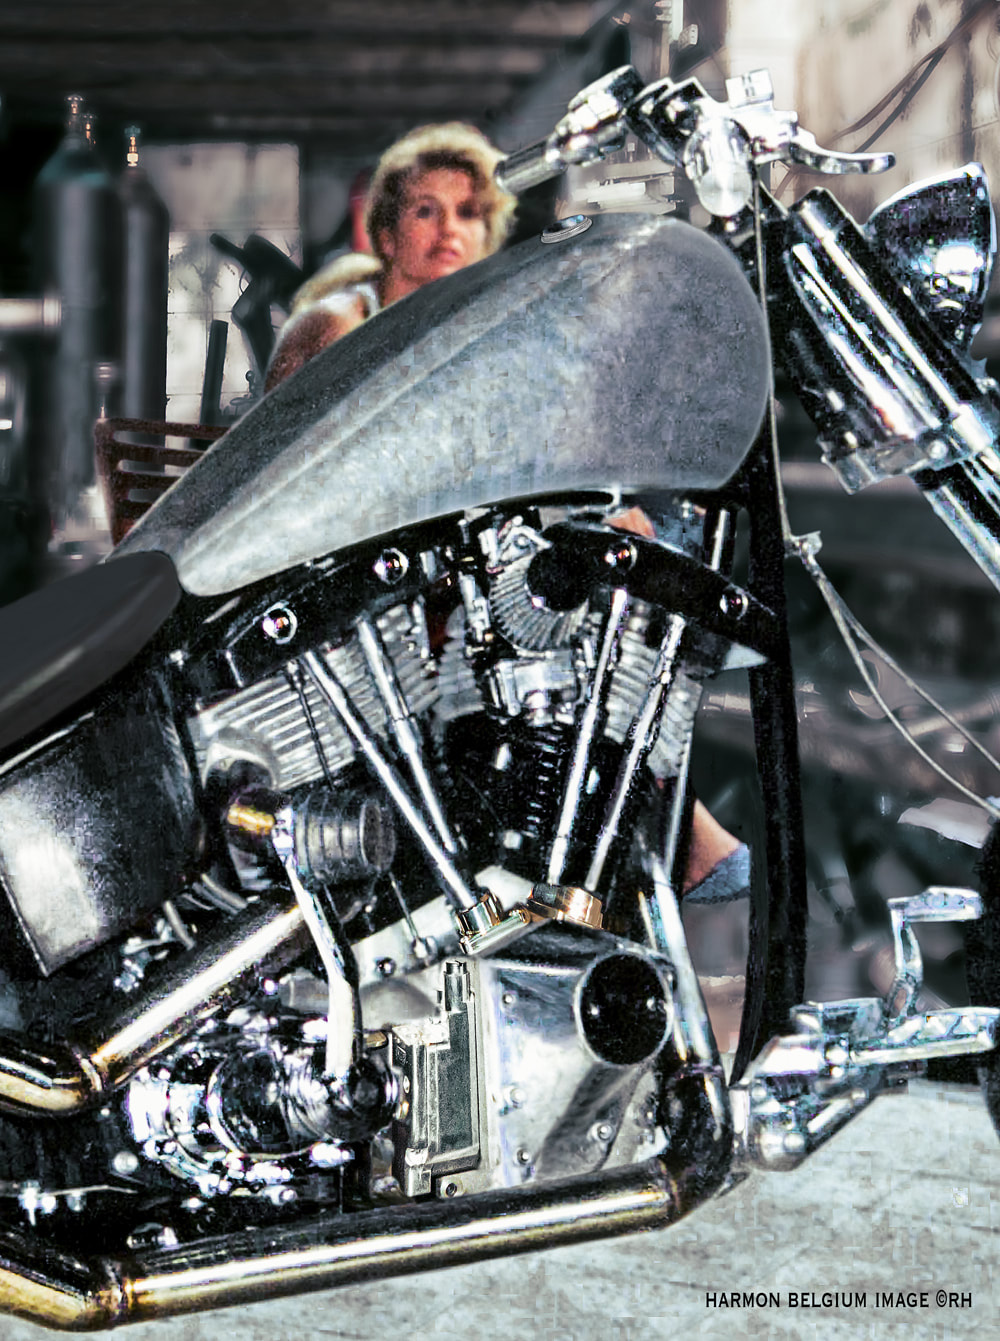
Below, a quick snap of a Harmon hardtail project by an old friend based in Belgium. His kick-arm lever should have been a taller version, but the bike was mounted with an electric start anyway - a wise move for this engine, unless one enjoys the classic art of kick starting with an odd kickback in the shin.
In The Beginning
Firstly I’d like to dedicate this page to the late John Harmon, and other bikers out there with Harmon projects. His brake away engine design was the beginning of a new era of big bore engine kits that went ballistic within the biker world after his passing. The John Harmon engine kits weren't flawless. There are several changes needed with the 120 design even before any assembly begins. The cylinder case stud holes were not CNC cantered aligned. Harmon cases have minor cylinder stud runout if replacing original cylinders. Harmon heads were finished without having steel inserts for head bolts. The addition of adding steel threaded inserts into the heads is recommended to keep heads from blowing head o-rings. The breather case oil hole also requires alignment trimming. The extended pinion shafts that came with engine kits should be replaced with a Jims pinion shaft. Crankcase bearing inserts on some kits are known to be slightly over machined. Early Harmon heads were designed for round top pistons. The early heads lacked power flow, and redesigned with squish band curves and flat top pistons. A fastidious construction process is required when rebuilding these engines with several minor changes and modifications to make any Harmon Big Twin remaining reliable. Any shortcuts will end up regrettable in time and cost.
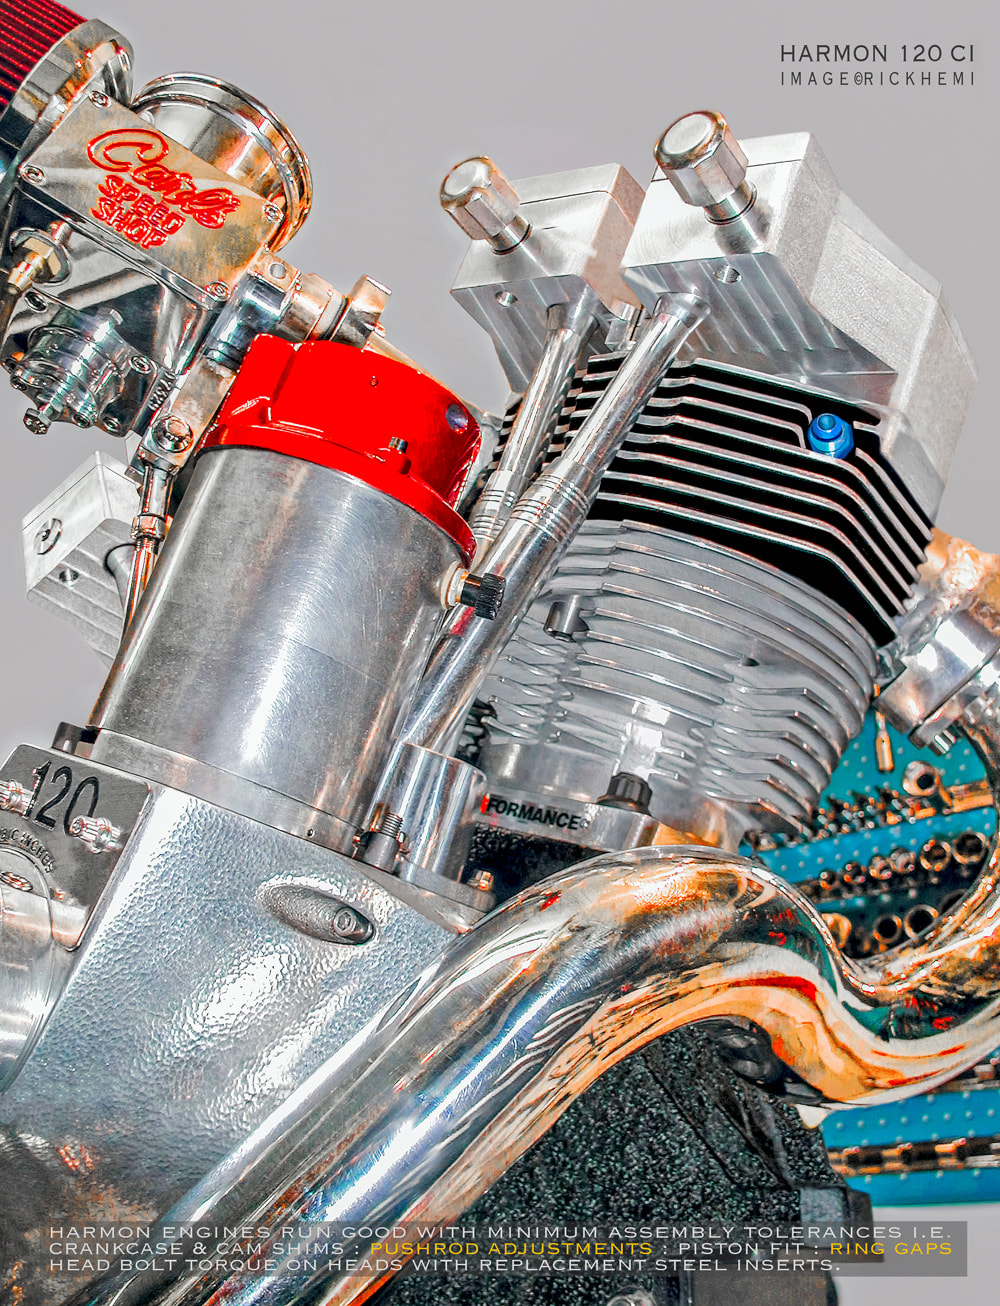
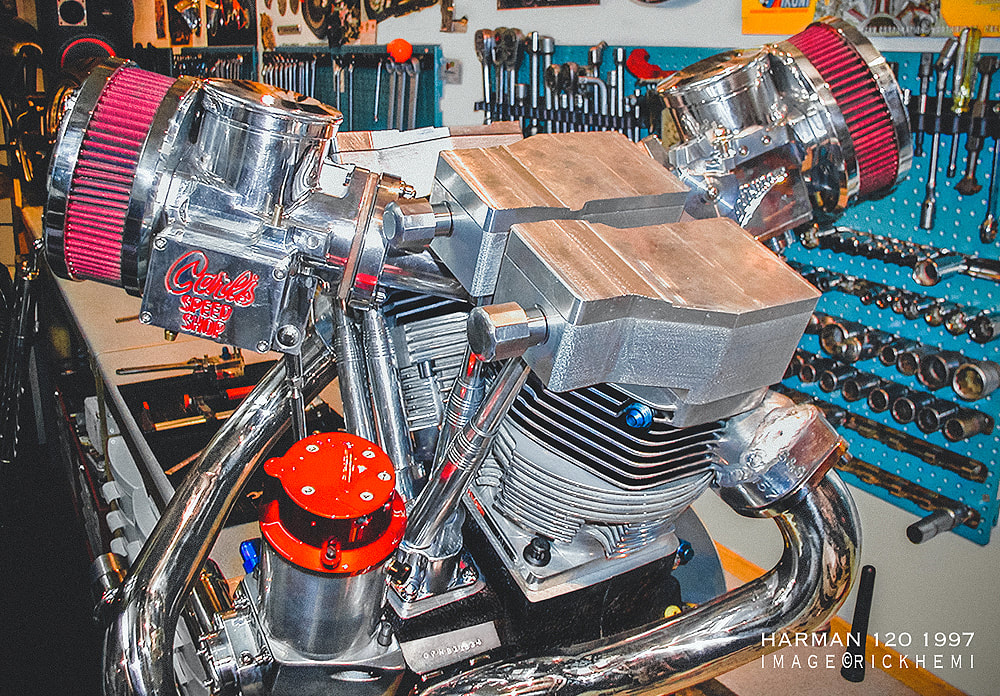
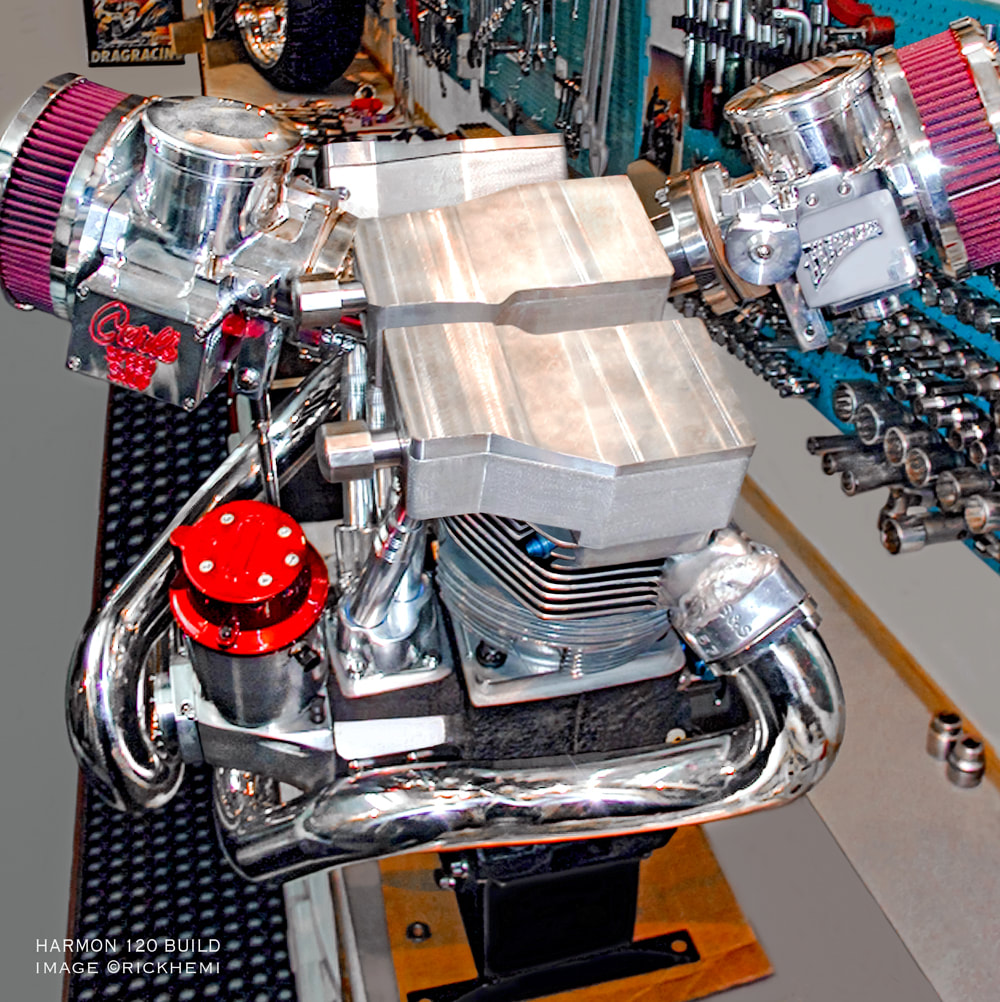
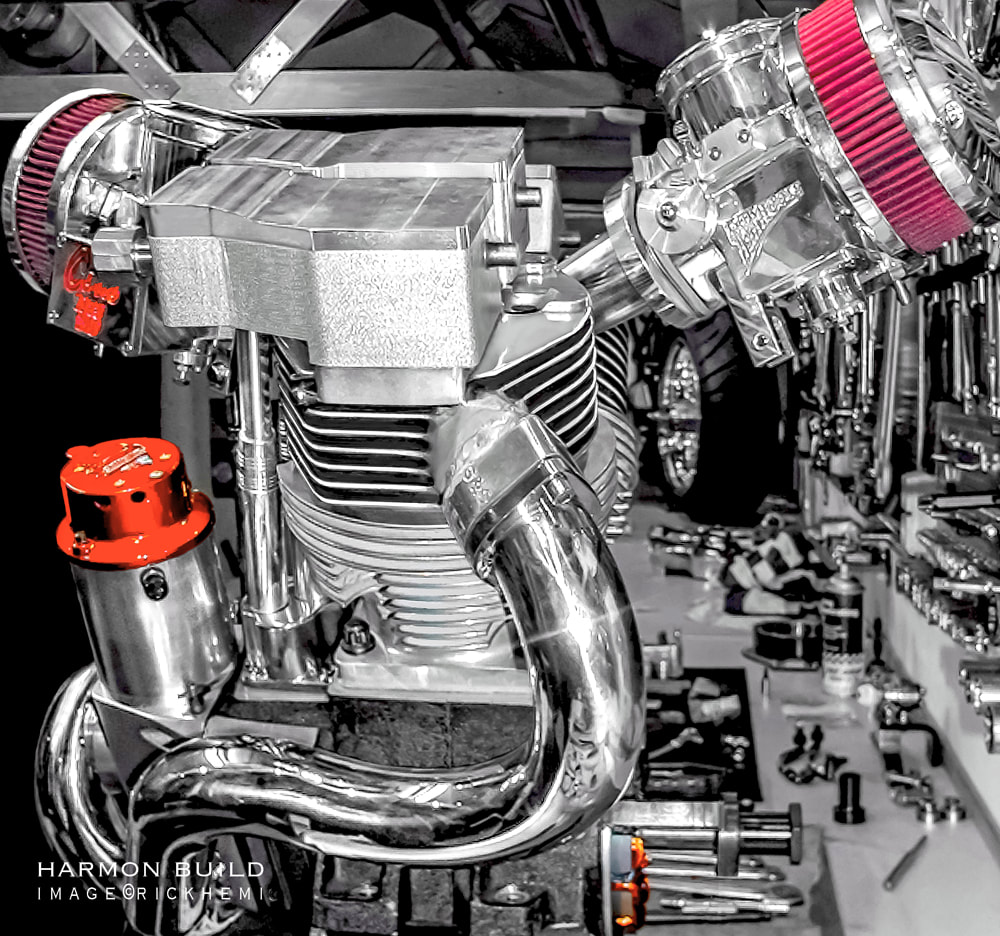
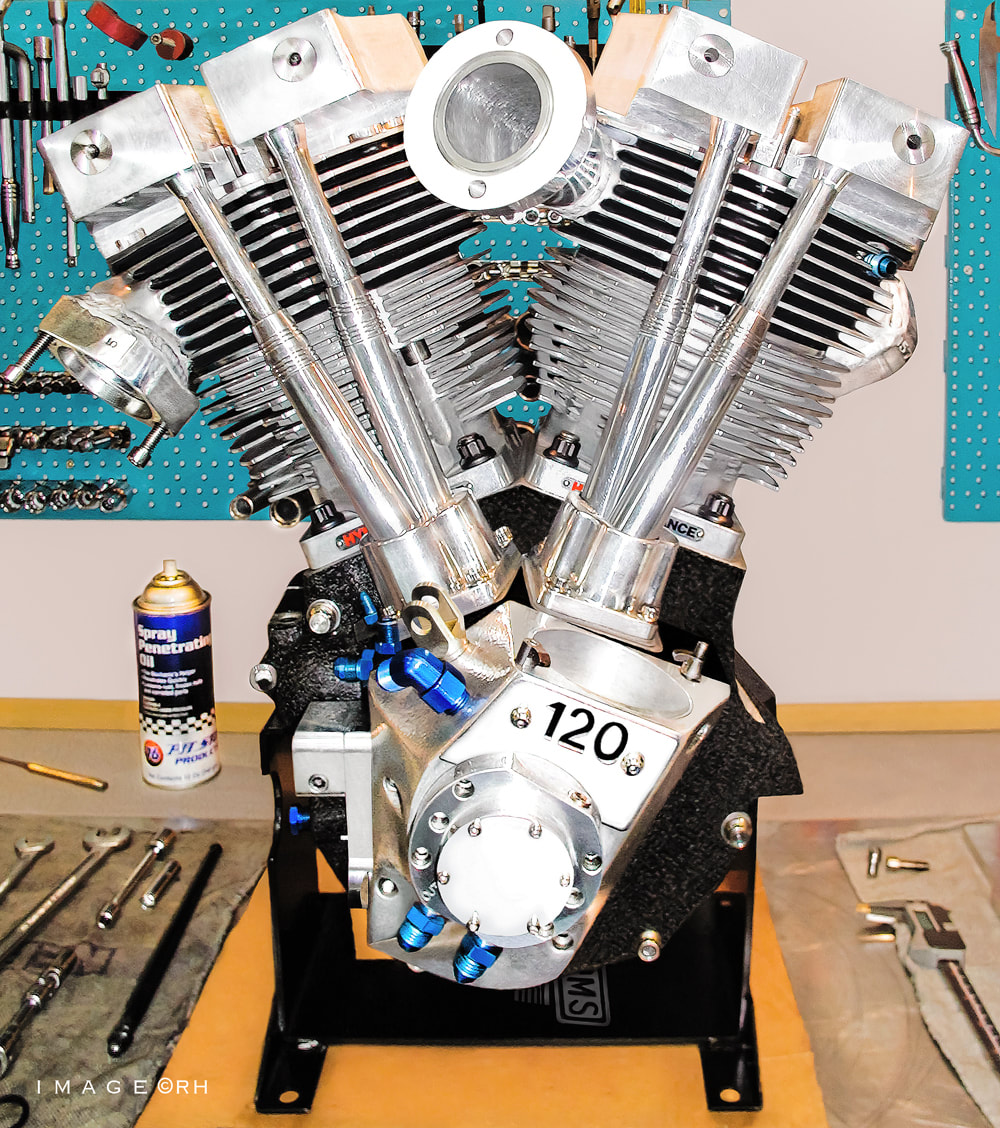
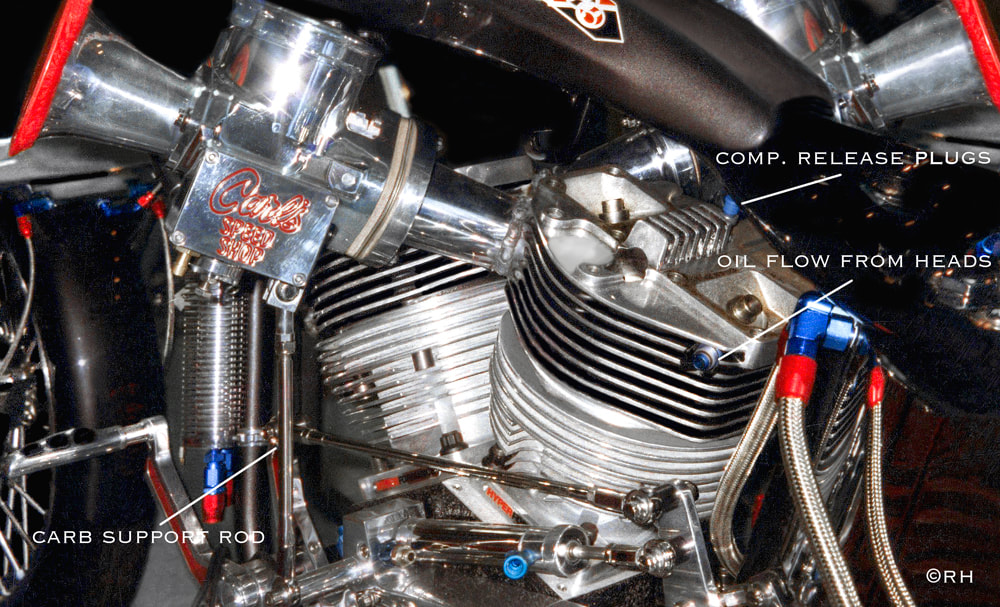
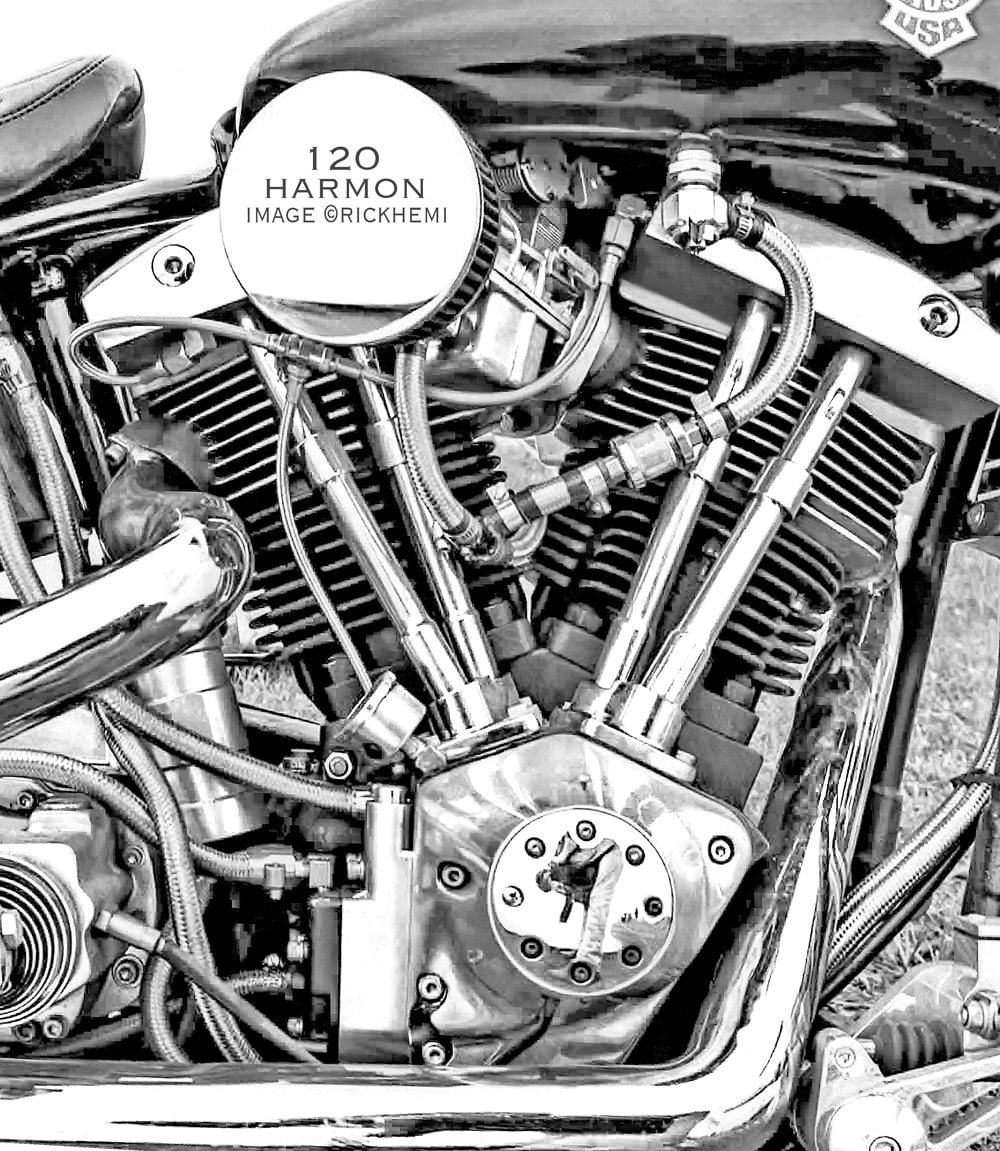
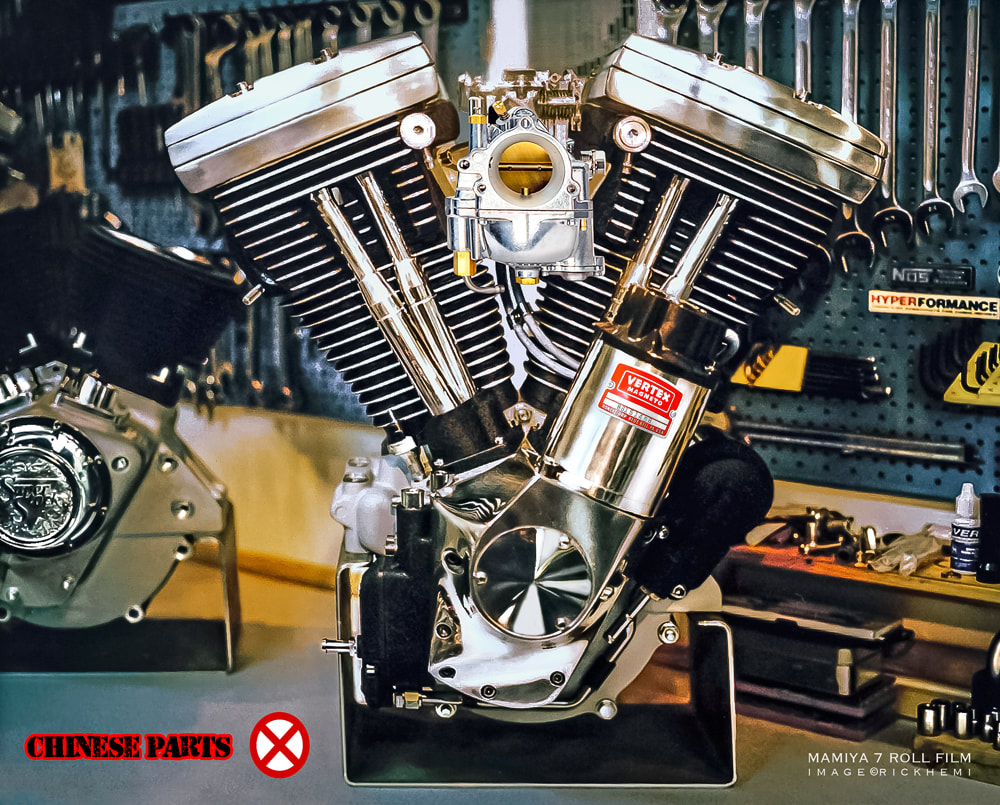
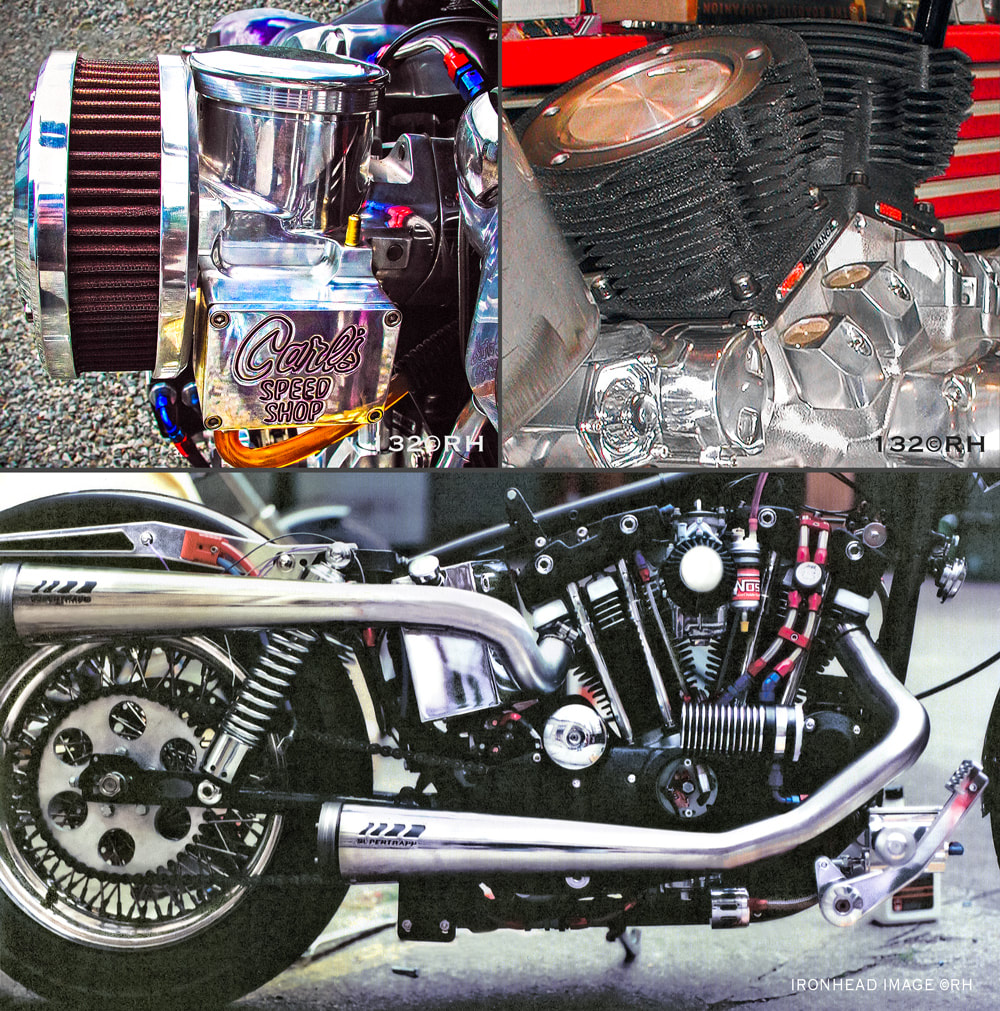
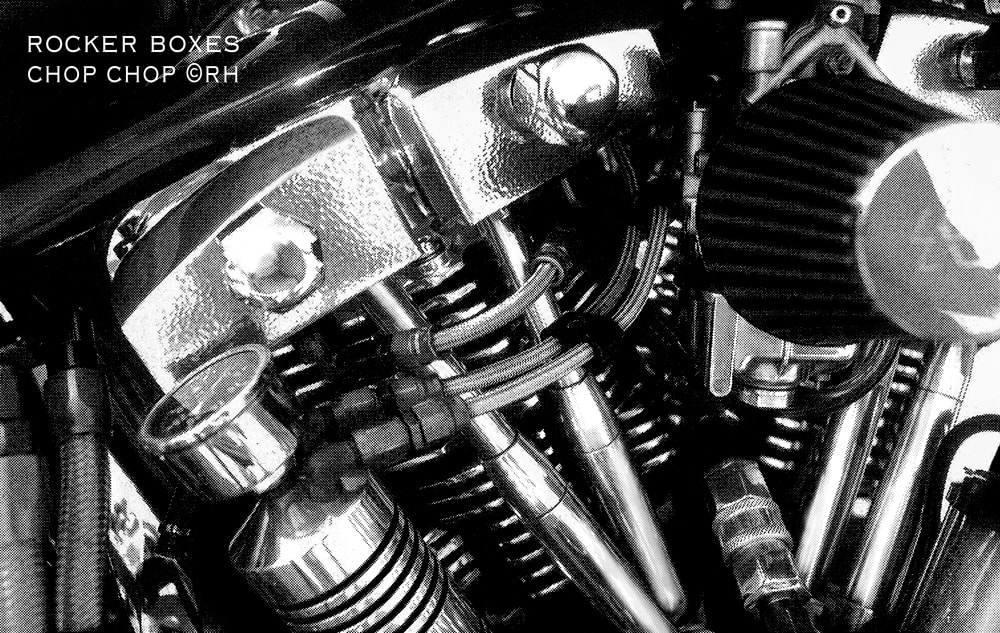
Checking the pushrod fit on the Harmon 120 Shovel with retro-machined rocker-boxes (designed and made by Rick Hemi). A Vertex magneto and Carls Typhoon carbs were already being used on this engine before it's 2nd major rebuild. Creating and making your own design work is what makes any engine unique.
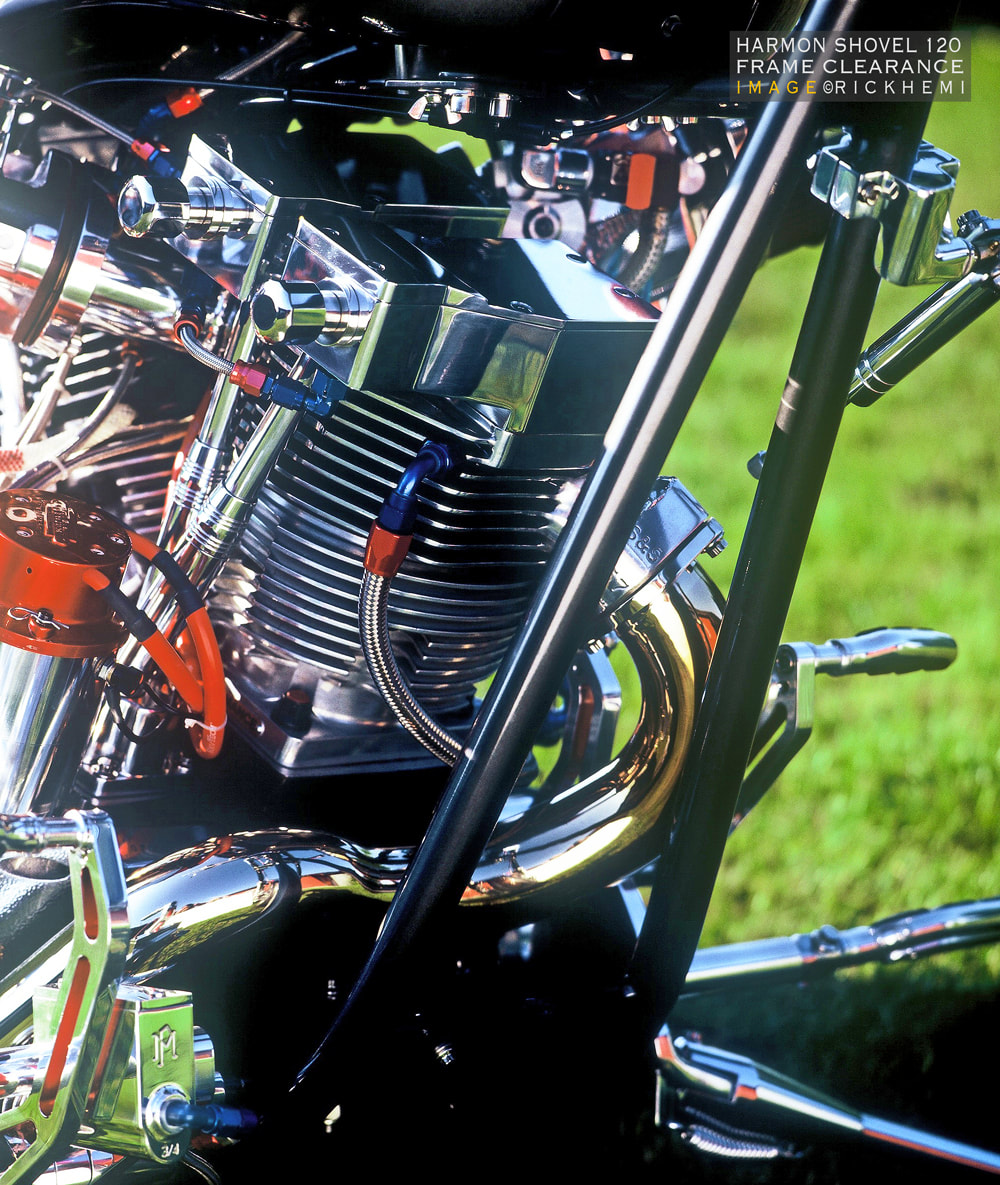
Frame clearance is an issue on OEM HD frames. Both front and rear Harmon head exhaust ports are in direct conflict with OEM down tubes.
Original HD frames require the repositioning of the front frame tubes moved forward approx 2" inches. This allows enough clearance for the exhaust to curve avoiding step downs which restricts flow. OEM rear down tubes also require repositioning an inch or so back at the top. It's actually better to use aftermarket frames that already allow plenty of free space, and they usually come with 38-44 degree rake. Below, an OEM early shovelhead frame modified for the Harmon 120.
Harmon 120 Replacement - Pistons & Cylinders
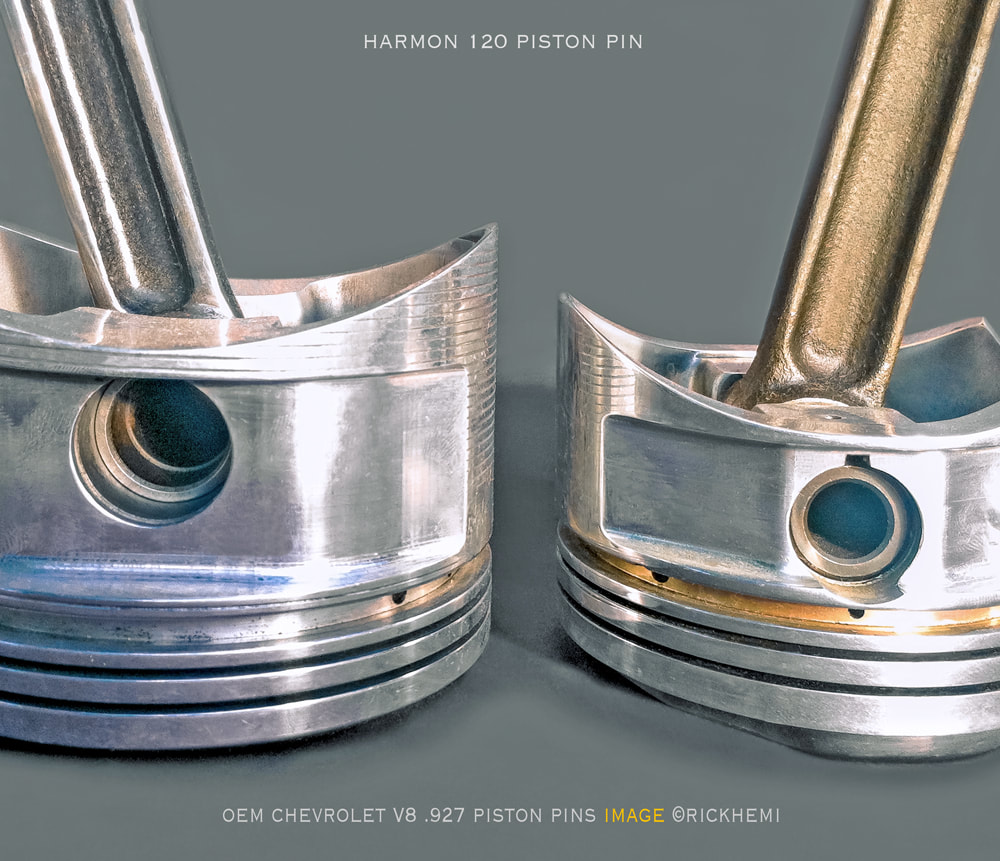
John Harmon was way ahead of the pack using stronger V8 engine parts in his engine design. Original Harmon pistons are larger in diameter than 454 Chev V8 engines (4.250 versus 4.300). Piston pins are stock Chev V8 (.927). Added bore and stoke to make a 143 square displacement (4.500 x 4.500), or increasing the stroke (4.500 x 4.750 = 151 cubes) are possible options on Harmon engines.
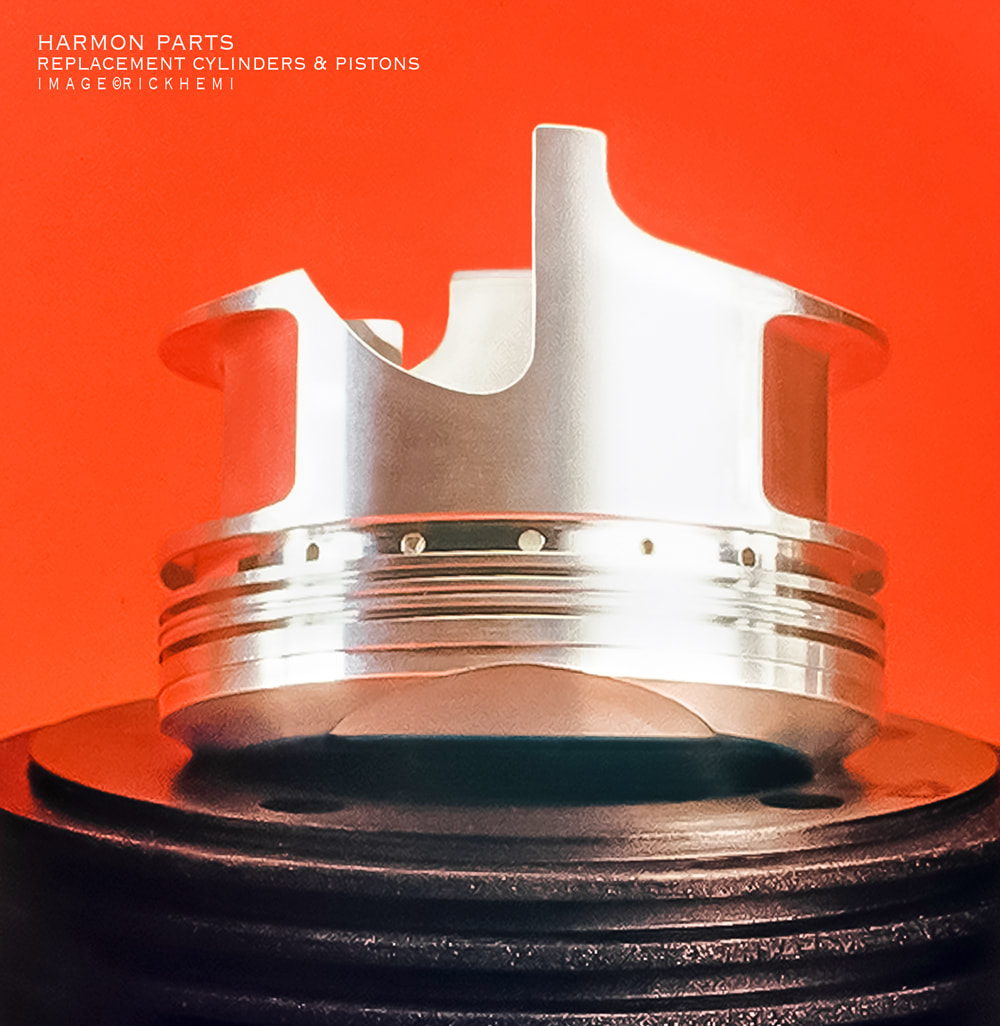
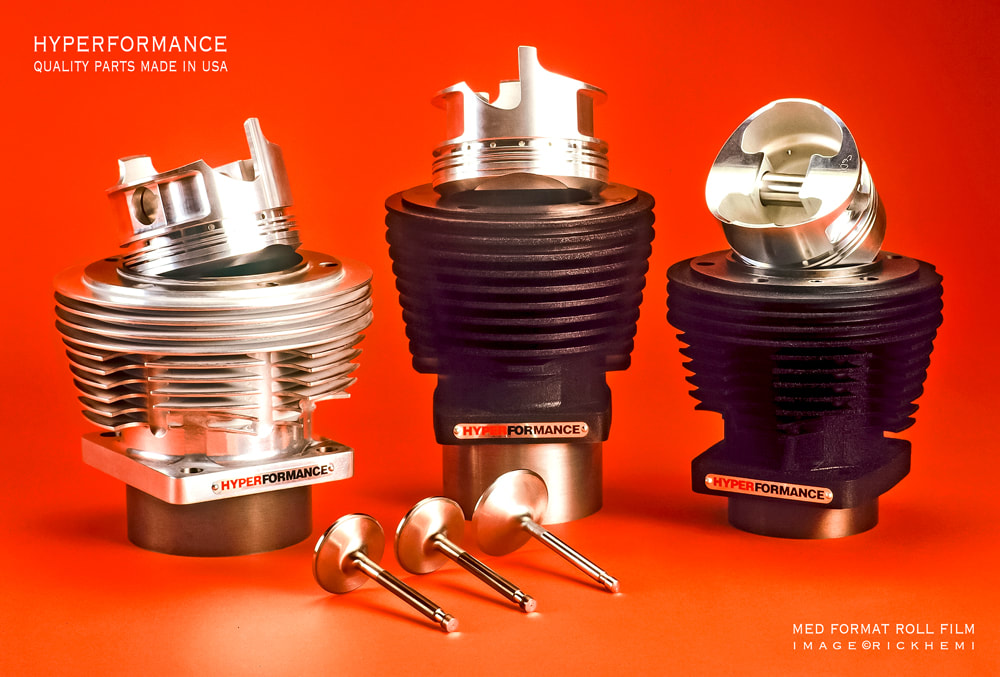
The first parts that probably require replacing are the original Harmon pistons with other aftermarket brands machined finished with the same weight. Hyperformance pistons are recommended.
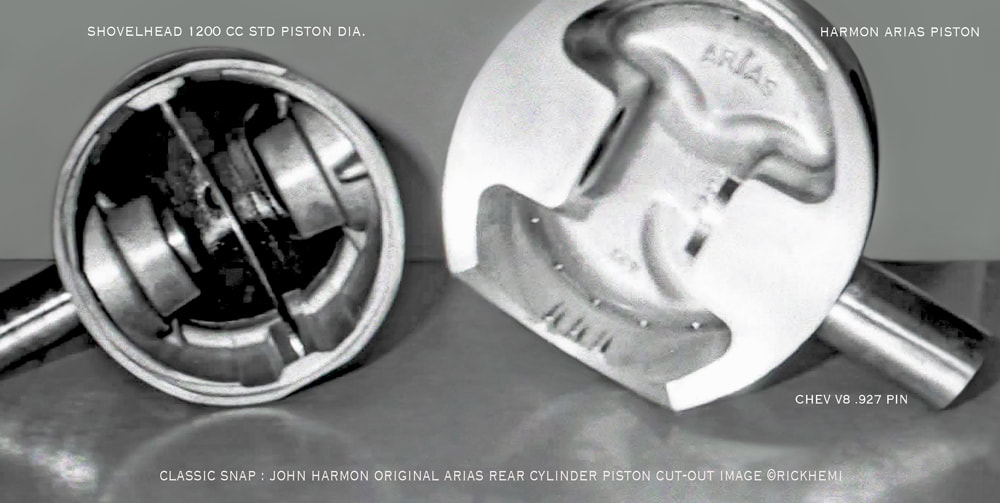
Image showing the size of Harmon pistons compared to stock Big Twin Shovelhead pistons
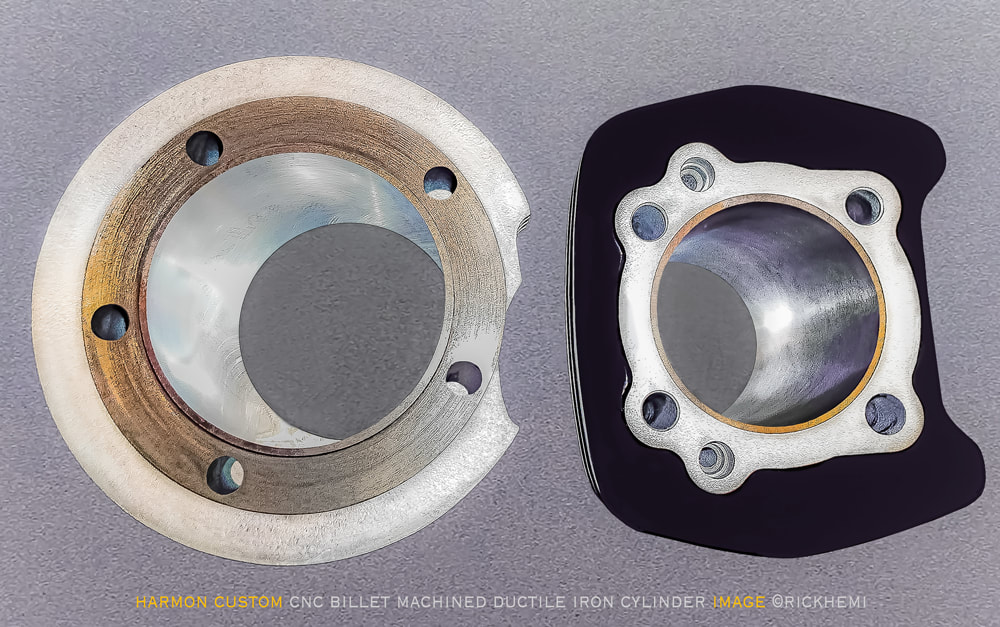
Replacing pistons is recommended due to the large cut-out on the original rear piston skirt. Quality made aftermarket suppliers, like Hyperformance in the U.S. can reproduce billet CNC ductile iron cylinders and custom CNC machined pistons for John Harmon engines. Hyperformance front and rear pistons are the same weight by keeping a section of the cut-out at the original piston skirt length. This eradicates unbalanced issues, resulting in less vibration and pistons stable under thrust. Below, Hyperformance billet machined ductile cylinders are good recommended replacements when original Harmon jugs become worn out. New original Harmon cylinders are virtually impossible to find. Below, Hyperformance billet machined ductile cylinders are good recommended replacements when original Harmon jugs become worn out. New original Harmon cylinders are virtually impossible to find.
The best thing rebuilding Harmon engines are the amount of good quality machine shops who can supply all the necessary parts to get them up and running again. Replacement Harmon heads is like finding a needle in a haystack - so take good care them! One can have machine made replica heads if needed, but be prepared to pay a large cash stash - unless you know someone who can programme and use a high-tech CNC milling machine. Some street Harmon cases have enough material to extend bore diameters to 4.500. There is also just enough material on the heads, this would create a square engine @ 4.500 x 4.500 equating to 143 cubic inches.
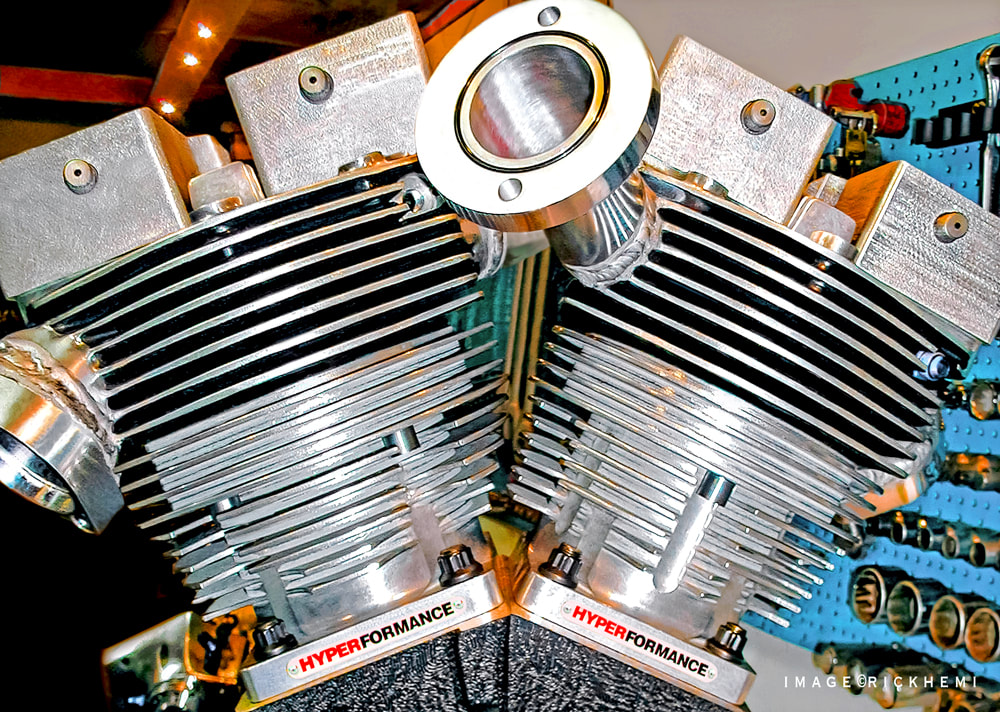
Replacement Hyperformance cylinders, pistons and titan exhaust valves, inlet spigots, billet rocker-boxes and shafts. After the second overhaul, the engine performed well clocking up mileage through Sweden and Denmark.
Original John Harmon cylinders will last for years with the advantage of getting approximately 7 rebores @ 0.10th increments. Those in need of replacement cylinders, hi-tech pistons, valves, and other quality made made products can be sourced all from one machine shop from Hyperformace USA
Harmon Engine Parts - Cheap Short Cuts
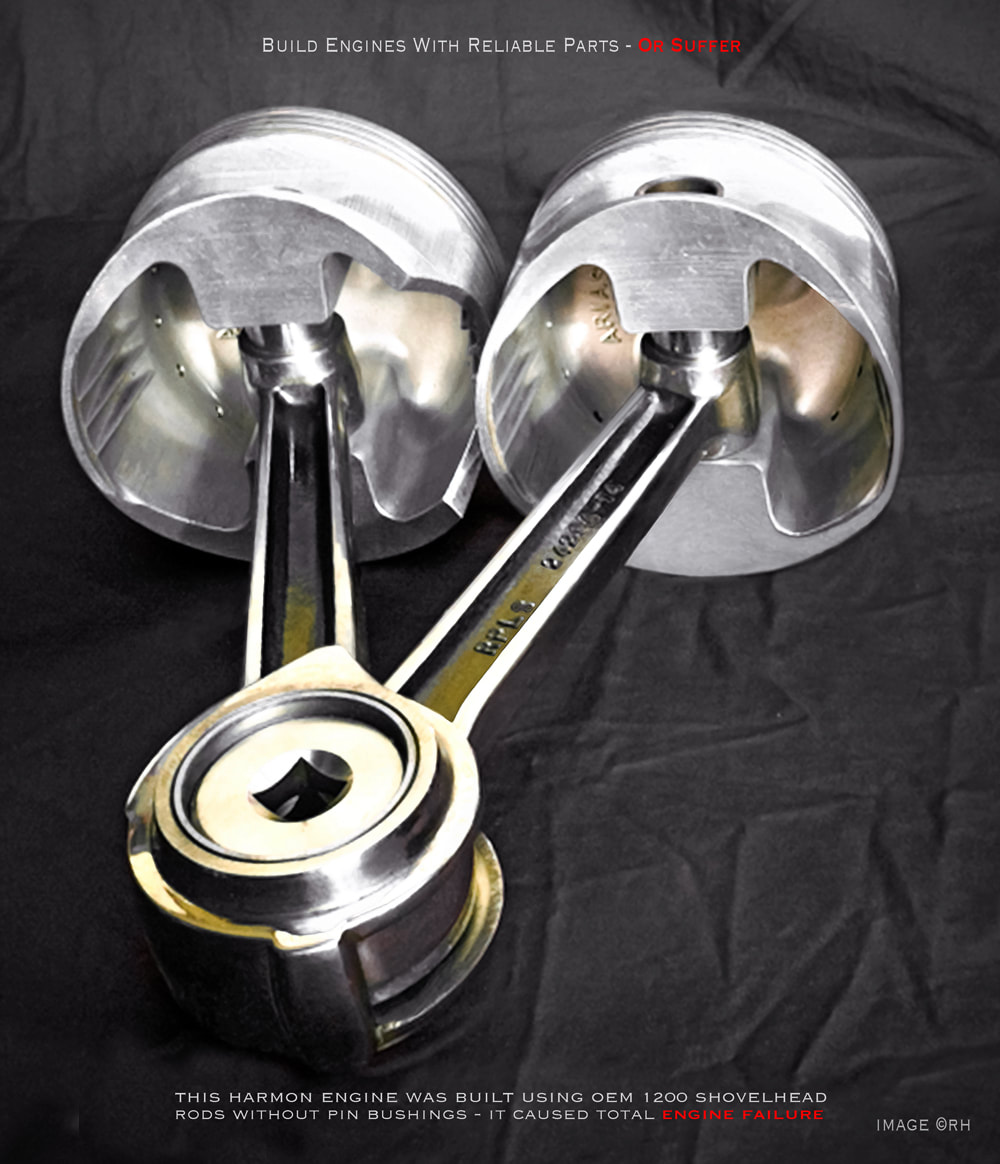
If you're about to rebuild a Harmon engine, don't slap happy assemble the engine with cheap wing bling parts. Avoid any Chinese made engine parts, like bronze bushing and internal bearings. Chinese made bearings have a habit of falling to bits within a very short time period. Using US or European made quality engine parts that already have a history of reliability guarantees satisfaction if engines are assembled properly. I'm not here promoting one particular brand above other brand names. Most aftermarket parts I've used are from well known manufacturers that most bikers are already familiar with. The piston rod set above was pulled from a Harmon engine that had been micky mouse assembled. If the engine had been assembled together properly, it would probably still be running today. The engine required rebuilding because of shoddy workmanship.
Harmon 120 - Bottom End
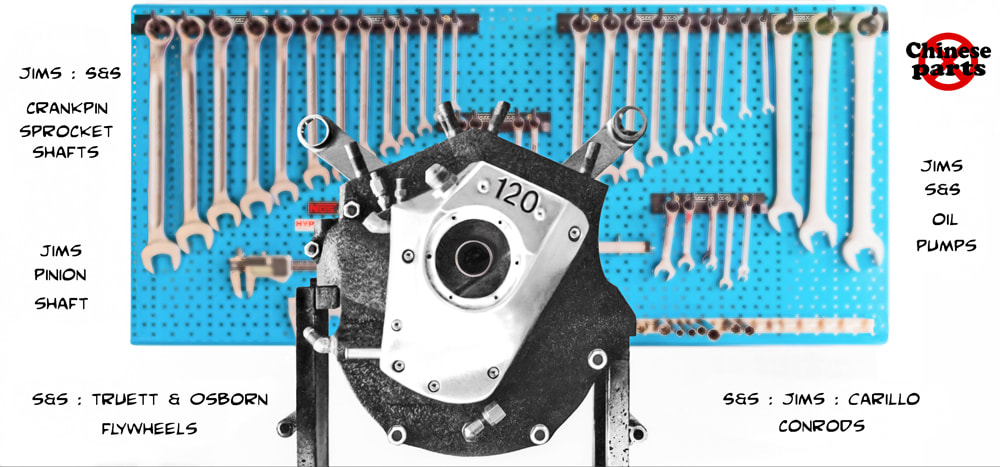
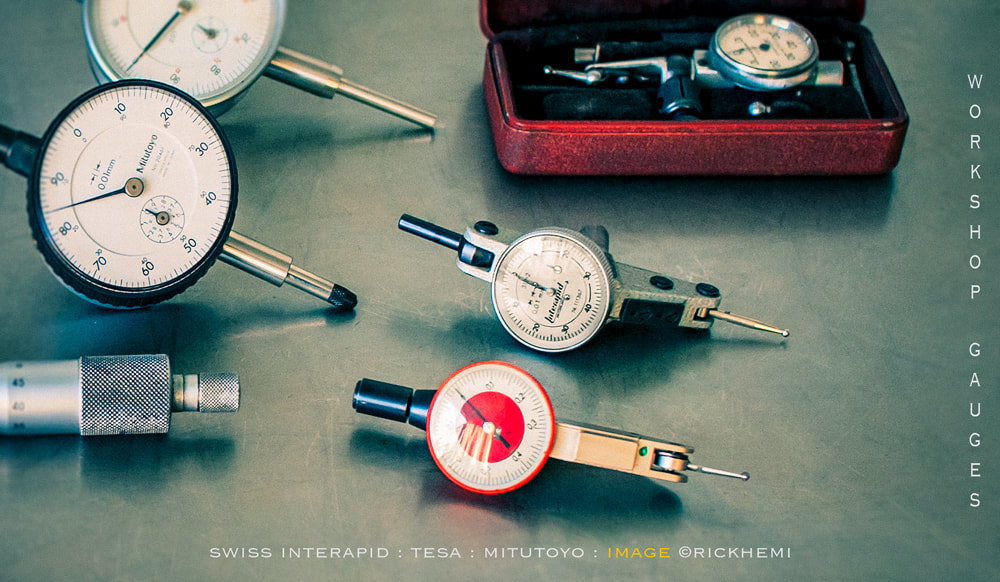
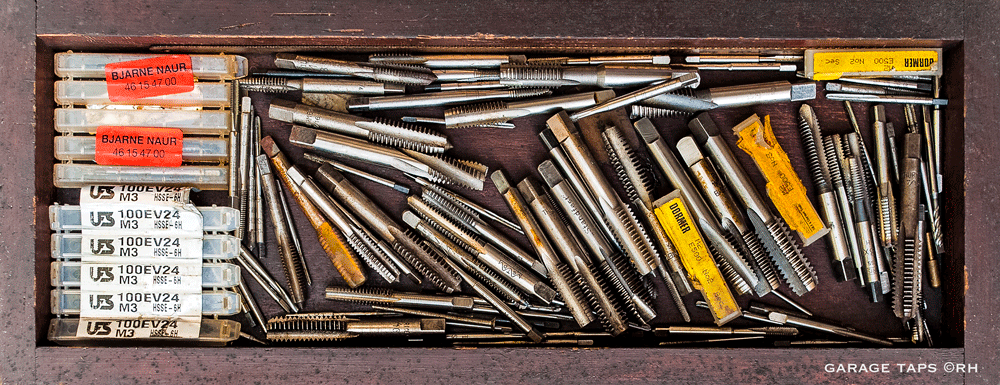
Below, every workshop biker has their own favorite tools. Swiss and Japanese dial gauges used for various types of machine shop work. I personally avoid using Chinese wing bling made Junk. Using subpar tools building engines is asking for trouble.
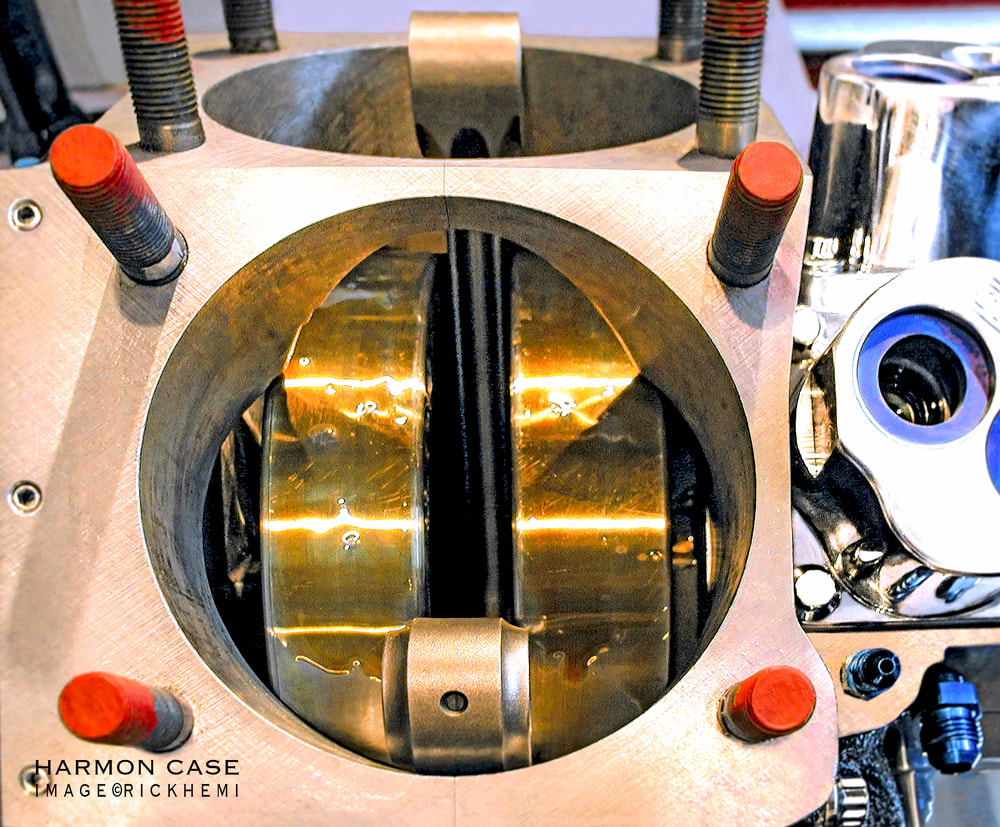
A set of reputable aftermarket flywheels, rod and pins are essential to keep Harmon engines together. This engine, on its 2nd rebuild received a new set of S&S flywheels, Carillo rods, Jims 3 hole crankpin, Jims pinion and sprocket shafts. The previous owner had built the engine shoddily causing issues. Some of the inner crankcase sprocket shaft bearings had disintegrated and disappeared somewhere. The left flywheel was also cracked, thus tilting the front rod which seized the piston rings with irreversible damage to the front piston and cylinder. The pistons were also running without any piston pin bushings, and the engine had the wrong oil pump, including no oil filter. This is what usually happens to any engine when taking cheap short-cuts. Using good quality made parts makes any Harmon 120 engine run properly without issues.
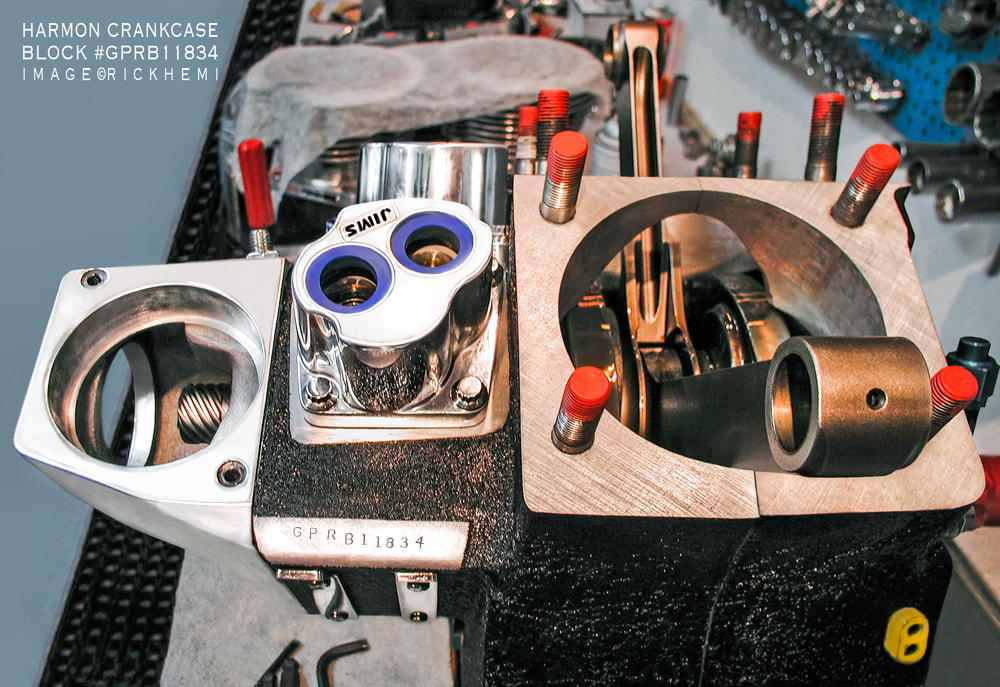
Above, John Harmon's original crankcase GPRB (Grand Prix Racing Block) engine kit number 34.
At a certain RPM most Harley engines dish out rhythmic vibrations. Harmon engines are more brutal, they have a habit of slowly ripping and rattling bikes too pieces if parts aren't bolted down properly. I was once on the back of a hardtail Harman on a 300+ kilometer ride. The owner had only one thing on his mind - full throttle without mercy! During the road trip, the Harmon snapped-off a mirror, and the rear belt pulley bolts became loose. Getting a numb butt by vibration on rigid Harmons is severe. This was probably symptoms of an un-shimmed engine tranny frame. Swing arm and softail frames with Harmon engines are more merciful. Proper flywheel balancing is important on these engines. This includes a straight frame. The shimming of engine cases before bolting them down in frames will dramatically reduce vibration. Crankcases should be placed into frames to check if the engine mounts are even and parallel with no signs of wobble. Bolting engines down into frames, especially Harmon engines with even the smallest amount of gap between the frame and crankcase supports is asking for vibration trouble further down the road. This will add even more vibration through frames causing cracked fenders, broken mirrors, loose bolts, and missing parts. Harmon crankcases can also be slightly uneven on front or rear frame mounting casts. I've shimmed-up several hardtail frames. Transmission mounts are the same. Older frames, including aftermarket frames can have some serious uneven engine mount and transmission lugs. Avoid using salvaged frames from crashes and accidents unless a proper jig is used to check alignments. Bolting down engines and transmissions by shimming run-out, if required, will lesson vibration considerably.
Harmon 120 - Vibration Is Real.

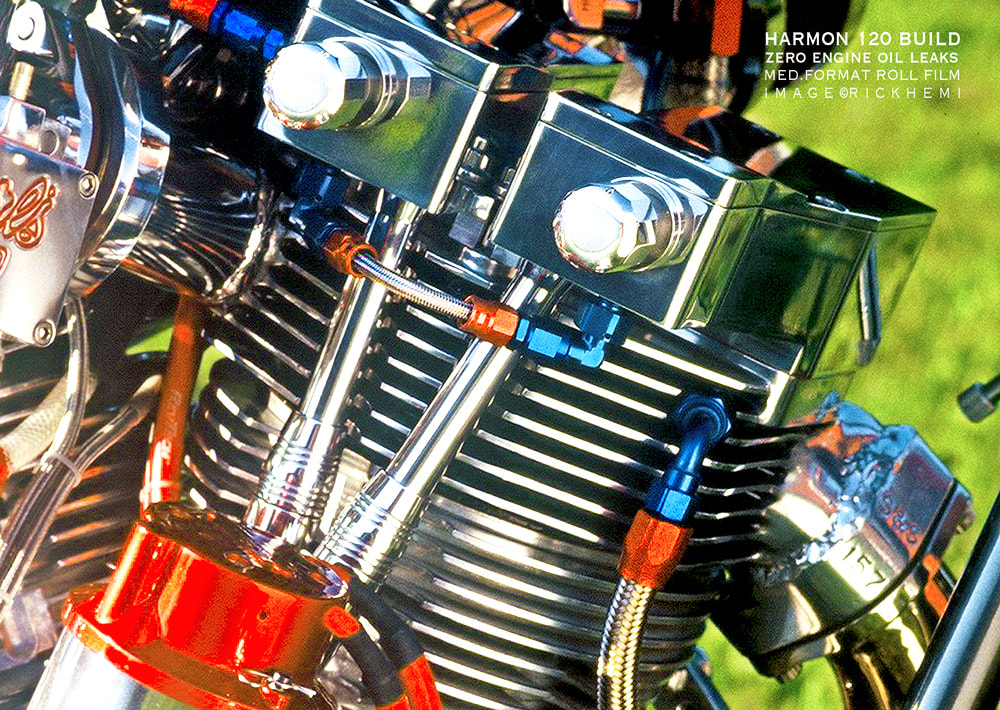
There's no escape - Harmon engines vibrate at certain RPM levels! External moving parts should be bolted down using lock nuts with an added drop of blue loctite. This will reduce parts becoming loose or falling off on extended road trips. Whatever you do - Don't use yellow loctite, unless you're wanting a permanent bonded weld, and then gas-axing the bolt off later. I've seen this happen on main shaft sprocket nuts. Stainless hardware bolted into alloy threads should always use a dab of anti-seize paste to prevent galling. I've never had problems or issues over the years with bolts becoming loose on the Harmon. Parts were either bolted down with quality lock nuts, a drop of blue loctite, or anti-seize paste. They say, a smooth vibration is a happy vibration. Below, keeping oil leaks from happening on Harmon engines, is by using quality fittings, gaskets, seals and pushrod covers.
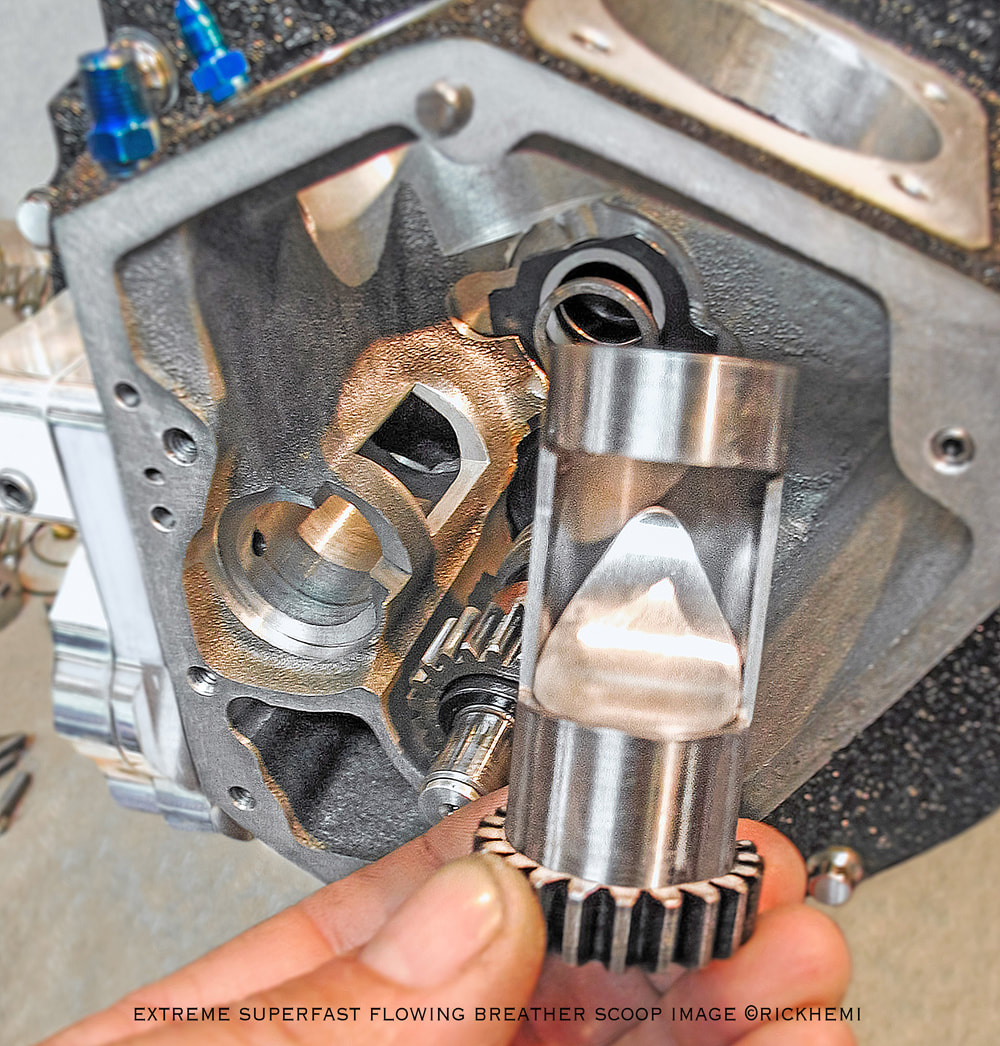
Harmon 120 - Crankcase Breather
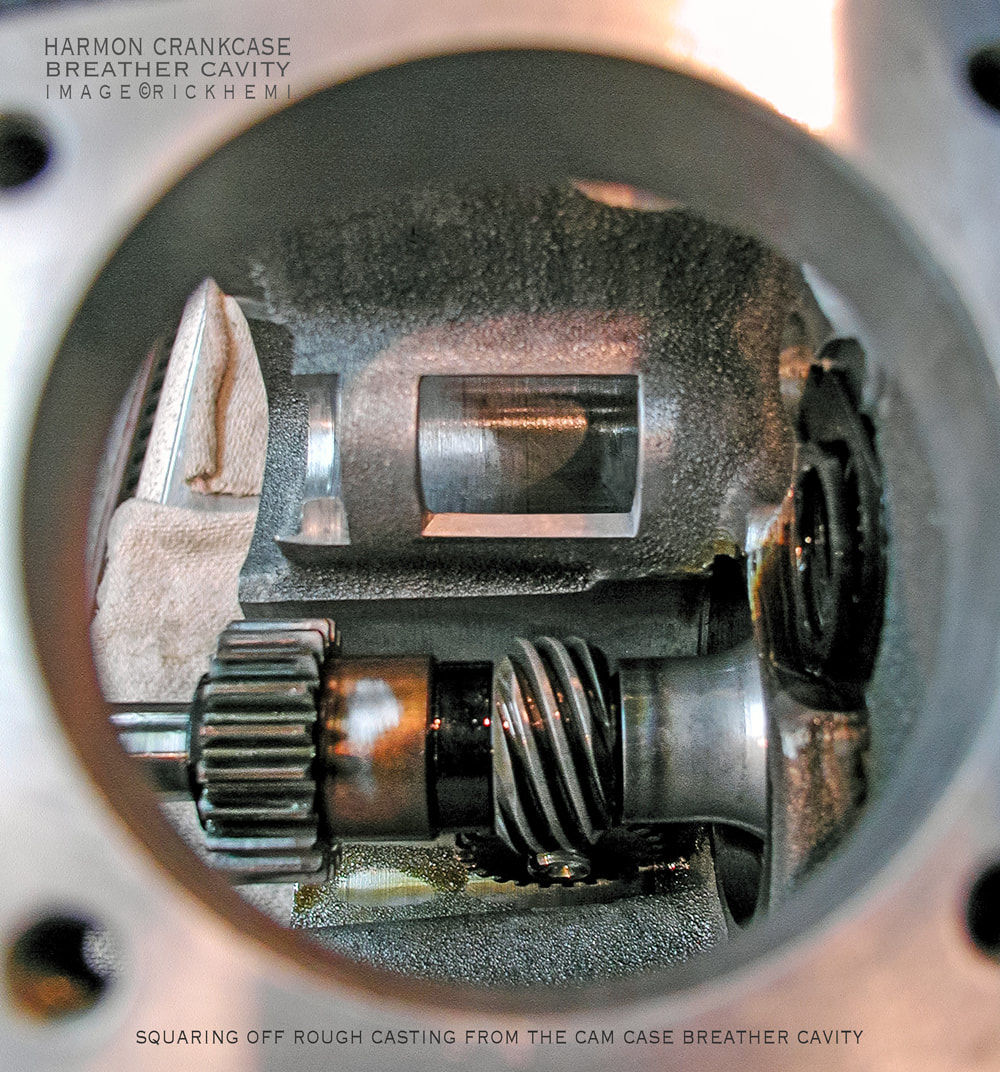
Harmon breather cavities should be trimmed matched with the breather for maximum return oil flow from the crankcase. The breather hole can be square up easily with breathers. Removing the breather screen will also give less restricted flow. Any metal or other bottom end pieces entering through the crankcase vent hole will normally mean the engine has already blown to bits, so removing a screen is relatively safe. Replacing a machined billet scoop fitted inside breathers will ensure maximum oil flow. The only red-flag warning, is not to increase the length of the crankcase breather cavity dimensions beyond breather timing specs. Grinding and filing too much out can't be replaced. This job should be done when the crankcase is disassembled.
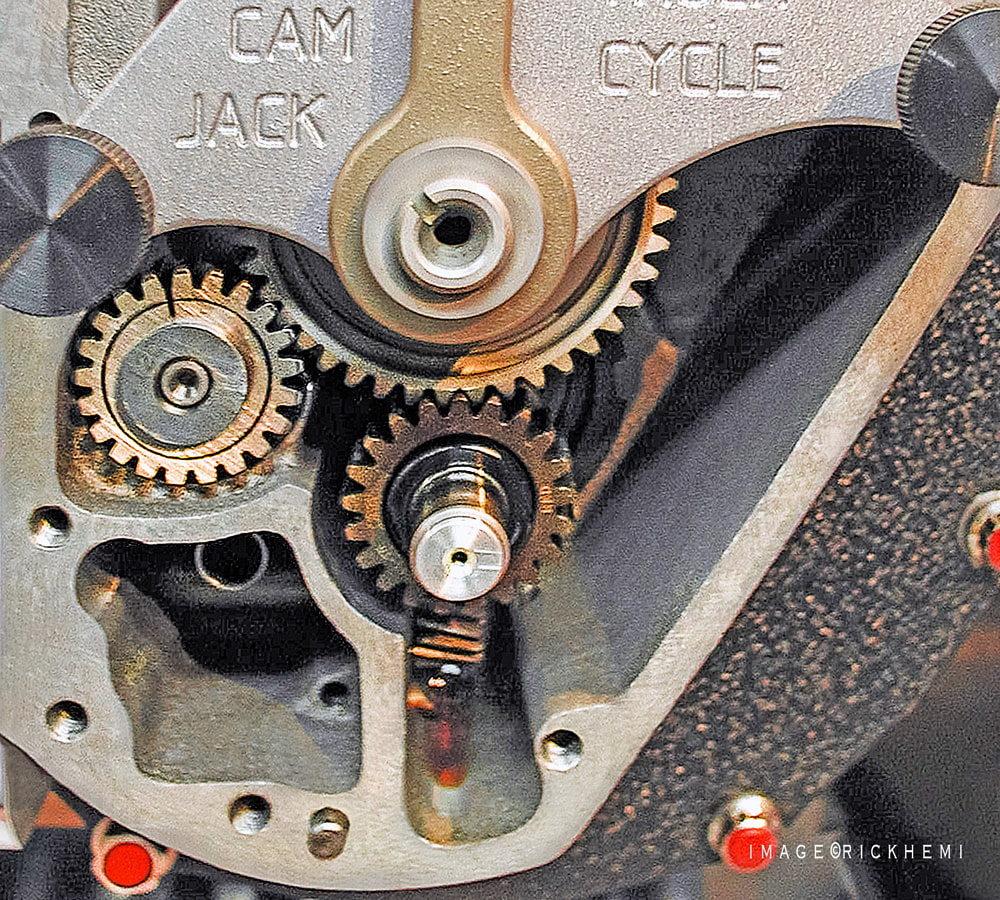
Below, the Harmon pinion shaft with an oil flow end-cap restricting oil flow to the crankpin. Without doing this, especially on these engines and most stroked engines, oil will over flow crankcases with too much oil.
Harmon Shovelhead - Valves
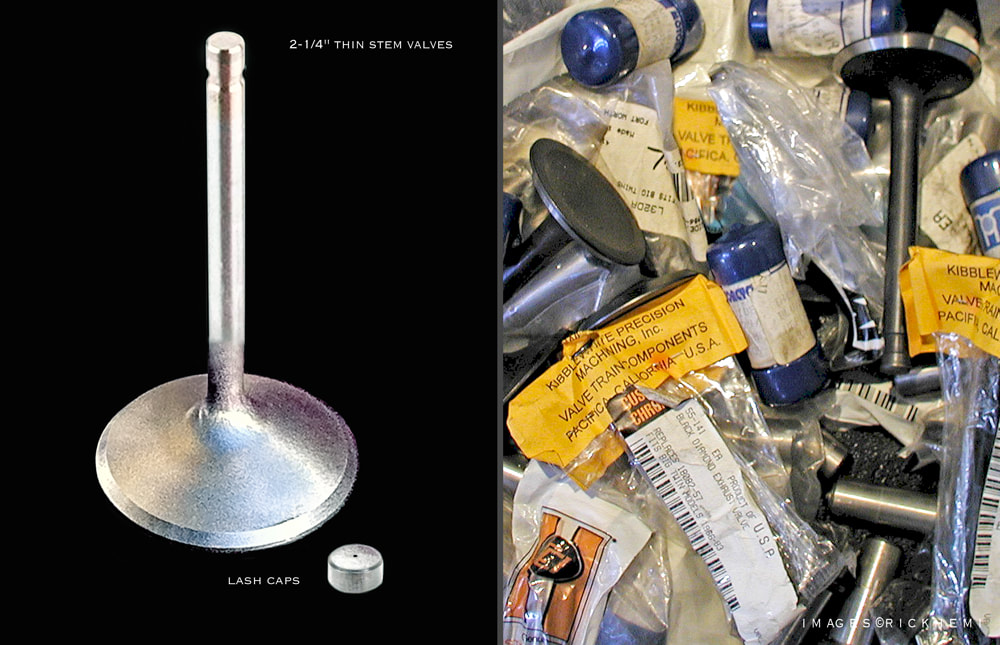
Original Harmon inlet valves are shortened Hemi 426 V8 2.250 inch valves. Replacement Manley valves can be purchased through V8 auto shops, or from reputable aftermarket Big Twin engine builders. The addition of lash caps are necessary on inlet valve-tips from pounding, and flattening the tip edge. For safety, lash caps should be replaced every year!
Harmon 120 Shovelhead - Camshafts
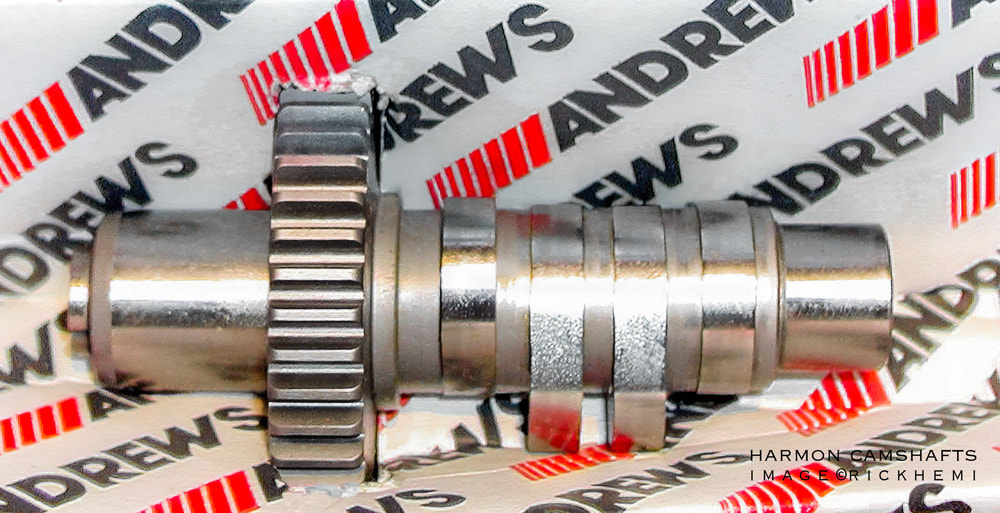
Harmon camshafts - Andrews : Leinweber : Sifton : Jims : S&S : Redshift
Harmon engines work best with cams having early high lift with long durations. I've tried various camshafts, with most of them working well from 3000 RPM up. Some to mention are the Andrews M & C grind, with the Leineweber L5 being the best performer overall. The L5 has a .519 valve lift, the inlet valve opens @42 and closes @72 with a 294 duration. The Leineweber L51 cam is another goody. I was wondering why the previous owner was struggling kick-starting the Harmon when first viewing it. There was plenty of gas and spark, but do you think the engine would fire up. After an hour or so of kick starting, the Harmon finally breathed some life. When the cam cover was removed, I discovered the engine was running the wrong camshaft, thus making it difficult to kick-start. The short length kick-arm was also part of the problem.
The above camshafts mentioned requires correct valve spacing. Cam side play can be shimmed at minimum OEM tolerances. Torrington cam needle roller should also be replaced when changing cams. Jims Evo blocks using solid lifters never gave issues clocking up road mileage on the Harmon.
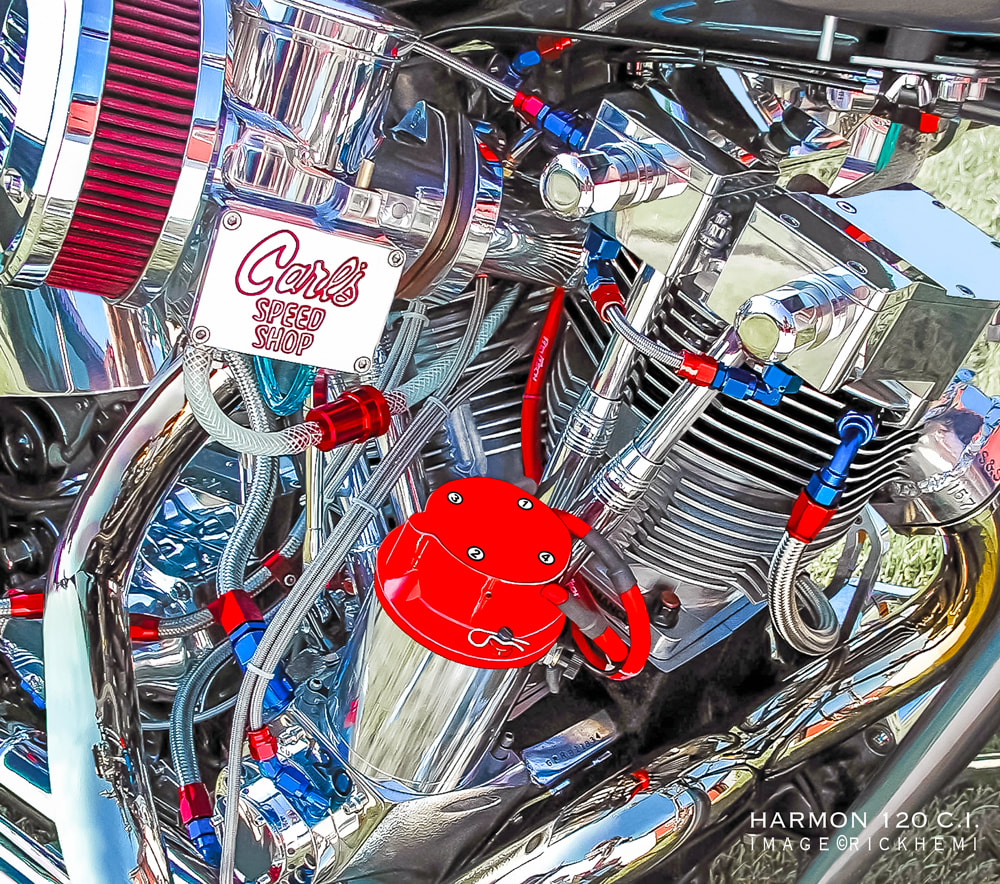
Harmon 120 Shovelhead - Oil System
Using good oil systems on Harmon engines will keep them running for years. Most quality brand oil pumps made in the USA will do the job. A larger oil tank with a capacity of 5 litres is recommended. Harmon engines should have an added crankcase vent line for crankcase breathing issues. Tapping a hole into the nose cone with a hose line to the oil tank is sufficient enough.
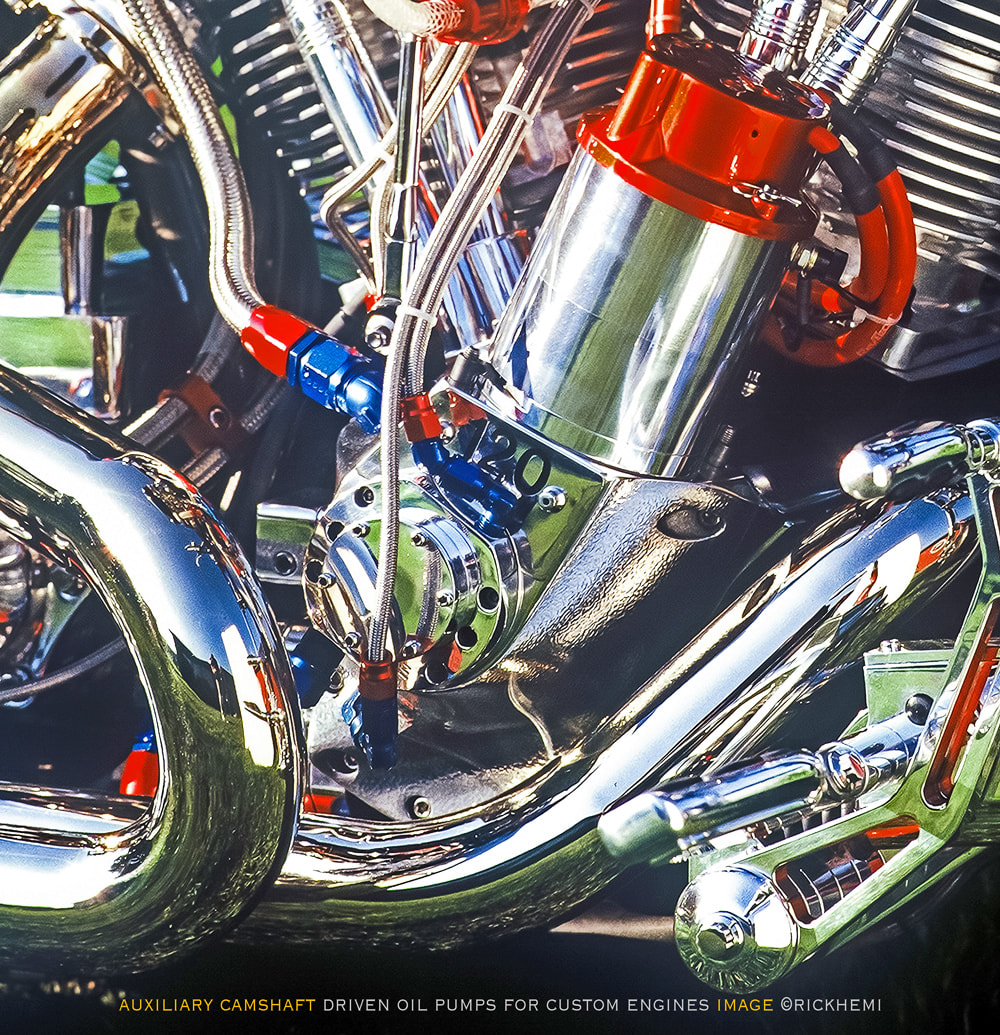
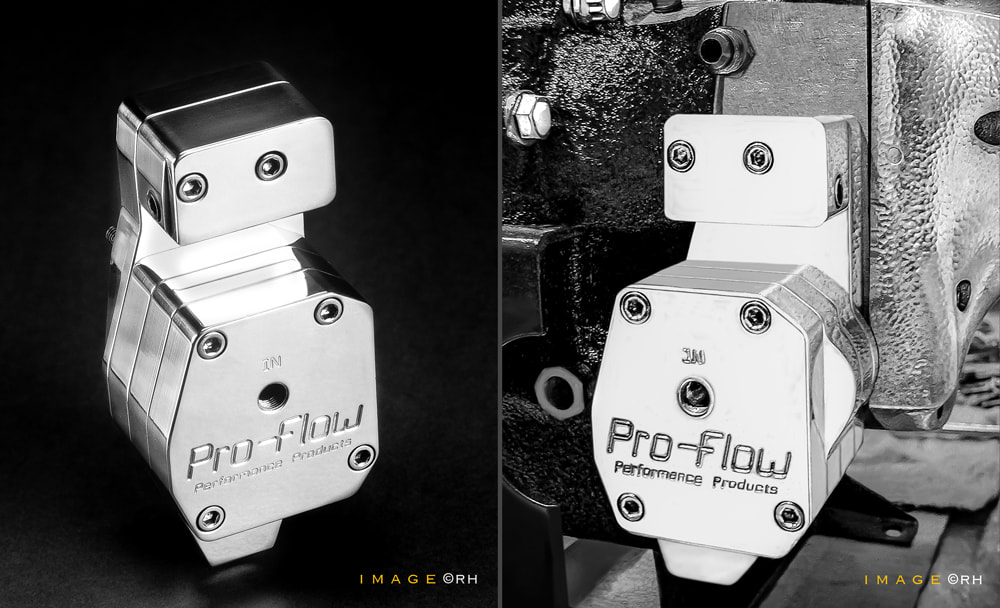
An added auxiliary oil pump was added on the Harmon to separately feed oil to the top end. The pump has functioned well with no issues from 1994 onwards. The heads were modified allowing oil to return externally back to the crankcase using -6 lines. This avoided the normal route of oil returning through the cylinders. Evo Sportster oil pump gears are used in the auxiliary pump. The pump is driven from a mini slot-hex extension that fits into the Magneto gear drive bolt head.
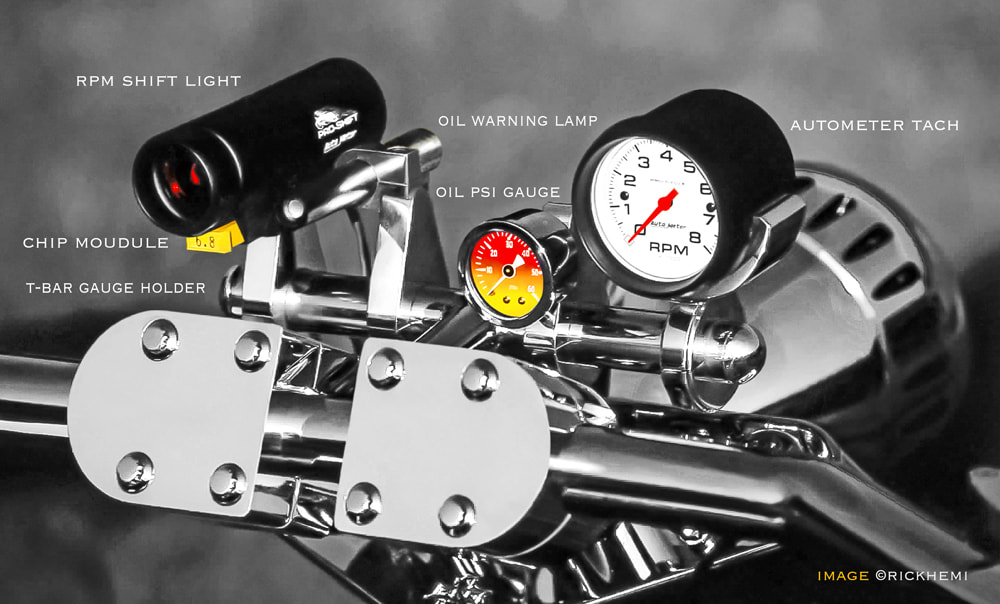
The most important instruments on Harmon's, are the RPM readout and oil pressure. A liquid filled PSI gauge and powerful oil warning lamp keeps everything in check - no matter what vibration the engine is dishing out. Many have blown engines to bits because of not having gauges operating where they can be seen.
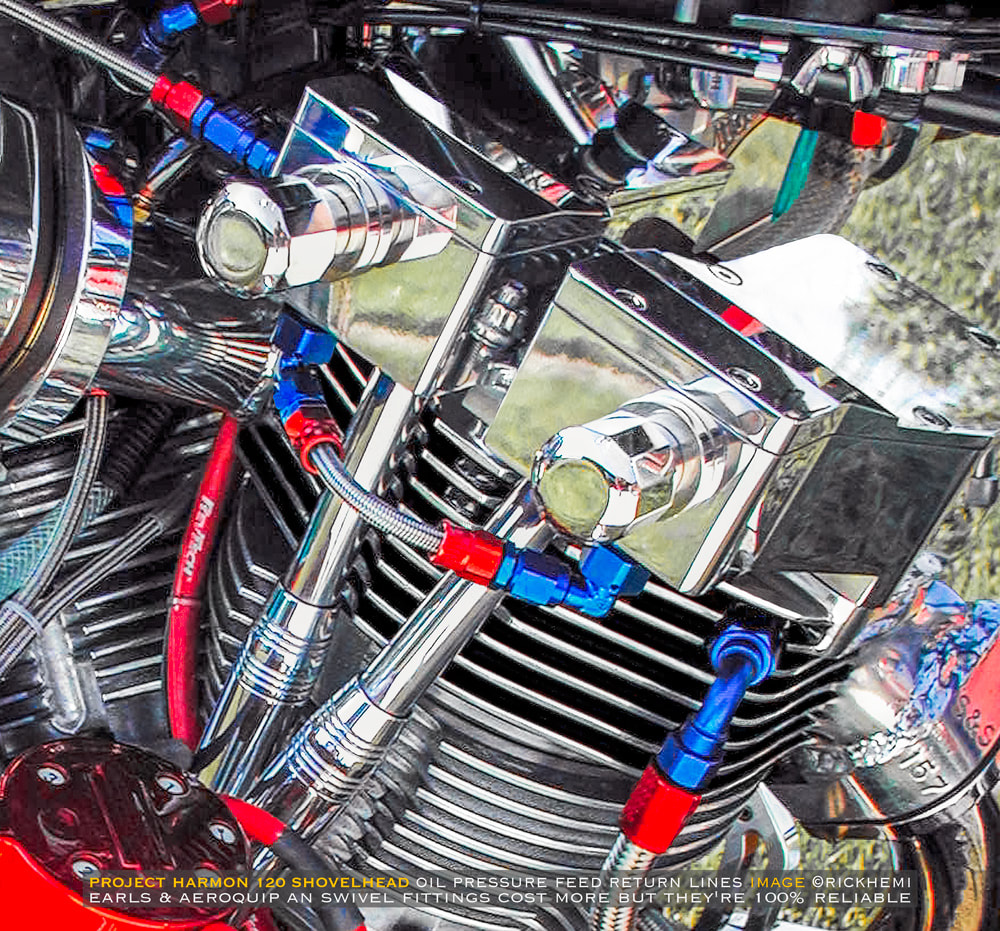
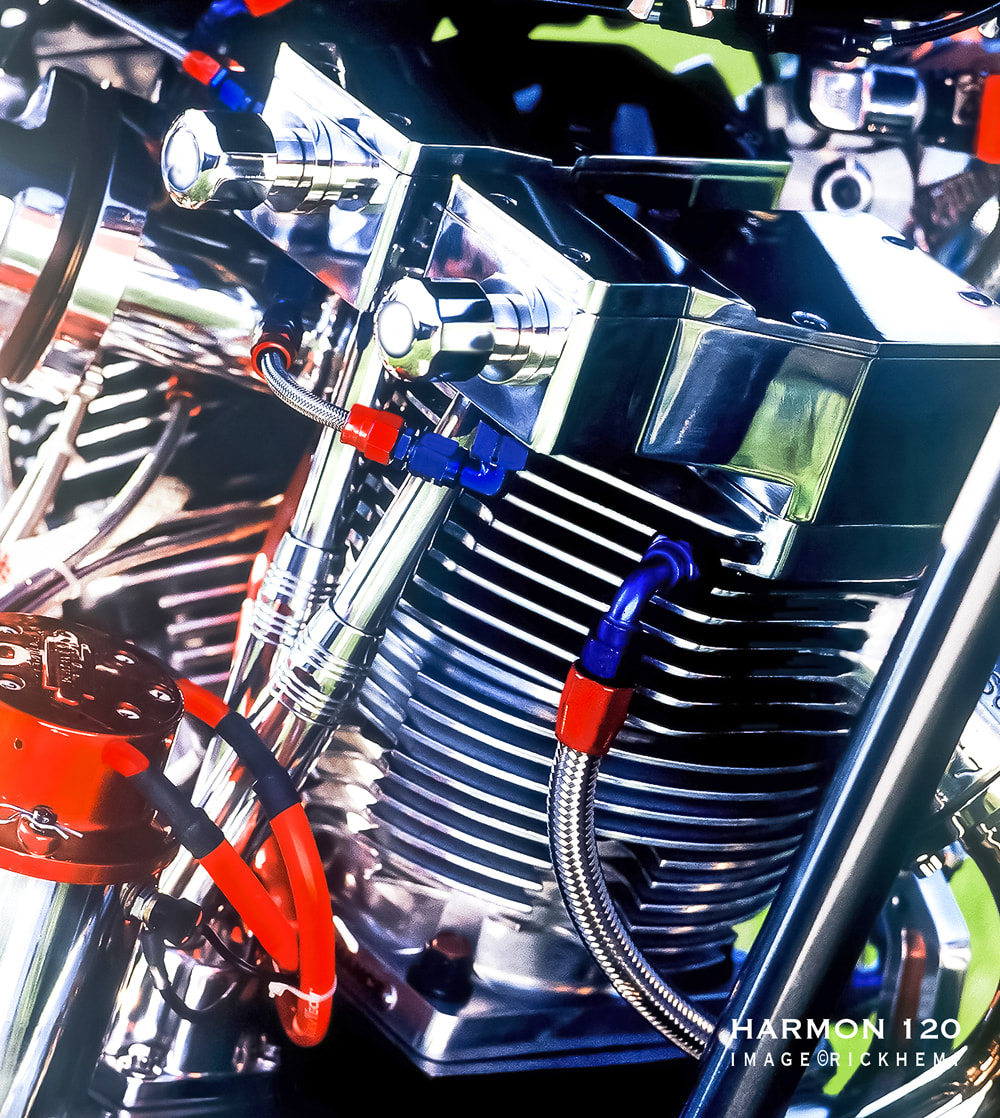
Because of using two oil pumps and two Oberg screen filters, with the addition of four rocker boxes, plus external oil returns from the heads to the crankcase, Earls AN swivel fittings were used. With years usage of running this particular engine, not one fitting or line leaked a drop of oil, or blew a line. That's reliability one needs especially with Harmon engines. They can handle constant oil pressure feed in and out. The main engine oil filter and oil pump gauges ran consecutively @ 60+ PSI all day non-stop.
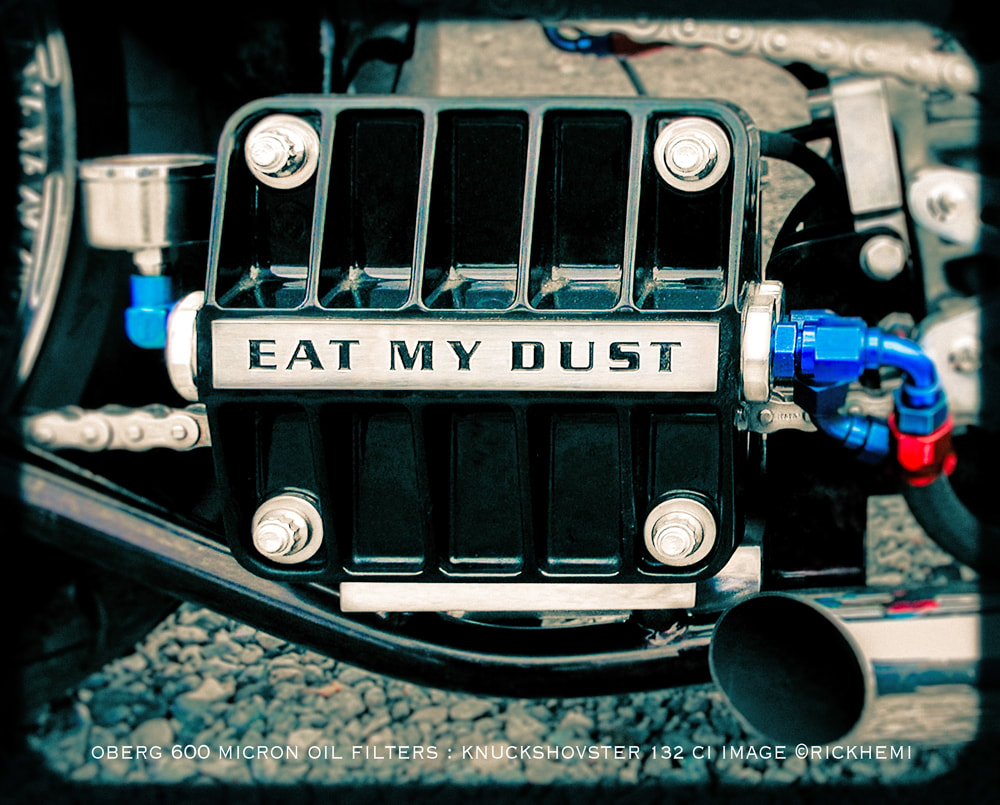
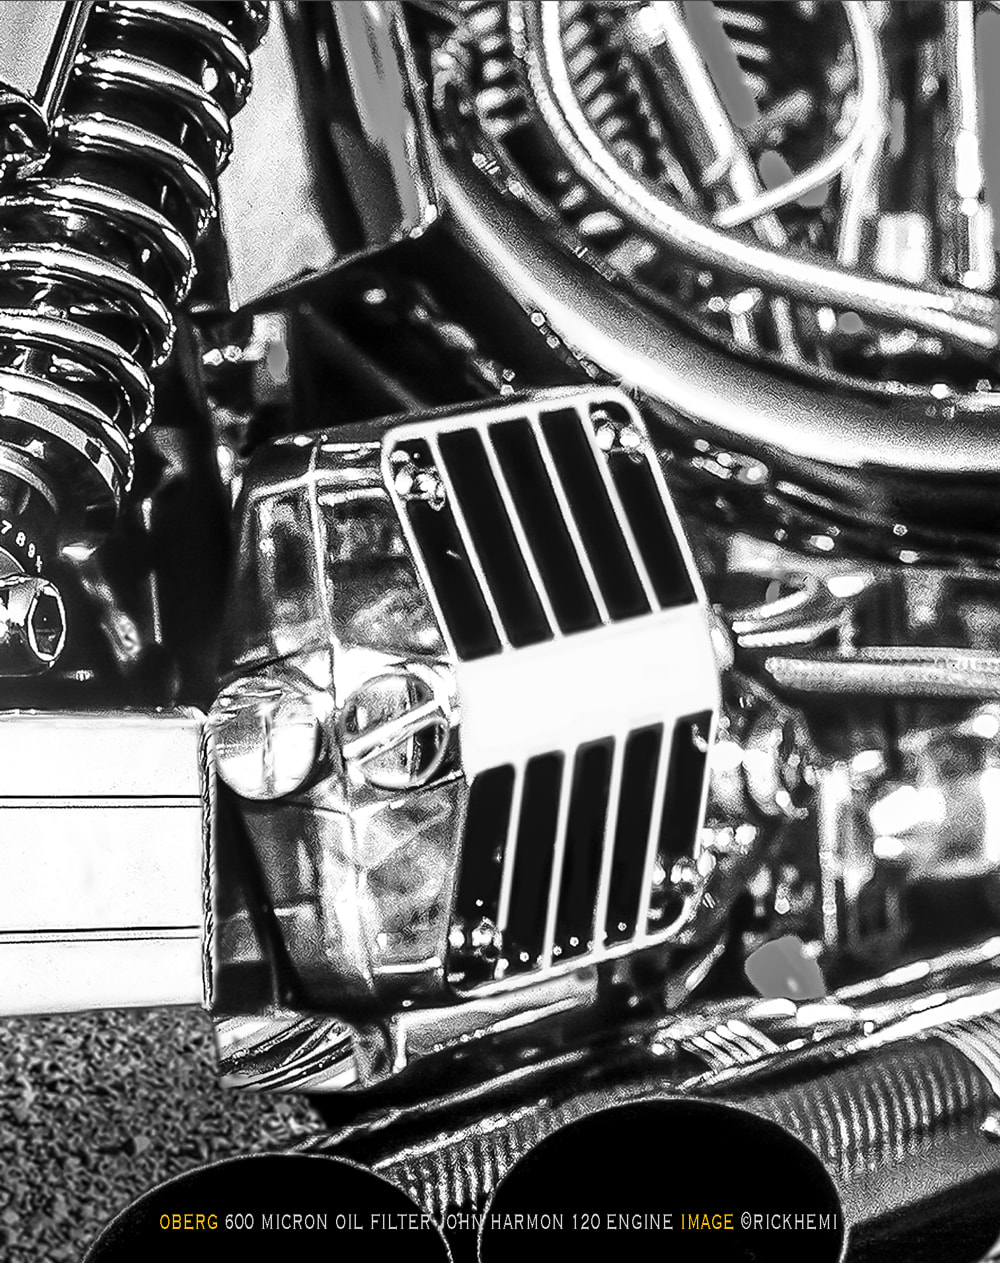
An integral part of any oil system is the oil filter. The majority of screw on filters require replacing after a few thousand kilometres on air cooled engines. The Oberg filter is one of the best performing aftermarket designs for any engine. The 600 micron screen stops everything right down to invisible dust particles. Changing oil using an Oberg filter is as easy as it gets. Undoing the four bolts will open one side of the filter, The screen can then be removed and cleaned, air blown and used again and again. The bonus of using Oberg filters is how fast it cools the oil down before returning to the tank.
Harmon Engine Failure - Oil Change On Time!
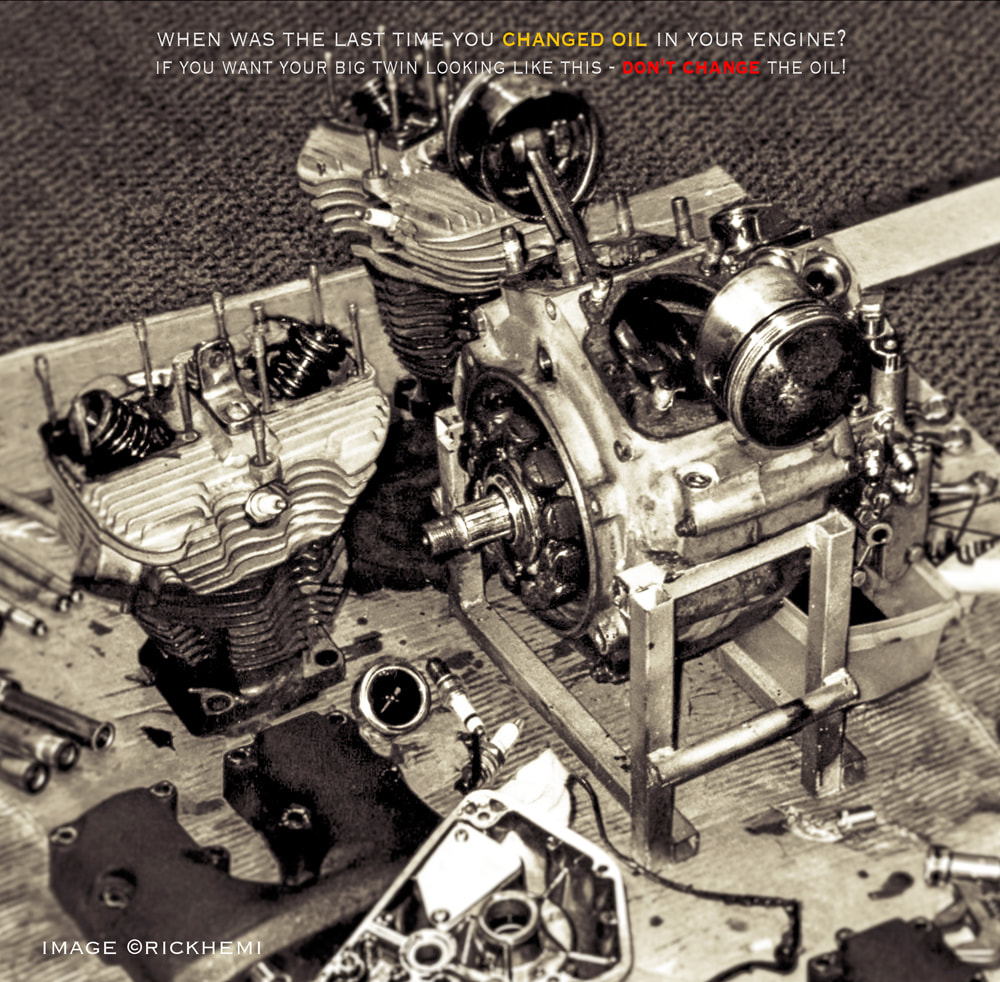
Big Twin HD engines can take a hammering, but those thinking they're indestructible have either been dropping far too much acid or inhaling high octane weed. The endless amount of BT engines I've pulled down - like the Shovel shown below are usually the direct cause of irregular oil changes. Some owners I've known haven't bothered to change their engine oil and filters for years. Oil loses it viscosity much quicker in air cooled engines. The result of old oil running through engines ends up as pitch black sludge, which slowly clogs oil passages, and oil filters (if any) causing engines to run even hotter. This then destroys moving internal parts of their harden metal surfaces from sludge paste. Sludge oil mixed with metal pumping through engines will slowly destroy internal engine parts until something lets go - usually crankcase bearings or shafts. Oil well past its use by date will cause shaft pins and rollers to wear down quicker, thus destroying engines, exploding them to bits. Changing oil and oil filters regularly will ensure the lifespan of engines.
One of the best methods to change oil in HD engines, is first by removing the oil filter, draining the oil tank completely, and filling the oil tank with fresh oil. Start the engine, and then wait until signs of fresh oil runs out from the oil filter bypass mount. Once fresh oil appears, stop the engine, and then screw on a new filter. Restart the engine again and top up the oil tank.
Large engine displacements require larger oil tanks. You don't see V8 engines running with micro mini sumps, and they're water-cooled. Older generation Big twin engines over 100 cubic inches should have at least 4 litres of oil capacity. This allows oil volume to constantly flow through the engine and cool down before being recycled through the oil pump. I've never seen a Big twin engine blow to bits because of too much oil. For instance, the Harmon engine pinion, crankpin, sprocket shaft and crankcase roller bearings after 6 years of run-time were still within tight tolerances. Even the camshaft lobes, and lifters had no signs of wear, including the camshaft cone bushing and Torrington needle roller. The only parts replaced (at an earlier inspection during the first year) were the Crane rocker arm needle rollers. Galling was apparent on all four rocker shafts - which has nothing to do with oil, and were replaced, including a fresh set of bronze bushings. The needle rollers were the weak link not withstanding the rotation weight of the pushrods and valve springs. Inlet valve lash caps were also replaced every second year - a safety precaution for these particular engines. The Harmon oil tank was designed to take approximately 4.5 litres plus whatever oil is left through the lines, crankcase and filter. Neglecting oil changes on Big Twin engines can result in major repairs costing an arm and a leg that can be avoided - Screaming won't help if your engine implodes because of neglect.
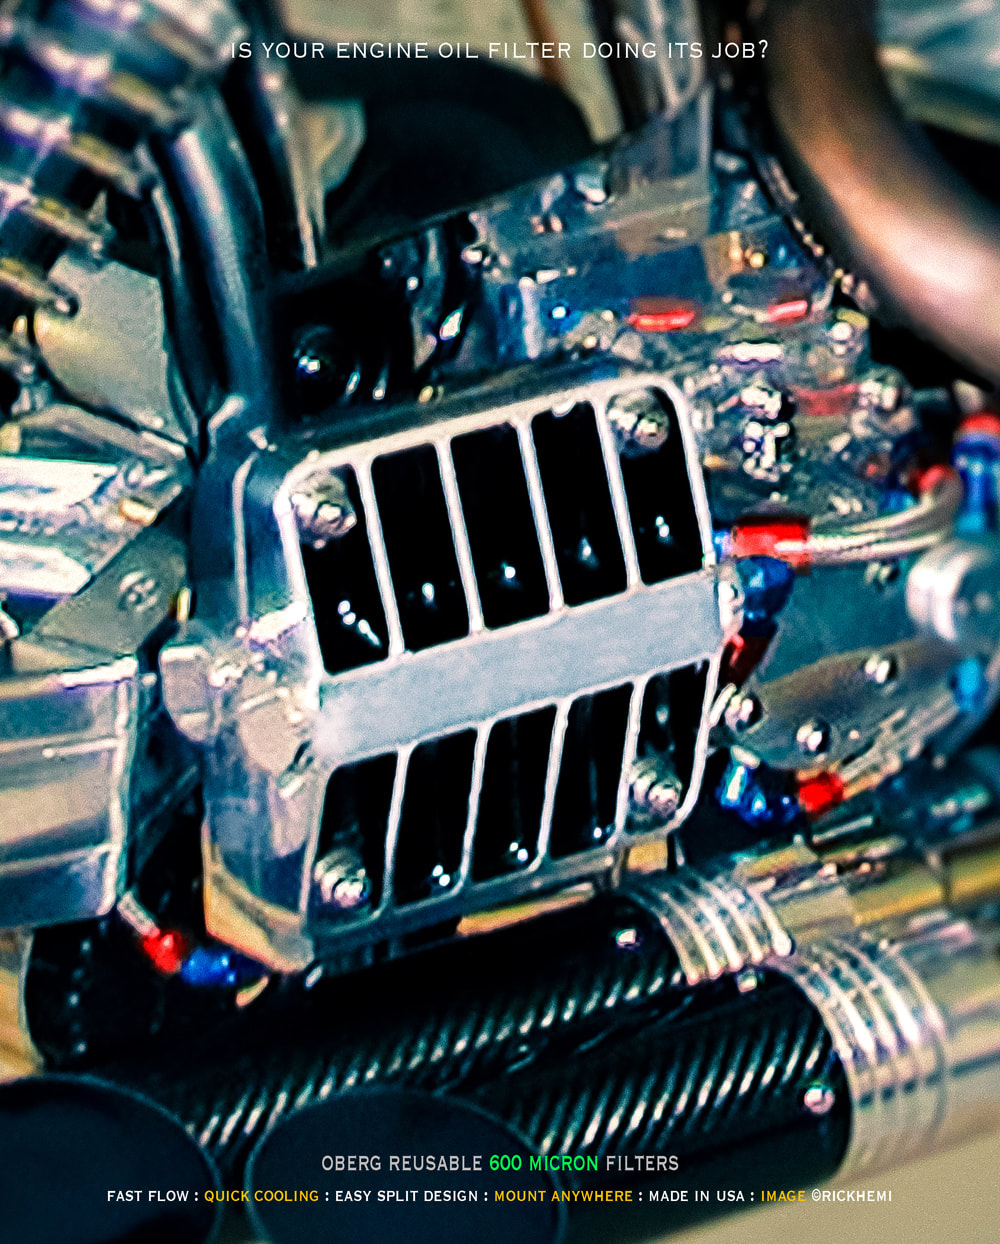
Have you checked lately where your one-time throw away oil filter is made? Cheap wing-bling imported oil filters can destroy air-cooled engines from clogging or failure from stuck internal bypass valves. Obreg Kits
John Harmon 120 - Modifications
One of many modifications were the replacement of the OEM Shovelhead rocker boxes. I had first begun by chopping up a pair of 1966 early Shovelhead rocker boxes that came off an engine from Baghdad. I had a constant flow of early and late Shovelhead engines, including Evo engines coming out of Iraq during and after the first invasion. The early and late Shovelhead engines were discarded for decades because of no apparent reason. Pulling down an early shovelhead engine that's never been touched since its assembly from the 1960s is a rear event. I even had one Evo engine from Iraq that had been found laying on its side inside a chicken pen with chicken shit all over it. The only thing wrong with the engine were the spark plugs and a botched homemade ignition module.
Chopping a pair of 1966 military cast OEM rocker boxes in half was the easy part, but cleaning them up to match together is another story. Crane roller rockers with Jims rocker shafts were used on this Harmon for many years. I found in the early stages while replacing Harman head o-rings, the Crane needle roller bearings had caused galling to the rocker shafts, and were removed and replaced with bronze bushings.

The first build was a mix and match of all sorts. The Harmon ran with Del-Orto carbs, Venolia pistons, Andrews cam, Vertex single fire magneto, tapperlite adjustable xxl pushrods, Jims solid lifters, triple valve springs, inlet valve lash caps, S&S oil pump etc. The Harmon was a kick start only. Through 6 years of kick-starting this monster, it had bent 5 kick starter shafts - it even bent a Jims machine shaft, which Jim himself couldn't believe, and wanted the shaft returned to see for himself with his own eyes. Kickback on this engine was quick and aggressive, it gave pain if the kick-arm had the chance to strike the lower leg. On various violent kickbacks, kick pedal replacements that had rubber chrome inserts would actually fly-off disintegrating into pieces. kick pedals from Chrome specialties, CCI & Zodiac all failed!
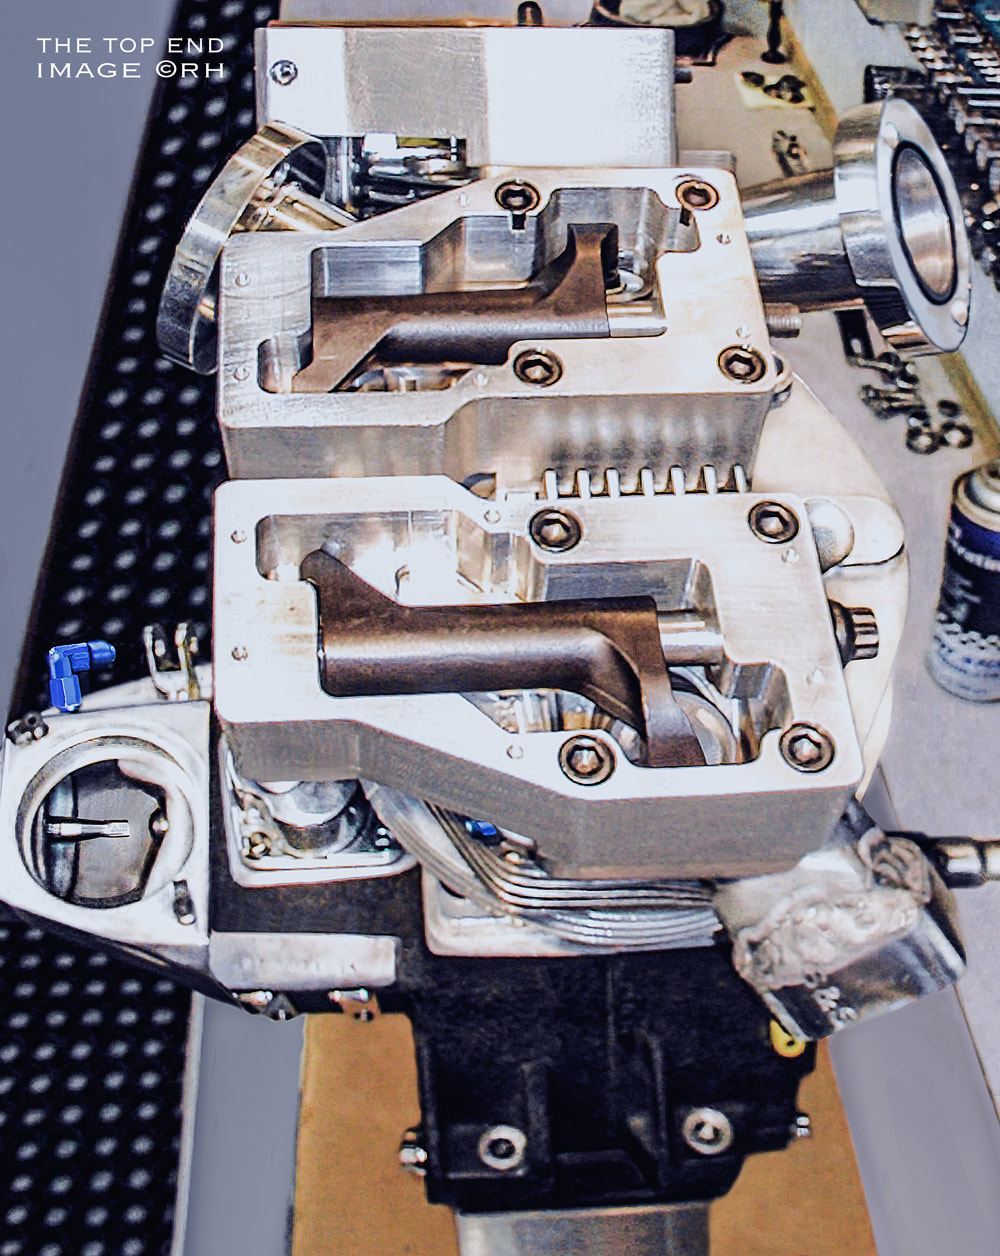
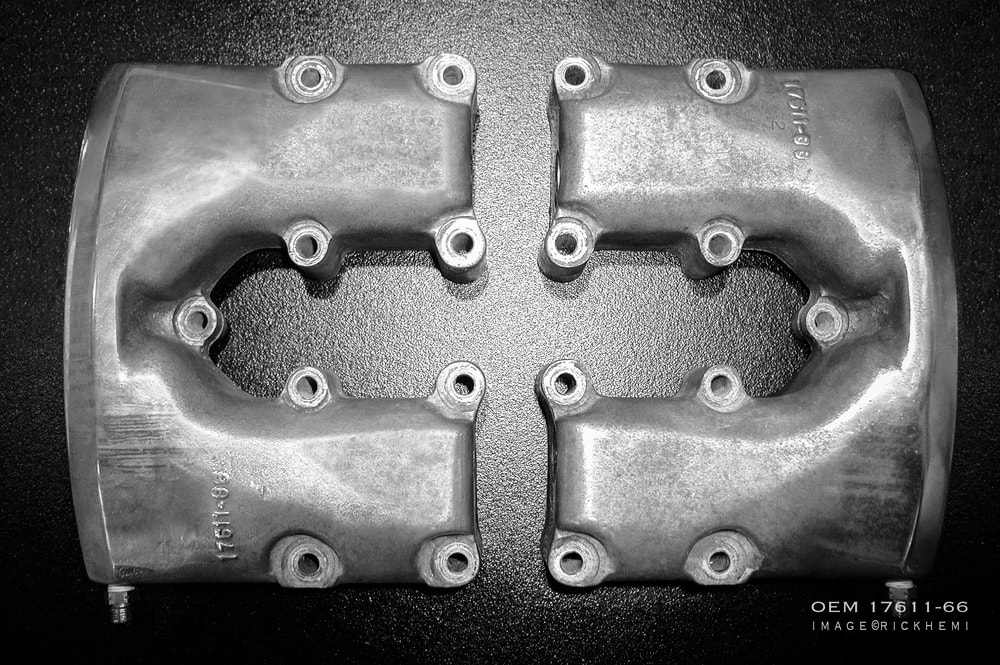
I ended up retiring the OEM chopped rocker-boxes and designed making my own. They were made from hi-grade billet alloy, with removable lids for easy inspection. This made it quick and easier when the inlet valve lash caps needed replacing. Larger diameter beefed-up rocker shafts were also made.

Using weak el-cheapo aftermarket wing-bling valve springs made in the "far east" on big cube engines is a no brainer! Top brands made in USA guarantees engine valve train reliability. Harmon engines use high lift cams requiring strong springs. Any of the above mentioned manufacturers make quality valve sets complete with retainers and keepers. Triple or double valve springs kits is optional. Harmon cam lift usually doesn't pass the .600 mark, so a strong set of double valve springs and titan retainers and keepers will do the job.
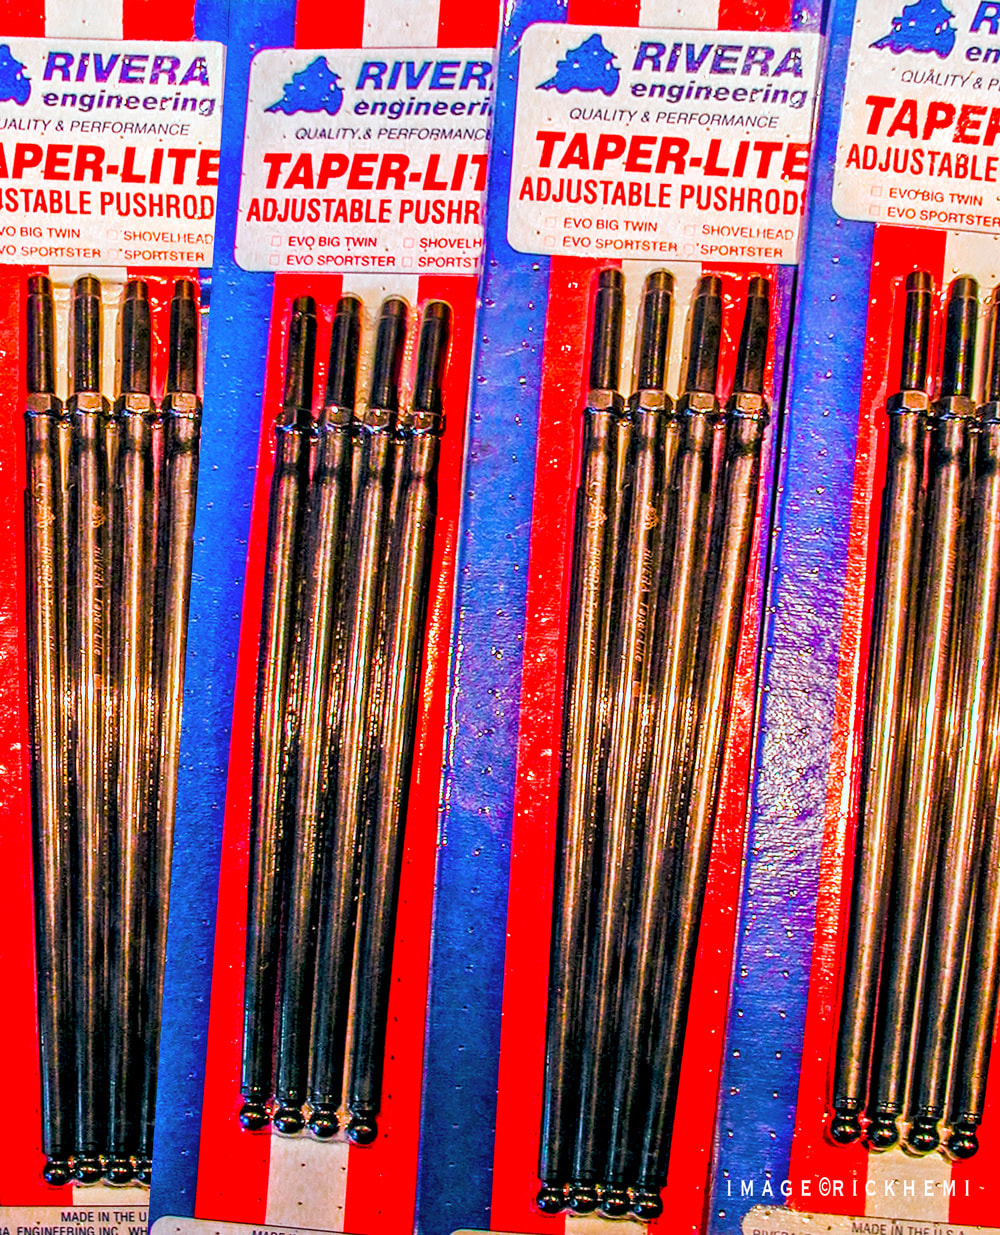
Pushrods vary with one or two designs way ahead of the pack. Taperlite pushrods are probably one of the best designed constructed pushrods - if they're still available. Taperlites are made from chrome moly, the top ball ends fit snug, right up inside the rocker arm sockets. The lower adjusting ends have super fine threads, which completely removes all up and down play. Locking up the pushrod adjuster nut tight with a good nip ensures freedom from a rattling valve train. Harmon engines require the XXL set. This keeps more than half of the lower adjuster inside the pushrod. Sumax pushrod covers have plenty of inner clearance - they don't leak either when using their upper & lower silicon seals. Lower pushrod covers on both exhausts should be checked for clearance if using other brands. pushrod rubbing may occur.
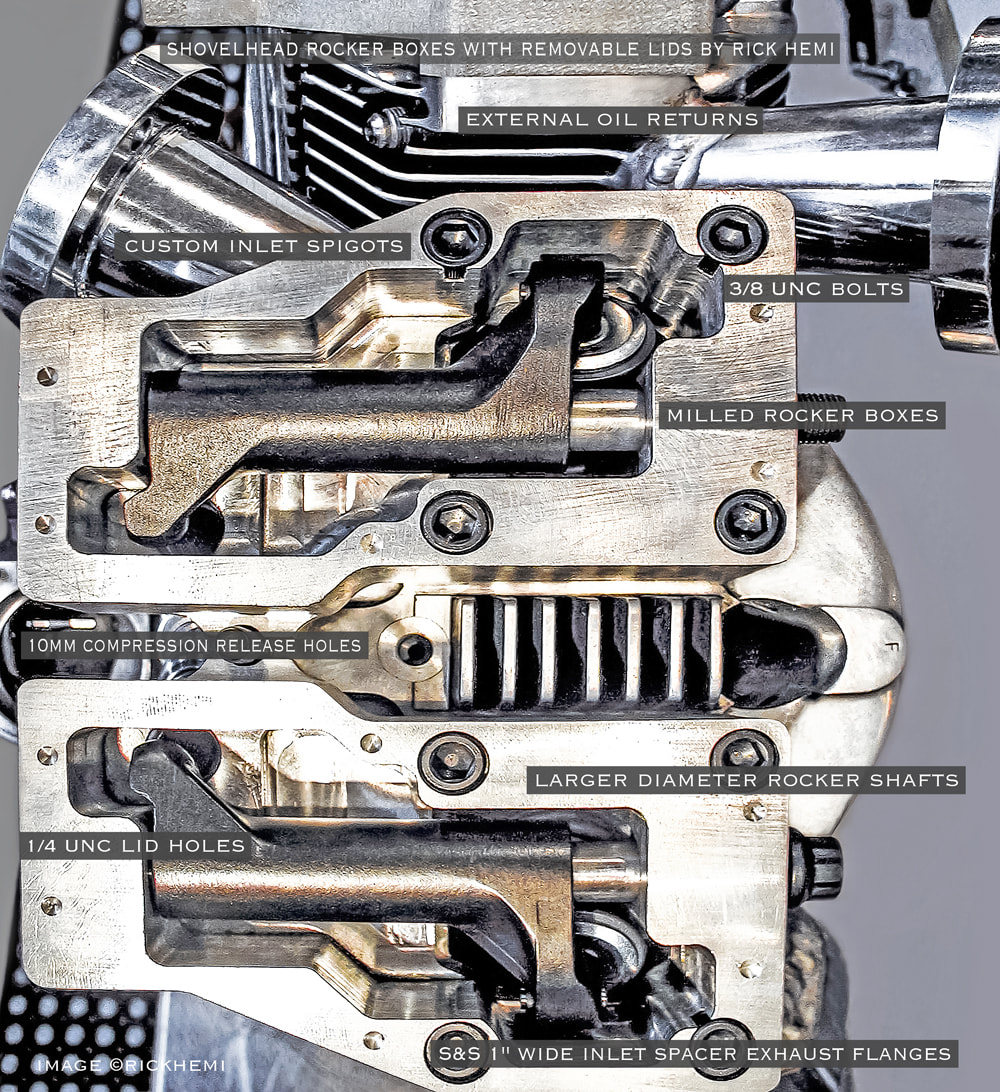
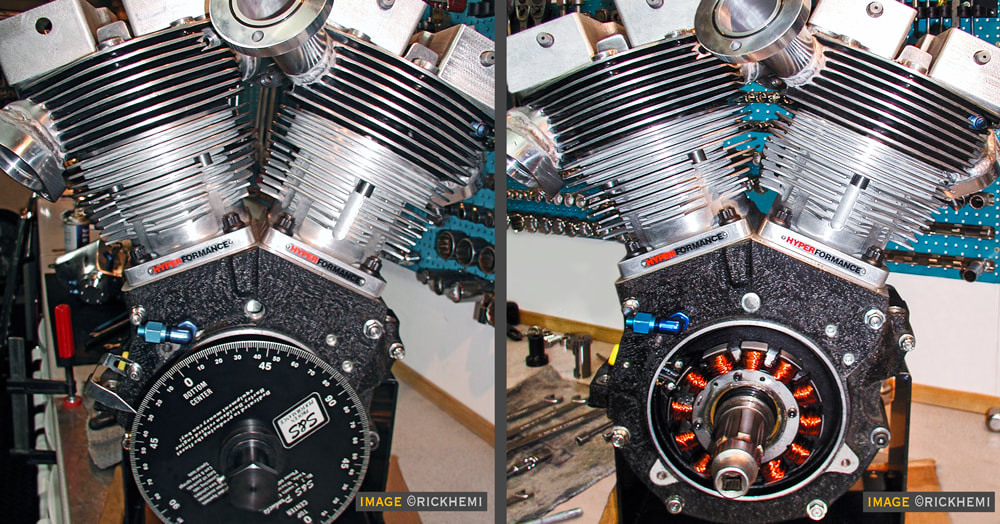
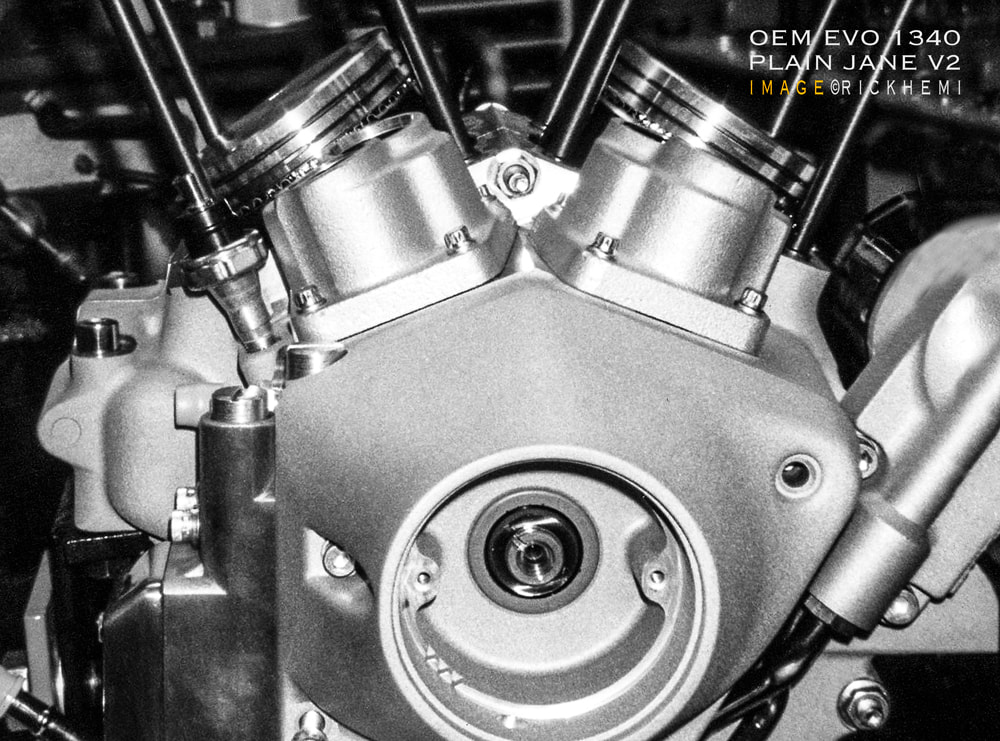
The most difficult task completing the boxes were the underside center locations and angles for pushrod covers to seal properly. A centering tool was made that fitted into the lifter blocks. The tool had a 12mm slide rod with a pin point tip that gave the accurate centering location. I'm still waiting for the return of this tool from someone who wanted to make a copy whom I trusted - He knows who he is!
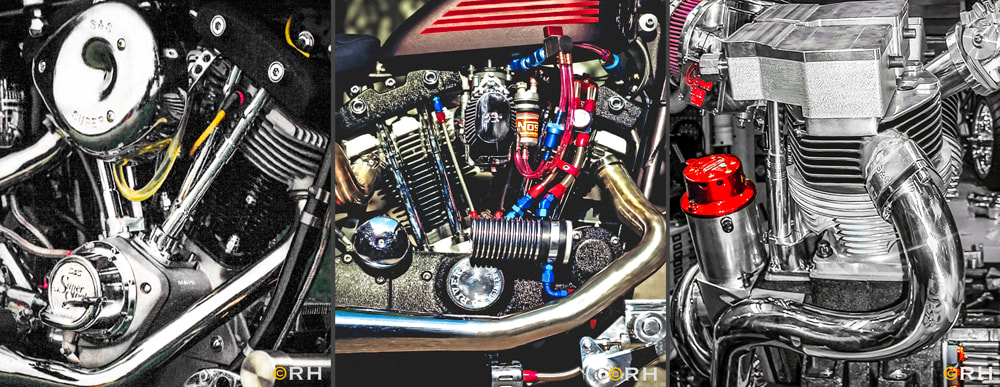
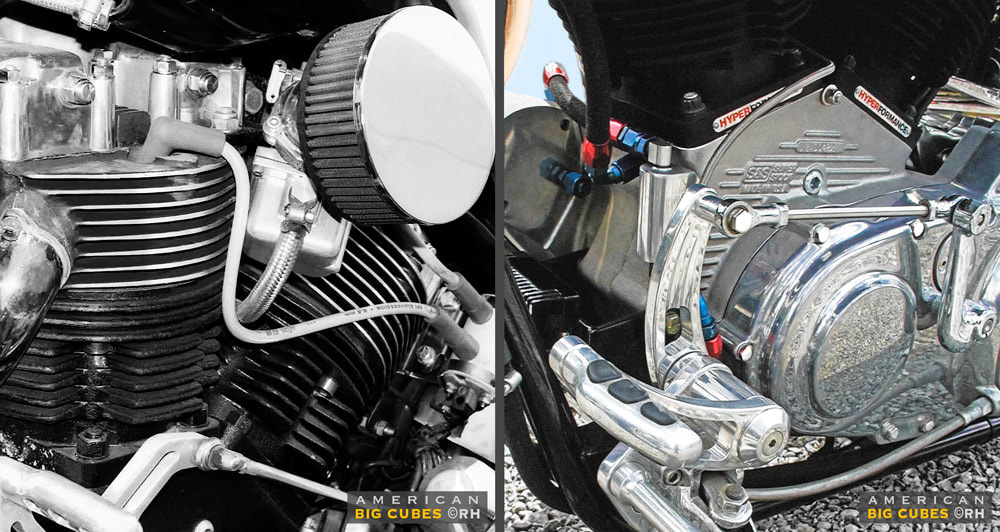
Stock Shovehead lifters blocks were replaced with later model Evo blocks. The above image shows the severity of the front exhaust pushrod angle. Tapperlite adjustable pushrods with solid Jims lifters were used after the engine's first rebuild which clocked up over 5+ years of non-hassle running. There was also no cam or pushrod clatter, rocker-box noise or piston slap before the engine was pulled down for new modifications. The original Harmon head-cylinder viton o-ring seals were replaced with custom-made copper gaskets. These engines can actually run without head gaskets if heads and cylinders are perfectly machined matched. S&S one inch wide carb spigots were added as exhausts spigots instead of using the original one bolt exhaust hole. On the 2nd rebuild, the Del-Orto carbs and flanges were replaced with custom made spigots to mount Typhoon carbs. The original Harmon cylinders were replaced with Hyperformance jugs and pistons. The original cylinders were already at their maximum bore diameter @0.70 th., due the previous owner's sloppy engine short-cuts that caused the engine to internally destroy itself. This wasted 0.60 th of reboring to the original cylinders. A damaged piston with seized rings created deep scars down the front cylinder. This is what happens when bottom end assemblies are put together with mixed unmatched wing bling parts with sloppy tolerances. A set of 10mm compression release plugs were added, including titanium exhaust valves, a fresh set of 2-1/4" inch thin stem inlet valves and lash caps. Below, flawlessly rebuilt Harmon 120 Shovelhead by Rick Hemi.
John Harmon 120 Big Twin - Stainless Hardware
Chrome Versus Stainless
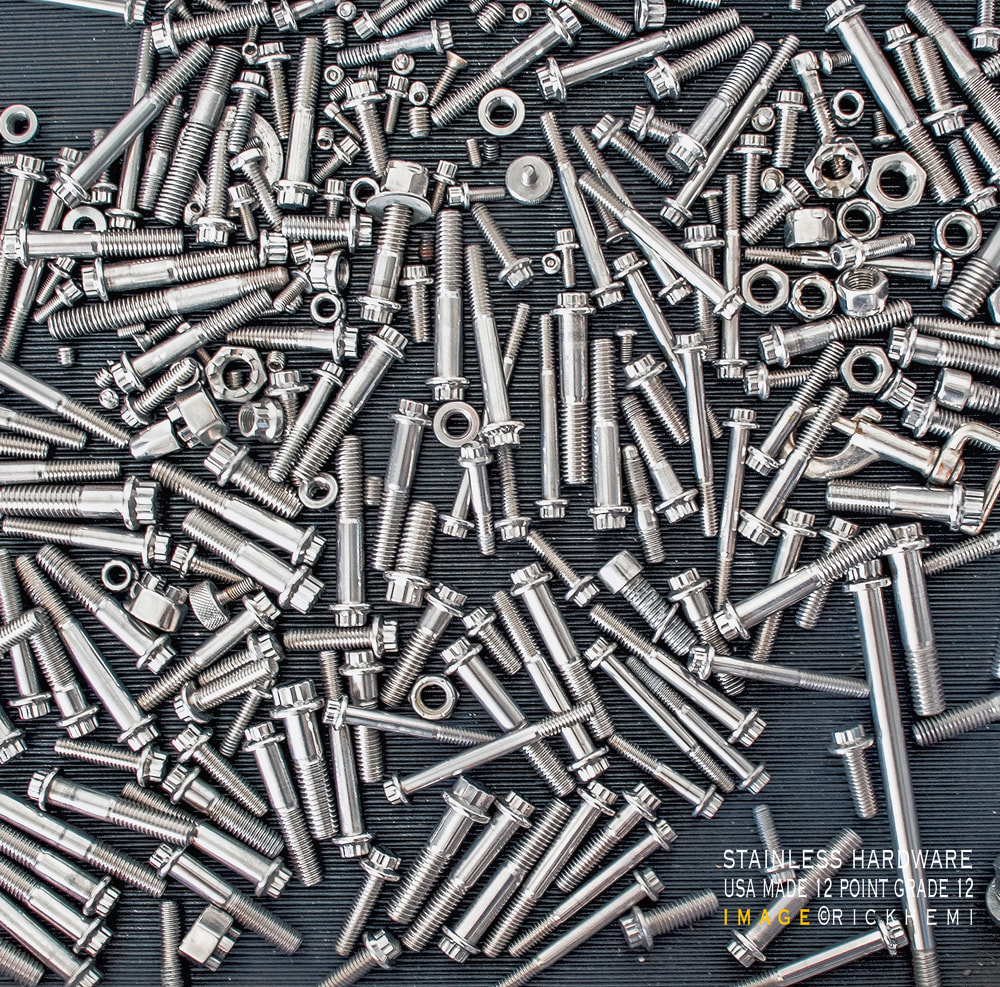
Hardware is an integral part of any Big Twin project, but what's the difference of choosing between chrome and stainless steel bolts, nuts and washers? If you live near or ride along coastlines, chrome hardware will eventually peel-off with rustic looking finishes - great for rat bikes. Quality grade Stainless hardware will keep on keeping-on! 12 Point grade 12 stainless bolts are normally used on tanks and other military vehicles. Knowing a direct US supplier will keep the costs down. The above image shows various sizes of 12 PT grade 12 polished hardware that was typically used on the Harmon project.
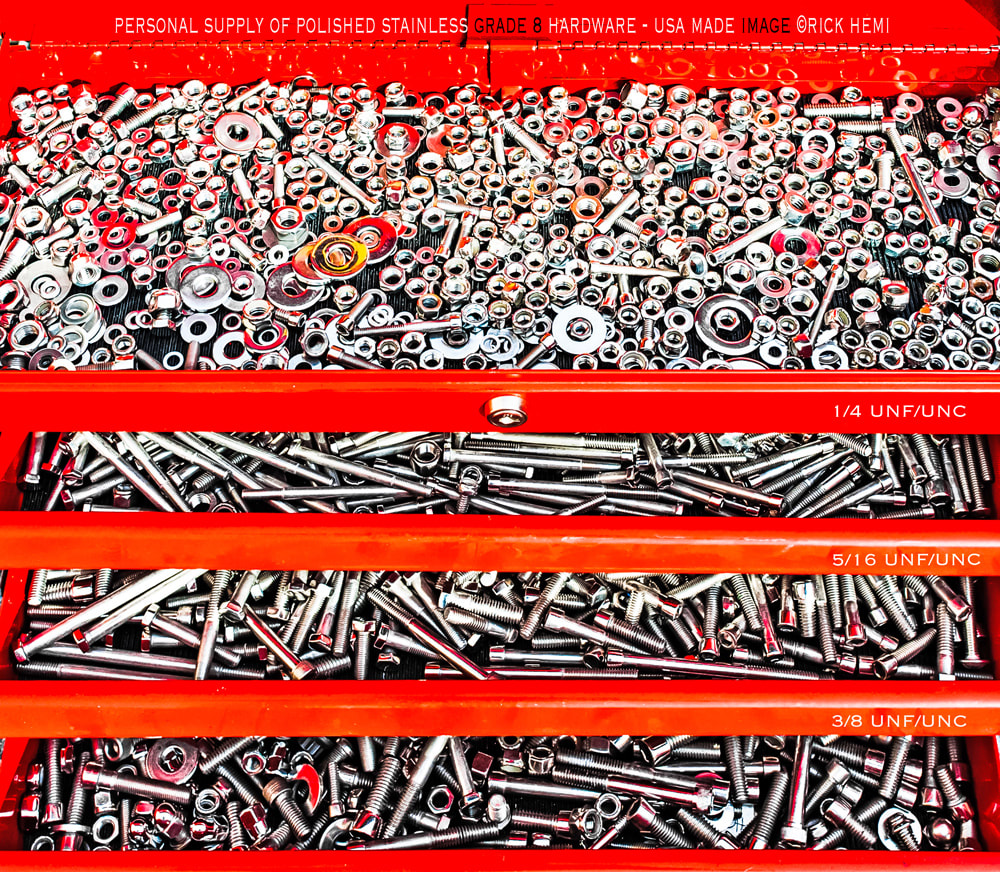
American made stainless Allen and hex bolt hardware is normally produced at grade 6 or 8. The quality isn't as good as grade 12, but it still beats imported Chinese chrome hardware that's normally available through aftermarket biker suppliers. Purchasing ready polished stainless hardware also isn't cheap, but saves the time and energy of manually polishing each bolt, nut and washer. I had my own 3 phase industrial polisher to to the job. My trusty old German 1961 FP1 Deckel miller, weiler lathe, and Swedish strand and arboga drill presses covered almost anything else. To stop galling, Anti-Seize paste must be used on stainless threads. If not, the next time any stainless bolt is removed, it will rip out the alloy thread it's attached too. The above image shows a treasure chest of US polished grade 6 and 8 backup hardware.
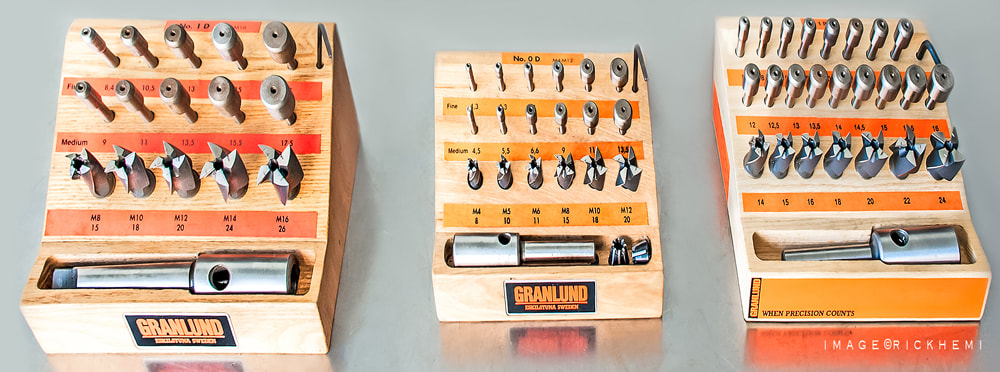
Below, counterbore tooling sets are a must have for certain custom made parts requiring clean flush finishes for Allen-head bolts and other work. I personally use Granlund counterbore tool sets from Sweden. Even though all sets are metric, the finished diameters are within US imperial tolerances.
John Harmon 120 Shovelhead - Drive Side

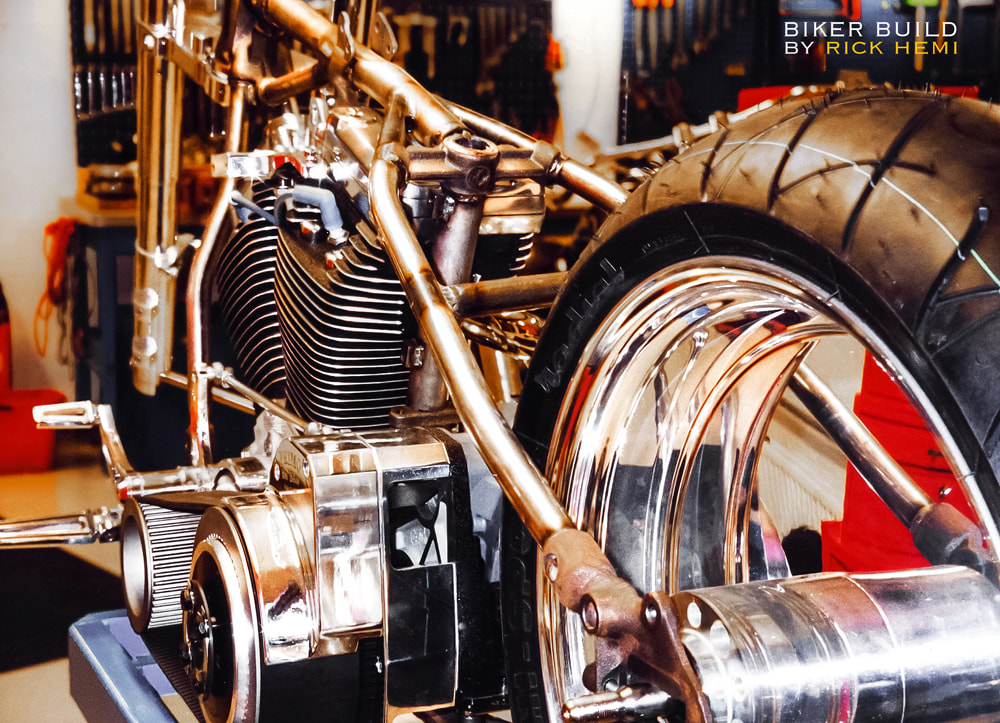
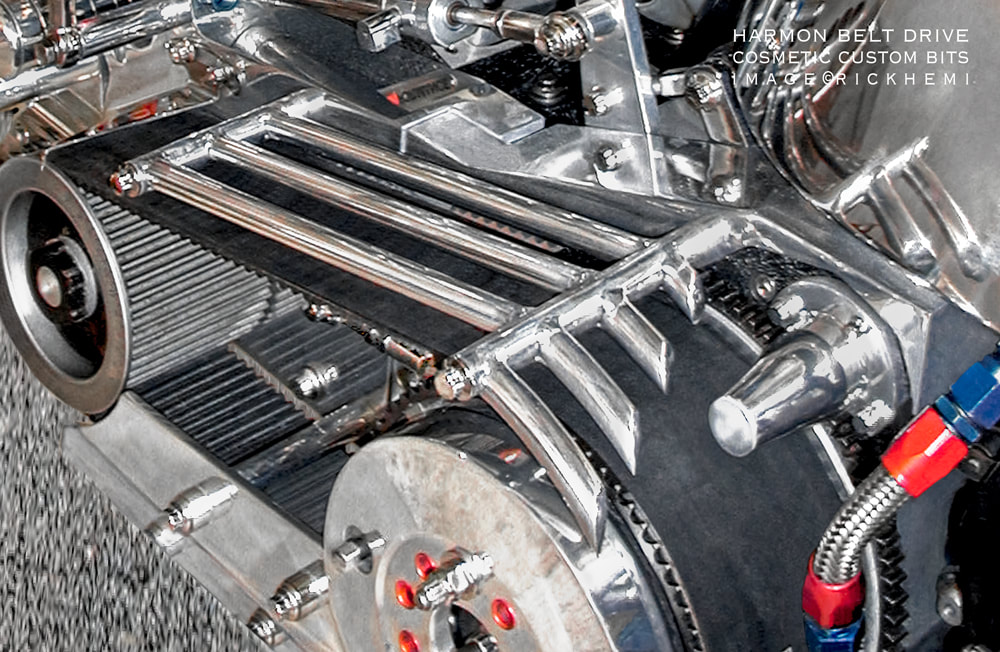
The Harmon Shovelhead drive side received a makeover from its former construction. I designed and made-up a newer heavy-duty adjustable plate that could hold everything in place. The two inch wide billet two section alloy plate is adjustable with a center rod bolted to both half sections. It could easily adjust the drive belt up in a few seconds. Re-tightening the plate is with four 12 point bolts. The plate is used to hold the starter motor, the belt guard rail, the stone catcher, air shift pump, timing pointer, and left carb extension rod. Vibration issues on these engines can rattle items to bits, a solid thick plate keeps parts intact.

Getting oil out quickly from the heads is via external lines to the crankcase. The original Harmon cylinder oil drain holes were sealed and blocked when they were being used. Both front & rear external lines join together on the drive side beside the crankcase. This was one of the first engine modifications done in 1994. The engine clocked up thousands of kilometers through the years with zero issues to all oil modifications.
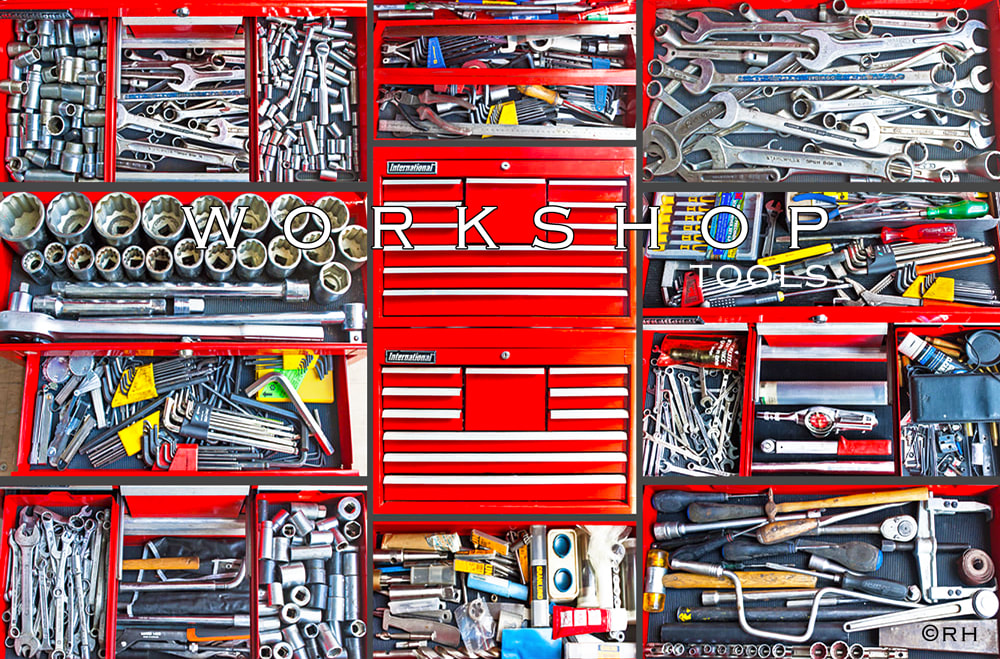
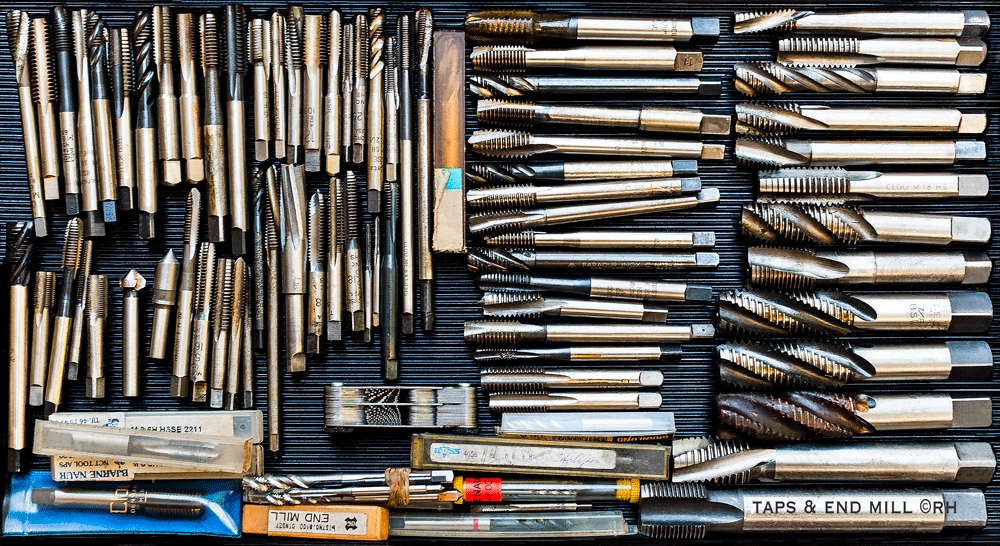
Quality Workshop Tools - Use American - European Made!
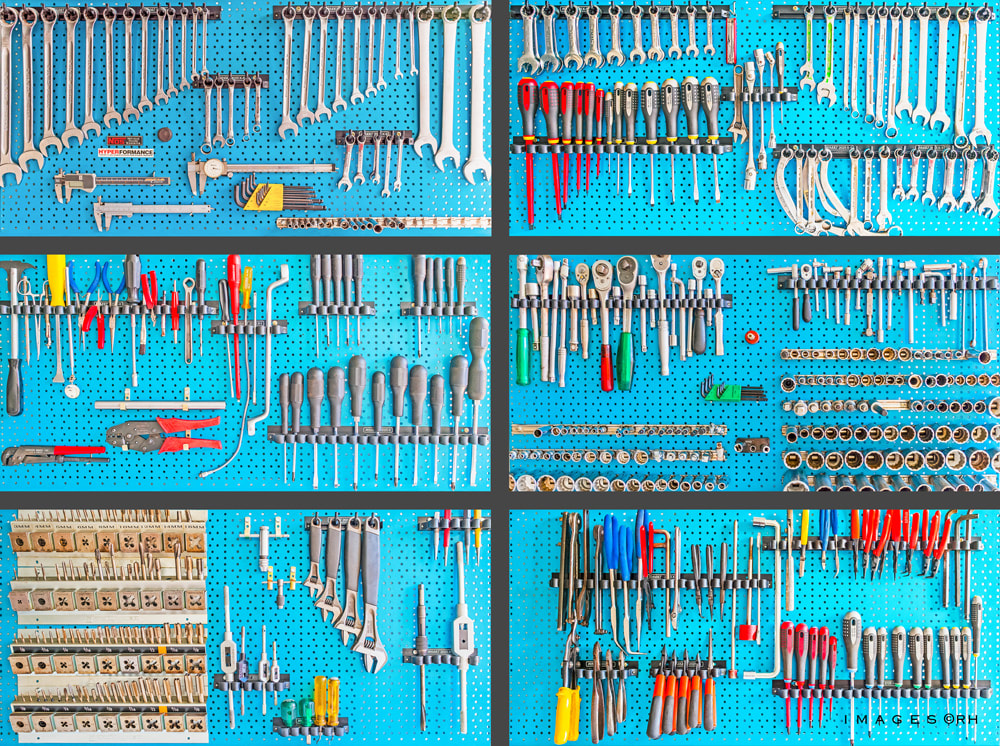
Forget about using el-cheapo wing bling tools for engine building. Junky cheap tools made in China are what they are - Sloppy Junk! It's better to shop around for good quality brand name tools made in the USA or Europe. Even purchasing 2nd hand quality made tools will outlast and be more precise in tolerances than crap made in the far east. I don't blame China, I place the fault at greedy western companies cashing in for higher profit margins using cheap labor and low grade recycled steel.
Above, one of many workshops through the years using the same bench top design. Below, tools used to rip a part anything on the ground. Two top quality tool brands I personally recommend are Stahlwillie from Germany, and original Armstrong tools from the USA. I've had a few Snap-On tools that have snapped-off (made in China). Swedish Bahco screwdrivers are hard to beat, I've never had one fail me yet. Shopping for good used tooling can be normally found at industrial machinery dealers selling lathes, milling machines, and drill presses. Below, a collection of kick around tooling - Dowidat, Hazet, Saltus, Facom, Schmole, Williams, Craftsman, Wera, Bacho, Snap On, Stahlwillie.
Street Harmon Shovel - Air Shift
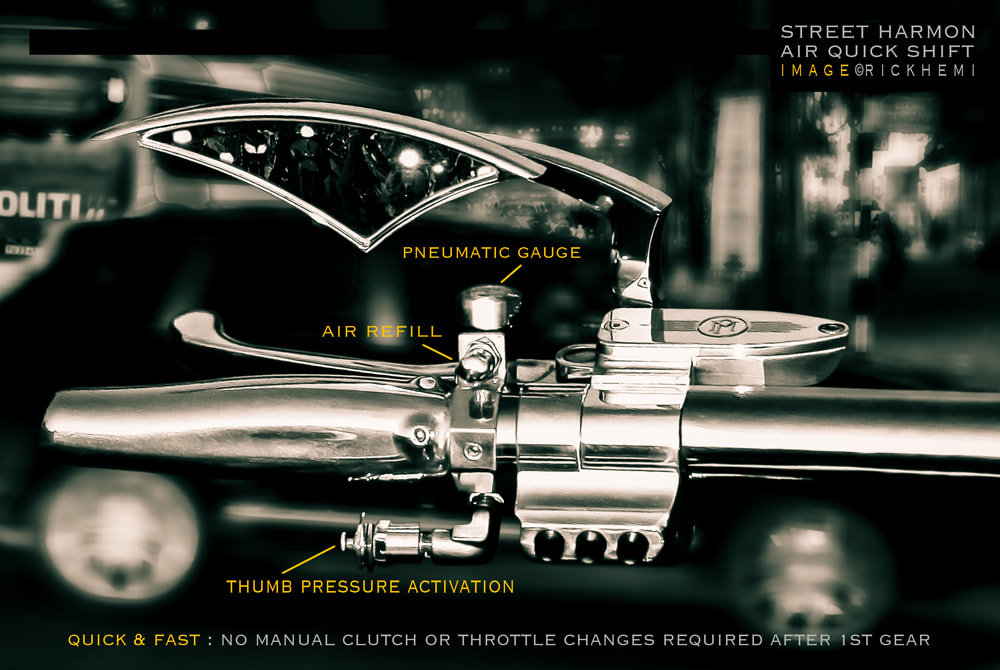
In the early 90s, street air shifters weren't so common as they are today. Making air shift systems for Big Twins requires a mini air pump with enough air pressure to push the gearbox linkage arm super fast. A micro mini electronic switch valve unit is easily hidden out of sight under the frame. A homemade handlebar unit constructed from billet alloy is needed to hold a thumb push activation switch, a refill air valve, and a mini pneumatic gauge. The air line is connected directly opposite to the air refill valve using an air line push-in fitting. Air supply can be from any mini tank. The Harmon since mid-1994, had used a NOS slimline bottle mounted to the swing-arm drive side. There was plenty of air for several 1st-4th gear changes. Did it work? You can bet on it! Air lines have to be totally sealed and secured properly for the system to work. There were times at traffic lights when rice-burners got a shock of their life with the Harmon roaring up the street using air shift. Changing front and rear sprockets gearing the Harmon down gave quick power take-offs through the streets of Copenhagen.
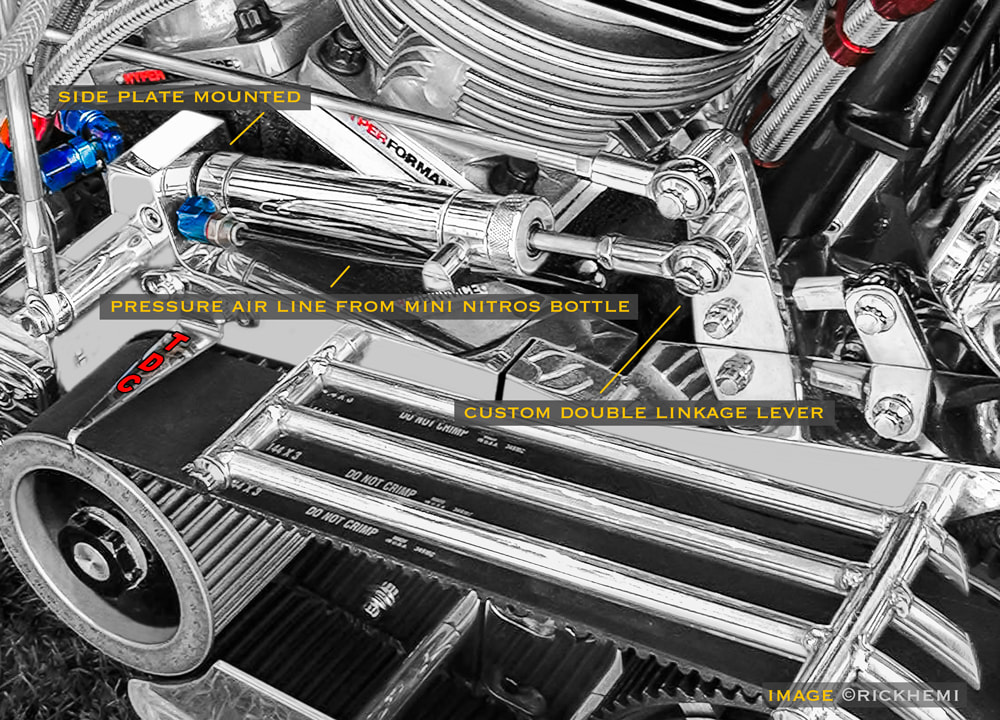
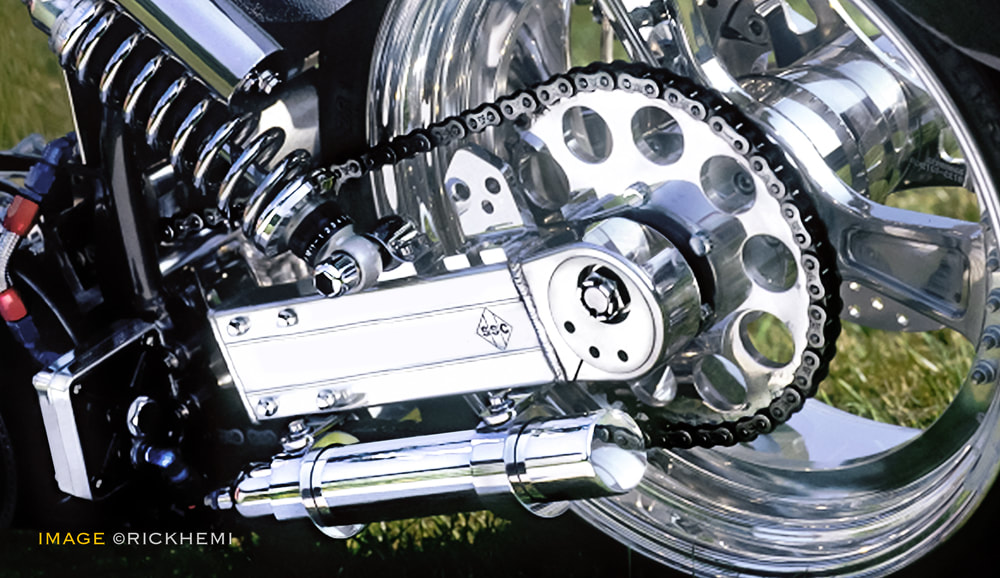
The angle of the air pump to release, engage, and return to its neutral position is important. The air pump arm should be adjusted to move backward just past the engagement of gears. A much larger bronze bushing or needle roller can be used on the double arm lower support shaft. An STD 4 speed case with a full house of Andrews gears and shafts worked well with this engine. The less gears to change - the better. Below, the SSC Wiwo swing-arm had plenty of space on the chain side to mount a slimline NOS bottle for the air shift system. Two alloy machined ring mounts with stainless support lugs held the bottle in place without issues. Below, slim alloy NOS bottle air storage.
John Harmon 120 Shovel - Carburetors
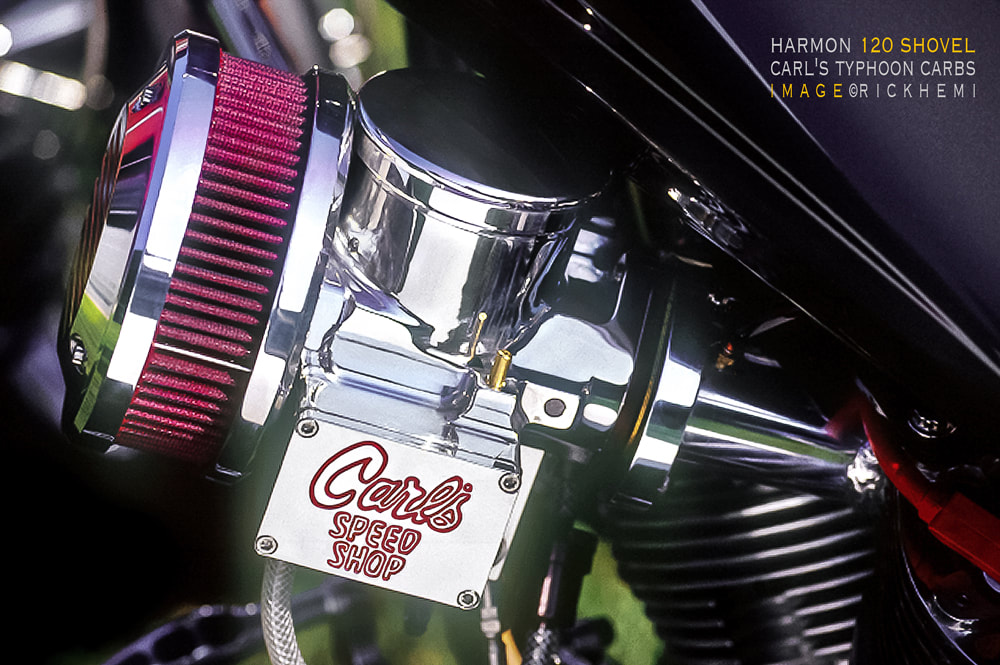
The Harmon engine's single carb per head is what make the this classic engine different to all other HD engines. The design had probably originated from the Vincent. The concept of using the same cast head for front and rear cylinders by just reversing the heads around was genius. Del-Orto and non-pump S&S carbs work well with the engine. The Carls Speed Shop Typhoon carbs also operate on this engine with minor adjustments. Zipper Thunderjets will also add a 3rd fuel circuit supply eliminating flat-spots on CV carbs.
For years, the Harmon engine had run with two 40mm Del-Orto carbs. It ran well, the carbs were easily accessible to fine tune or be removed from the engine within a few minutes. New parts for 40mm Del-Orto carbs are still available through various suppliers around the planet. The only minus for this particular model is the rubber mounting from the carb spigot to the head. A solid mount carb to head mount flange is superior for this engine due to vibration.

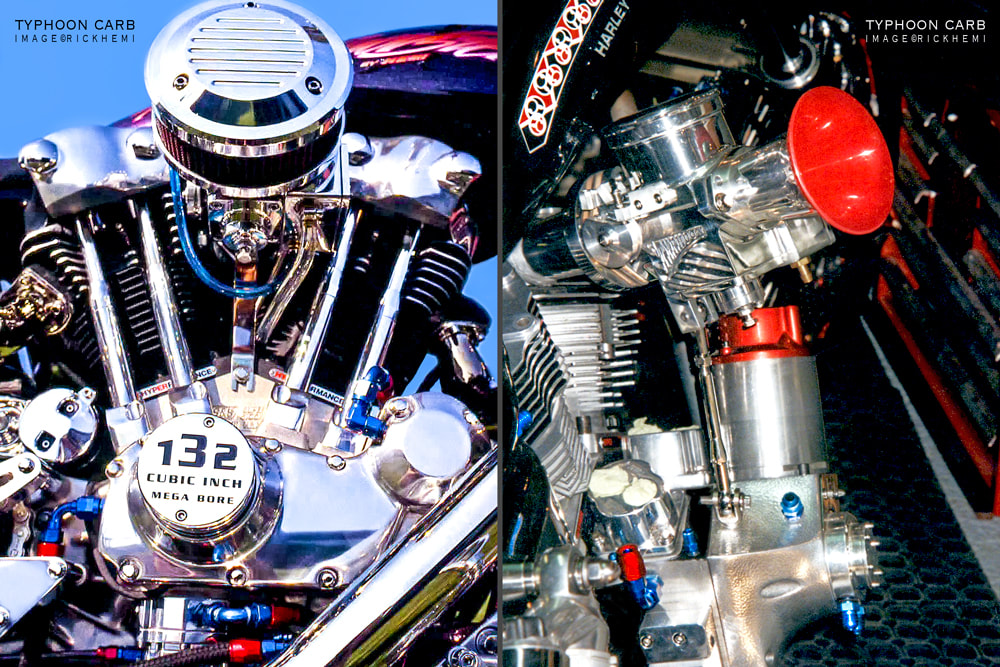
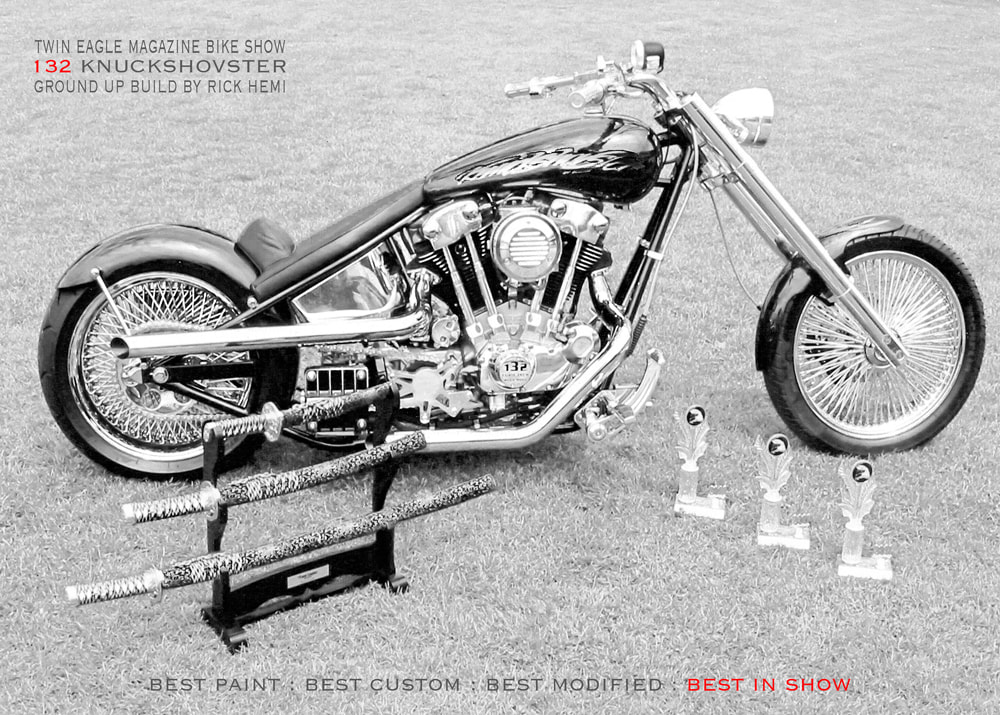
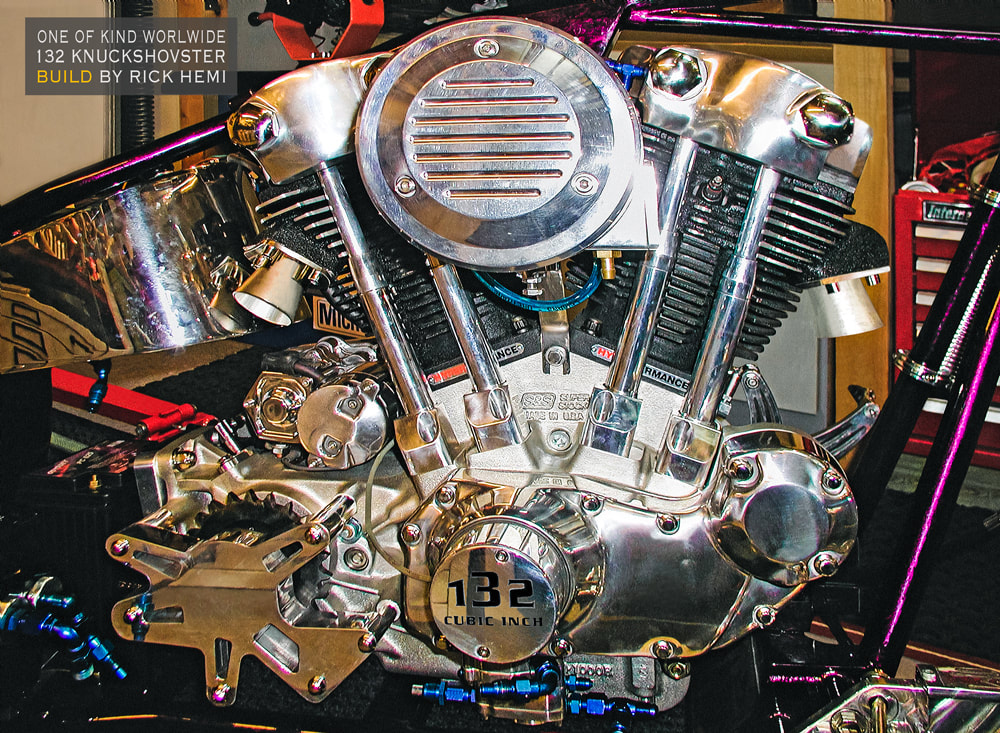
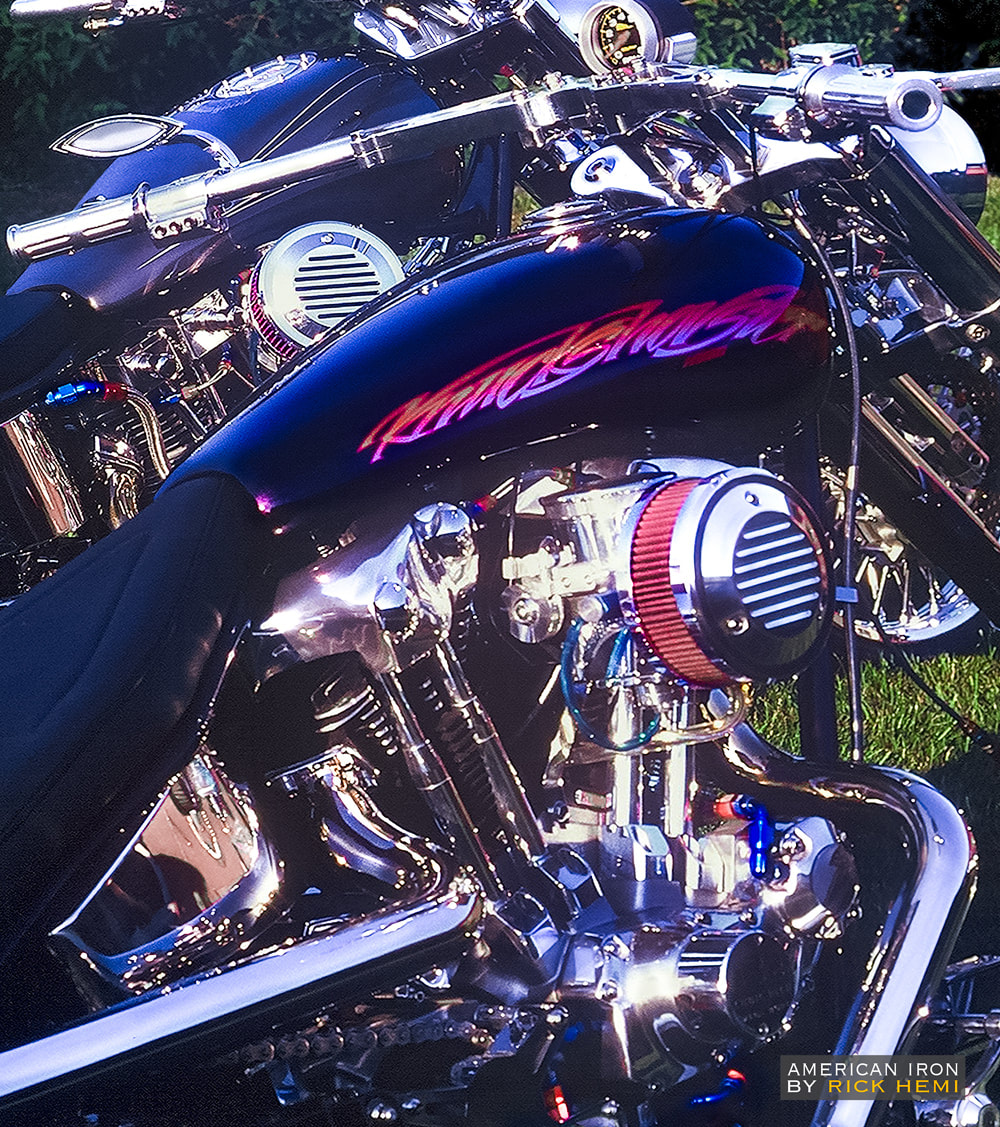
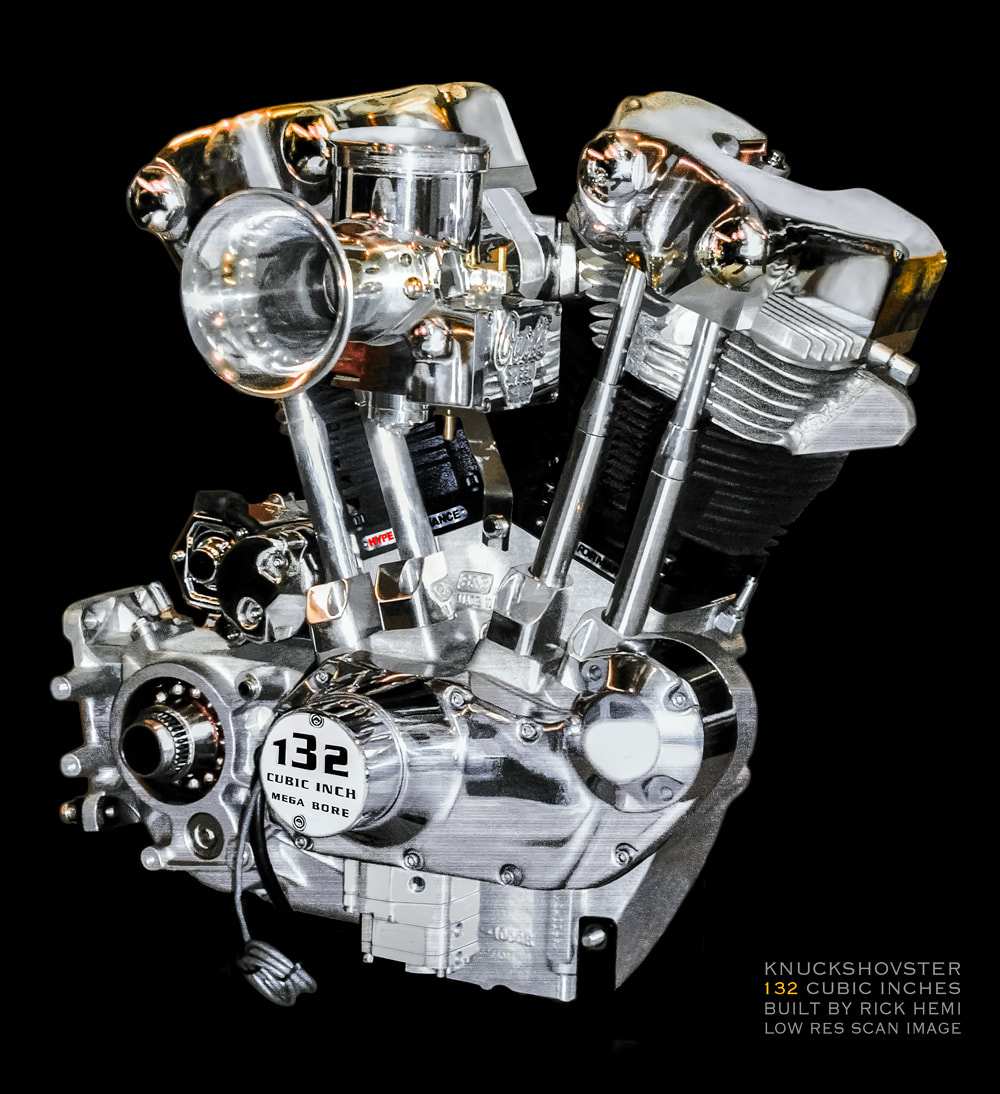
Carls Speed Shop Typhoon carbs were used on the 2nd rebuild. The engine response from these billet machined carbs was instant with no delays. I also used a Carls Typhoon carb on a 132 cubic inch Knuckshovster which also had an amazing fast full throttle response with zero lag-time.
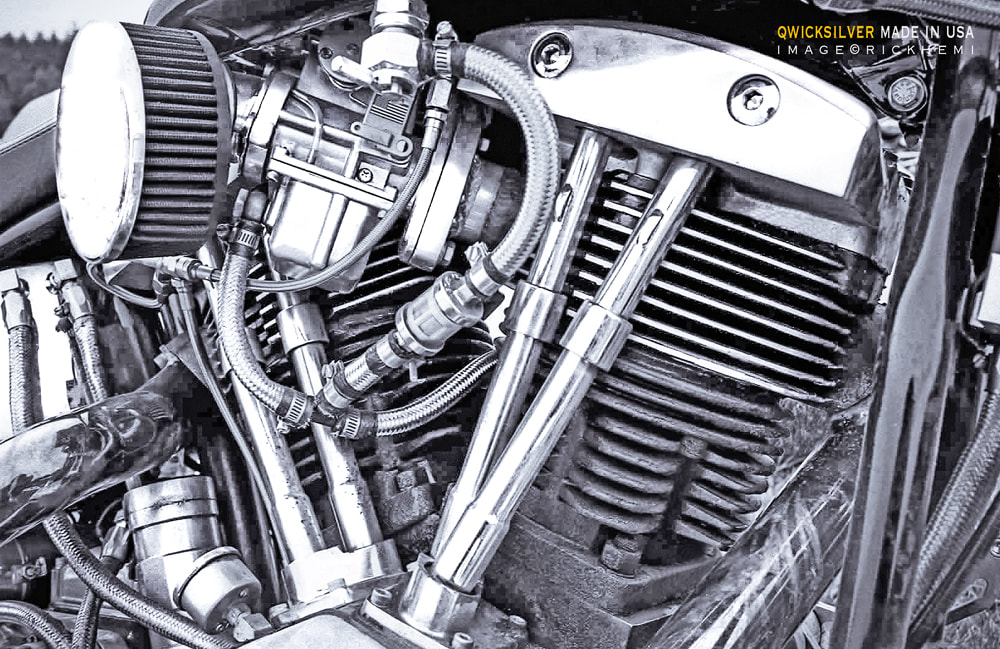
Another 120 Harmon Shovelhead engine kit I owned. It was sold to a friend who used two Qwiksilver carbs. The engine response was quick, but both carbs had horrible clattering sounds at idle. The carb slides would constantly rattle and could be easily heard a street block away. This engine was bolted into a hardtail frame. Within one year, the Harmon engine ended up vibrating almost everything that was bolted on the bike. Mirrors would snap off, bolts would come loose, and the vibration was extreme. The engine also left pools of oil wherever it was parked. The main cause was the pinion shaft not having a restricted end cap to stop excessive amounts of oil filling up the crankcase, which then ends up all over road pavements and footpaths from the breather vent.
The Carl's typhoon carbs worked and operated extremely well on both engines with instant response time.
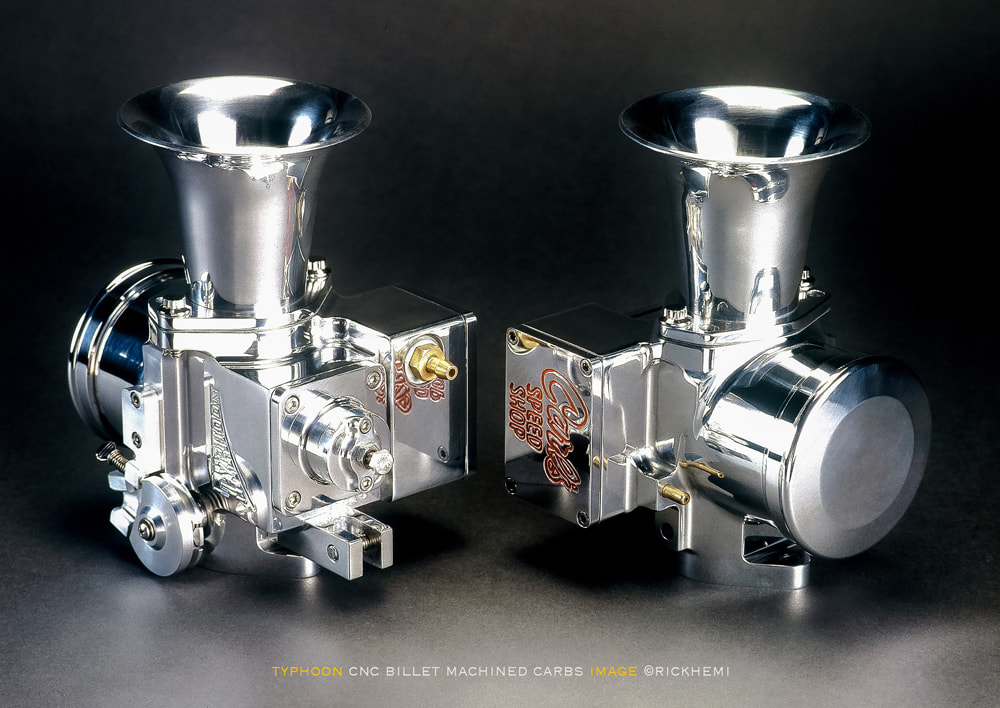
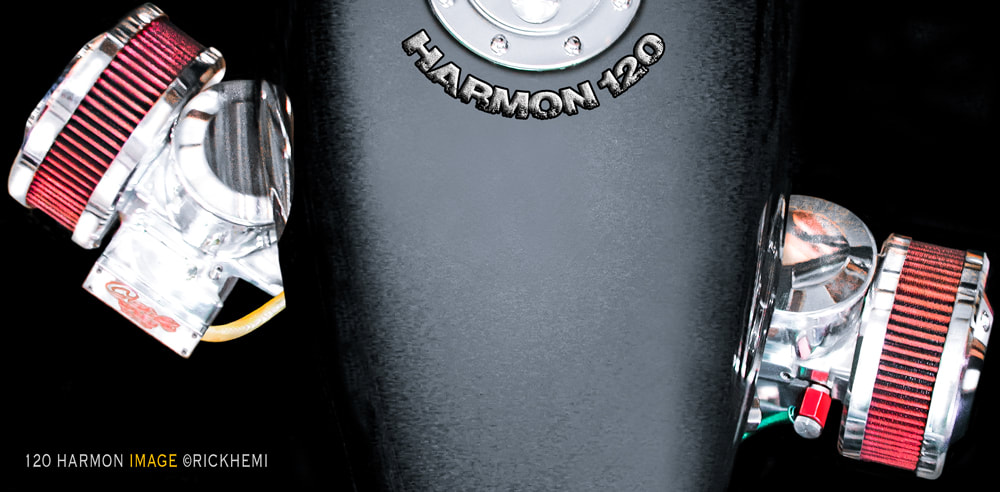
Using one Carls Speed Shop Typhoon carb on a bike is something, but having two of these cnc billet machined carbs running on one engine is insane. The John Harmon Shovelhead 120 ci engine had two Typhoon carbs pumping out street gas with a blend of leaded aviation fuel. The mounting system was tricky, but anything's possible. Extra 12mm adjustable support rods were added underneath each carb. This kept the weight of both carbs from cracking the inlet spigots when vibration occurs - which happens on Harmon engines.
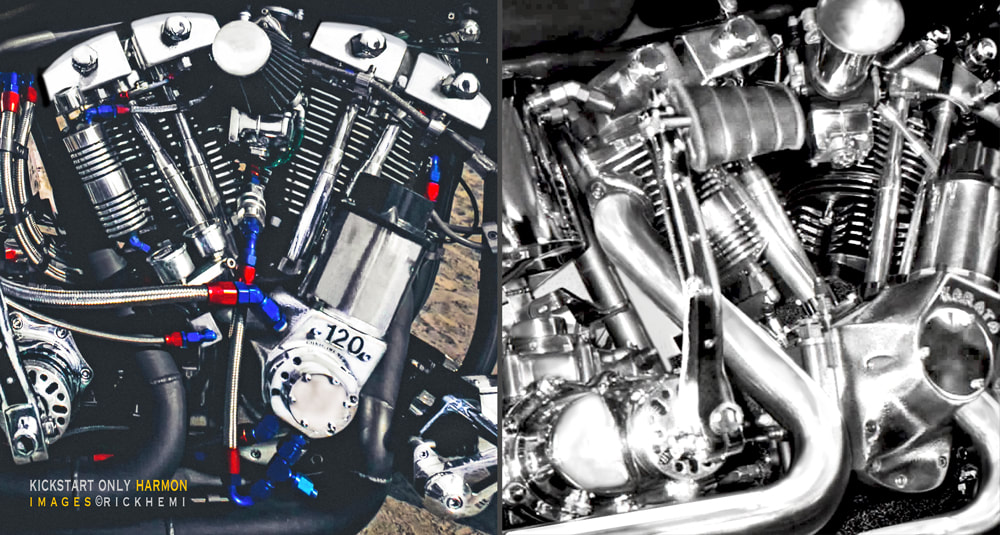
Above quick point and shot snap during the rebuild, below the finished project using proper photo gear.
Harmon - Flat Top Pistons
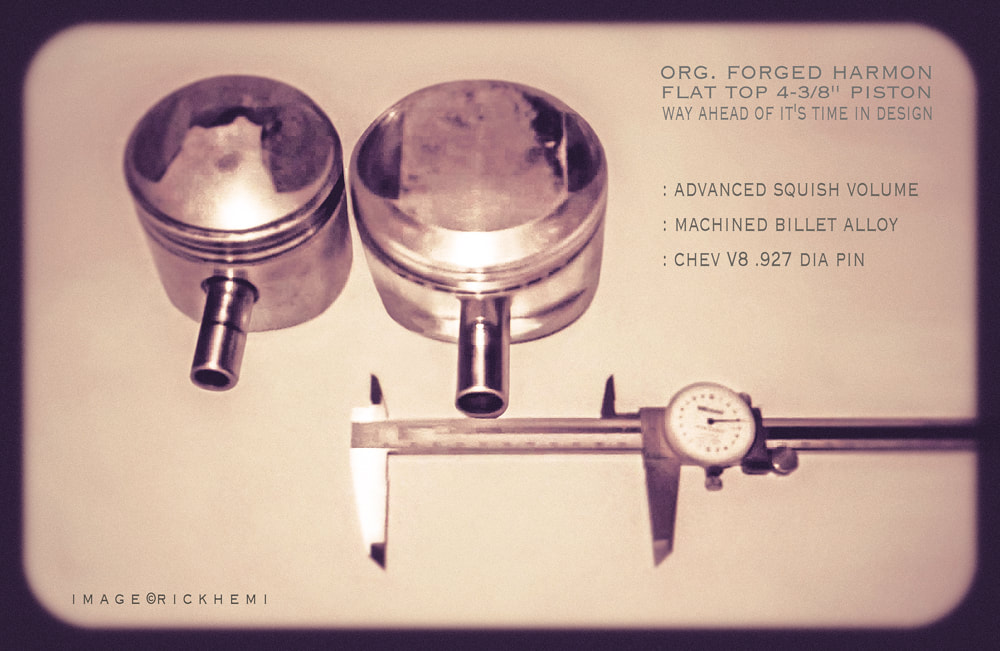
Early Harmon engine kits came with round top pistons. The heads were without squish-bands. These engine kits were lacking in horsepower until the heads were re-designed in the early eighties. Anyone having early head designs are out of luck to replace early heads for later model heads - there are none! One can either machine make new billet heads identical to the later John Harmon heads keeping the 2 carb design, or use a set of blank STD heads using one carb. Images show an original late model flat-top Harmon piston.

I used a set of Venolia pistons in the first Harmon engine consecutively for four years with no issues. Checking valve clearance is required. One simple method, is by using soft plasticine placed in piston valve cavities, and rotating the engine two complete revolutions. This will show the depth clearance if piston valve cavities require additional removal. This is an important procedure when changing to higher lift cams. For precise clearance, the heads must be bolted down with accurate pushrod adjustments. A high speed dremel can be used for removal of alloy until piston valve clearance is satisfactory.

If there was ever an image worth remembering - this is it. A snap shot of a Harmon piston within the first week of purchasing the 1st Harmon engine. Notice the monster inlet valve cut-out clearance, which is the same size as a stock Hemi 426 V8 ci valve. John Harmon was certainly well ahead of other aftermarket engine designers in the early 80's. The smaller piston is from a worn out mid 70s HD 1340 shovelhead. Below, a set of original Harmon 120 Arias pistons that had run with OEM 1200 shovelhead rods - a no brainer!

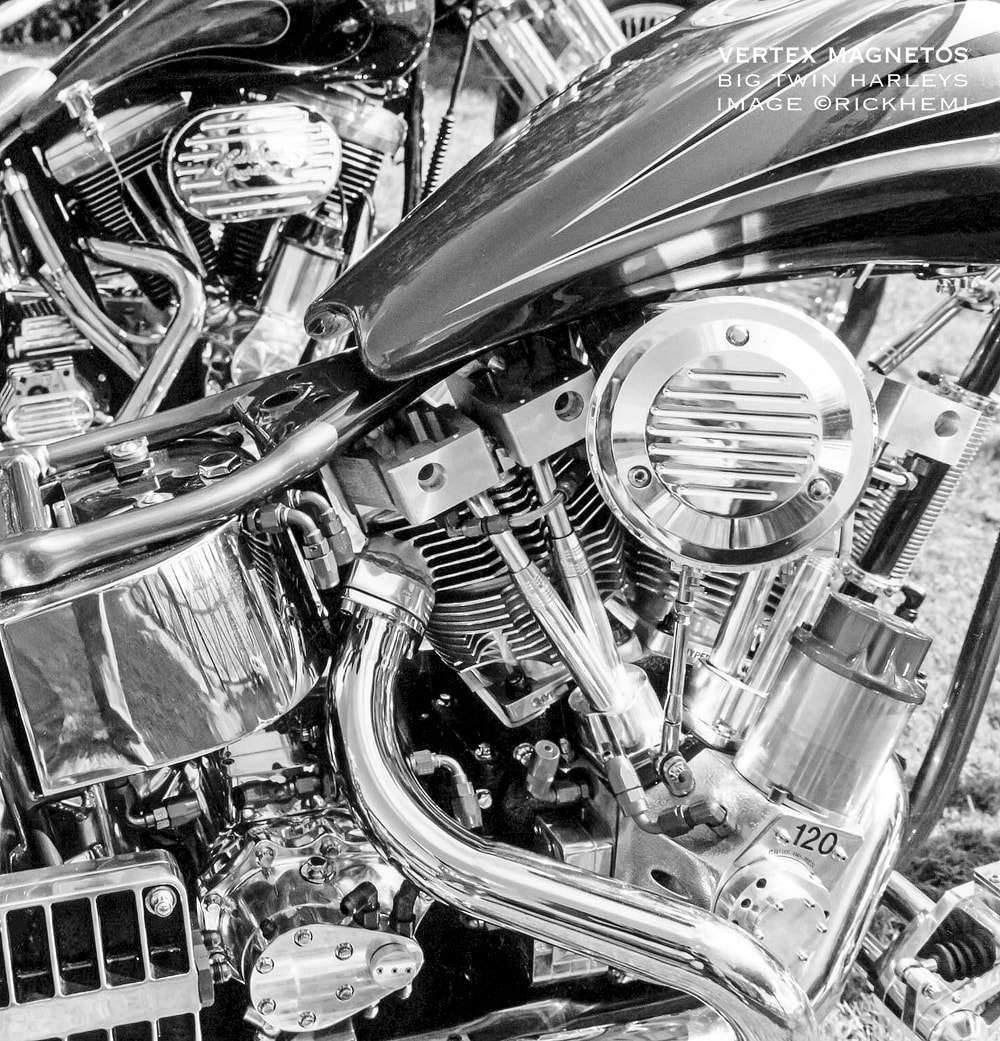
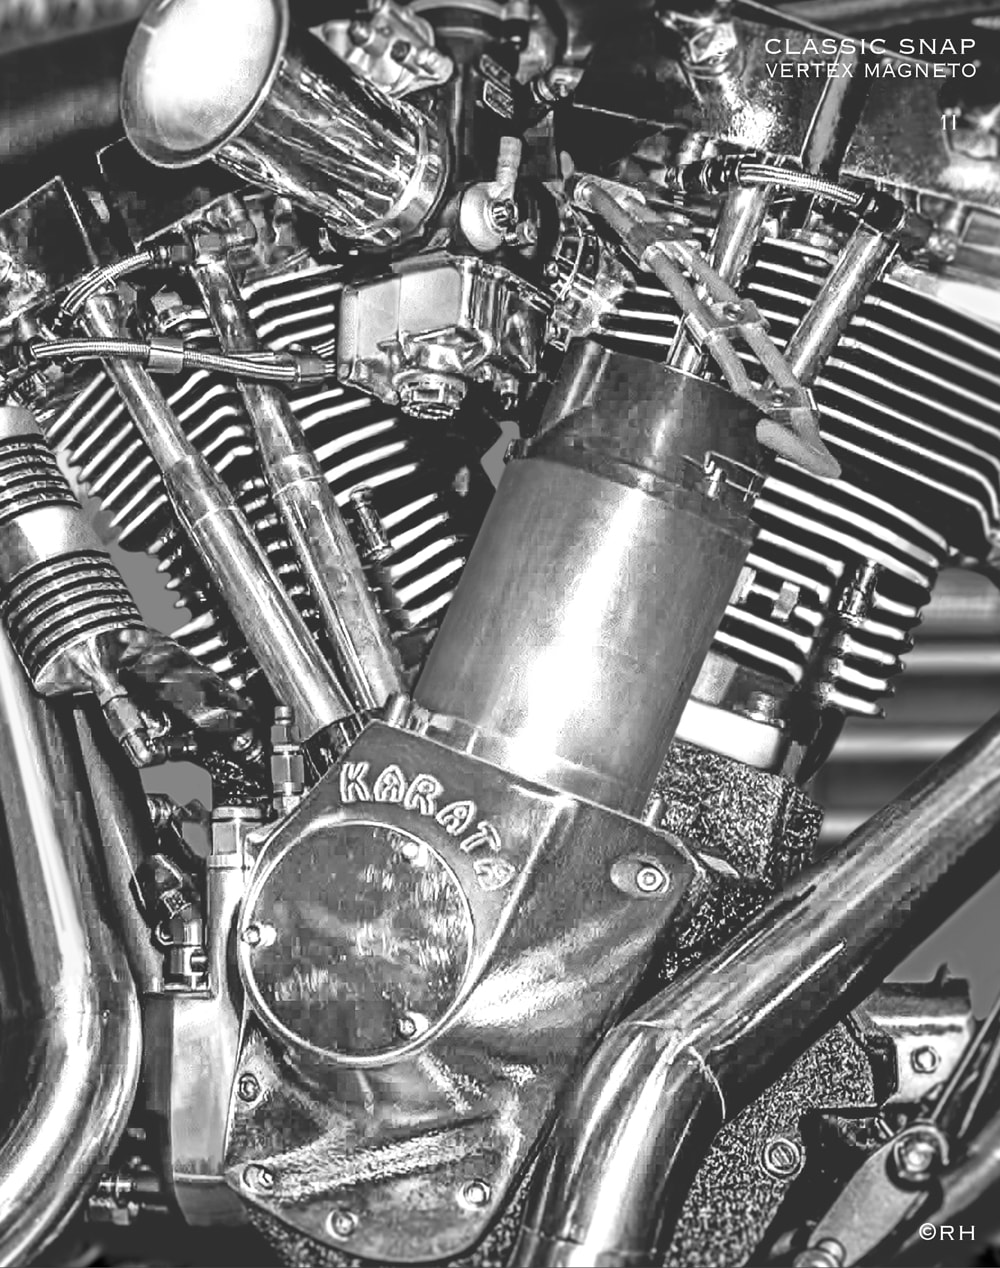
Harmon 120 Ignition - Vertex Magneto

All quality made ignition systems work on John Harmon engines. The Vertex, a single fire magneto has had an excellent reputation within the V8 world, grand prix, and used on nitro drag engines for decades. Vertex Big Twin models come with their own nose cone by Karata Enterprises USA. The Vertex is supplied with a high voltage transformer producing a constant flow of hot spark to the plugs. The more more revs, the more spark the magneto produces. A Vertex magneto was used on the Harmon engine since its first rebuild without any problems of malfunction. The Vertex mag is heavy and bulky for those who are weight conscious. The cam cone housing by Karata is well made designed made to last. Timing the Harmon engine with a Vertex magneto is straight forward - like any other engine. Once TDC has been established, the magneto needs to be turned approximately 10mm anti-clockwise with the points ready to open. Ignition setup can't get easier than that. The magnetos transformer produces more constant high energy spark than other ignition systems. This Harmon engine was more than responsive using a Vertex magneto.
The Vertex magneto gave unlimited amounts of voltage to the plugs via a transformer through the years with 100% reliability. Karata enterprises were the USA supplier for Vertex magnetos and back-up parts.
Below, workshop quick snap, Vertex magneto mounted to the Harmon 120 engine. The first rebuild included 0.50th Venolia pistons, S&S flywheels, carillon rods, Jims pins, Andrews high lift cam, black diamond exhaust valves, replacement inlet lash caps, crankcase bearings, shafts, Del- Orto carbs, tapperlite xxl pushrods, oil tight sumax pushrod covers, Crane roller rockers with bushings (not needle roller cages), jims non adjustable solid lifters, a set of 1966 OEM early shovelhead chopped rocker boxes off an engine from Iraq. The engine performed well using tight engine tolerances. No piston slap, zero valve train & top end noise.
Harmon Shovelhead - Scandinavia
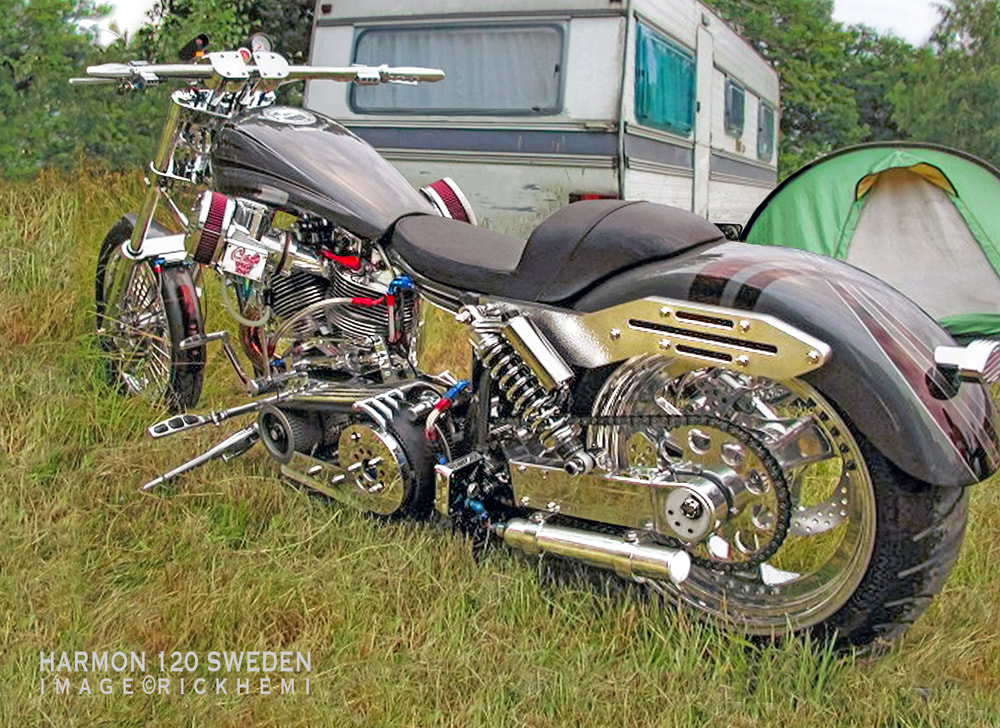
An image of the Harmon Shovelhead during a 2nd road trip in Sweden. As usual, the short Scandinavian summer months are unpredictable. The Harmon had done a run along the southern coast to Goteborg some years before with zero issues. The large ugly Danish number plate was removed for the above snap.
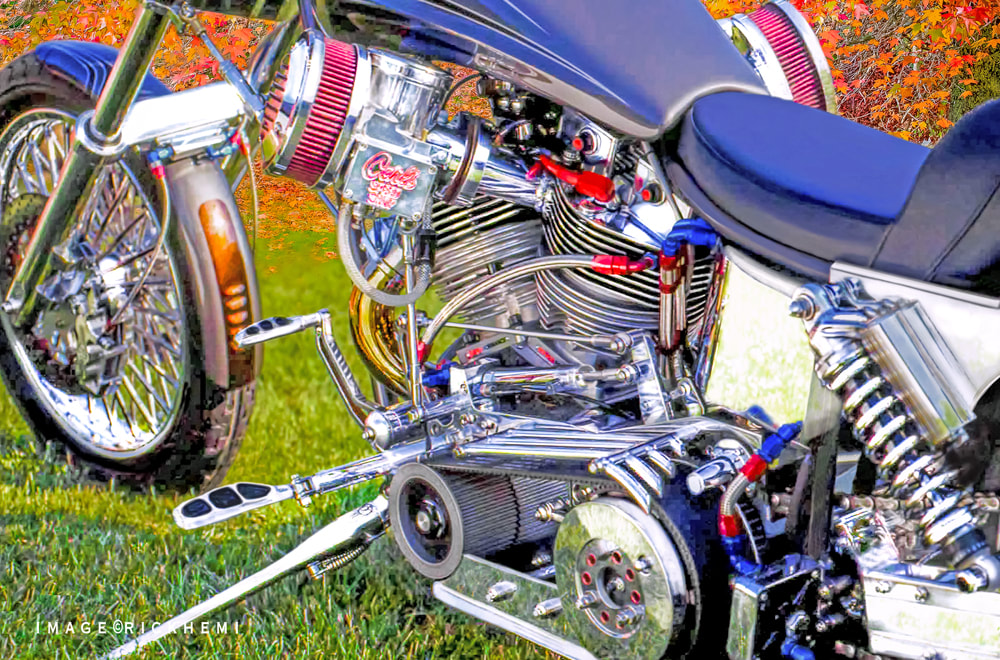
Drive side snap, Harmon Shovel 120 during the autumn - Denmark
Harmon Shovelhead Big Twin - DIY Custom Exhaust
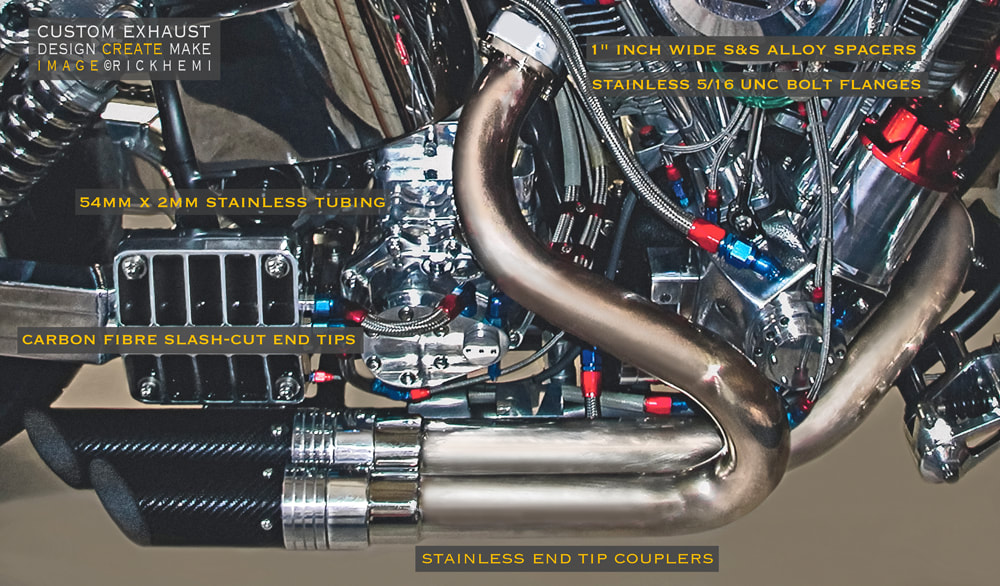
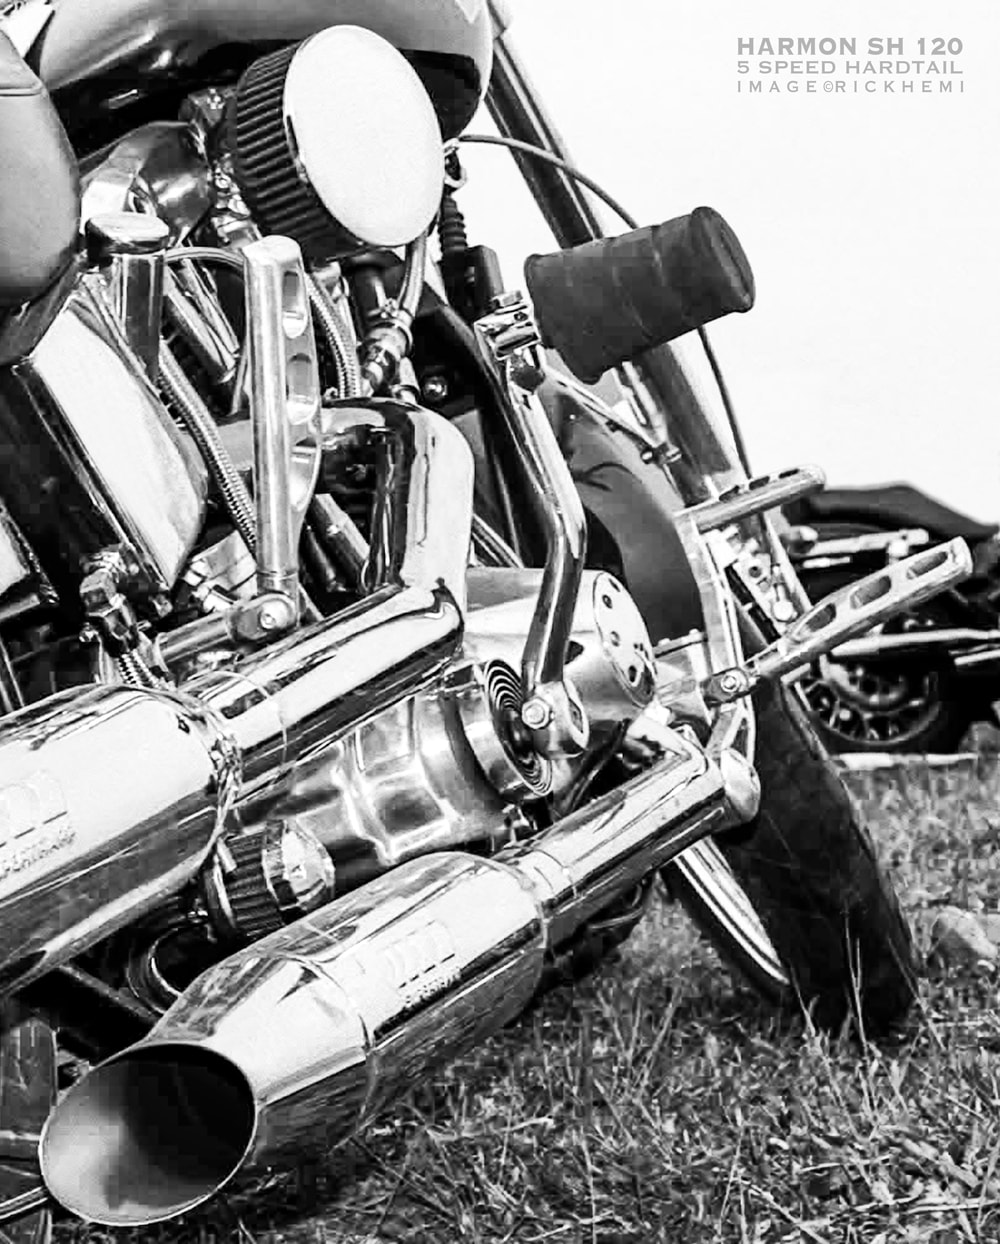
Stock OEM HD frames require modification clearances for Harmon engine exhaust ports. It's easier to use aftermarket frames that have more front and rear tube space, rather than chopping-up and altering stock frames. Designing your own exhaust system on Harmon engines is straight forward with whatever finished concept one desires. Stainless tubing with 54mm diameter was used on this project. A supply of 90 and 45 degree bends made it simple creating the necessary angles. Extended spacers were welded to the head, I used modified S&S one inch inlet spacers. This gave the addition of using two 5/16 UNC bolts securing the pipes. Carbon slash cut ends with baffles kept highway patrol happy. I avoided leaving the engine sitting idle more than required in midsummer months. Both pipes just after the head flanges would glow lava red - That's Hot!

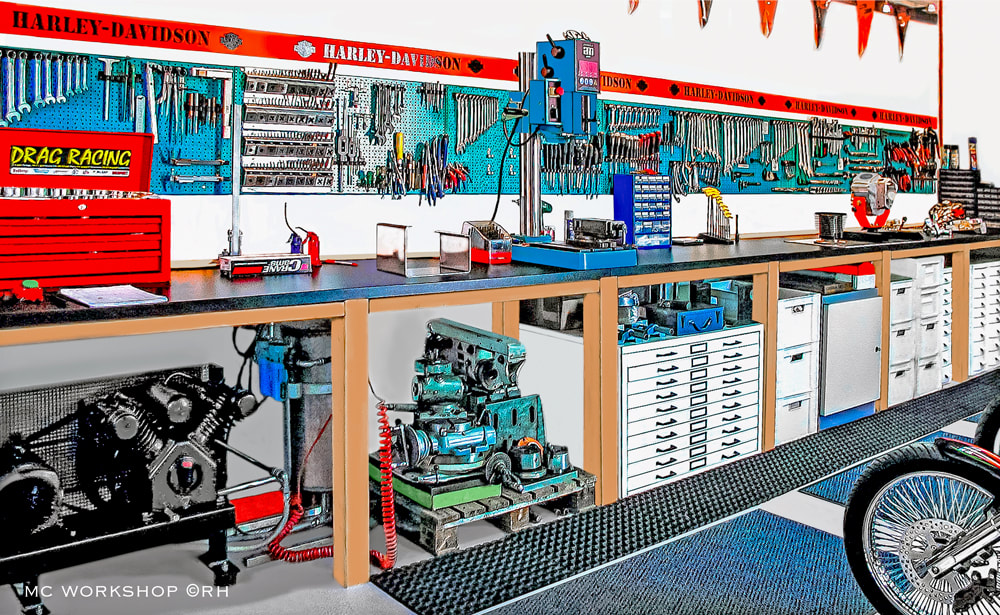
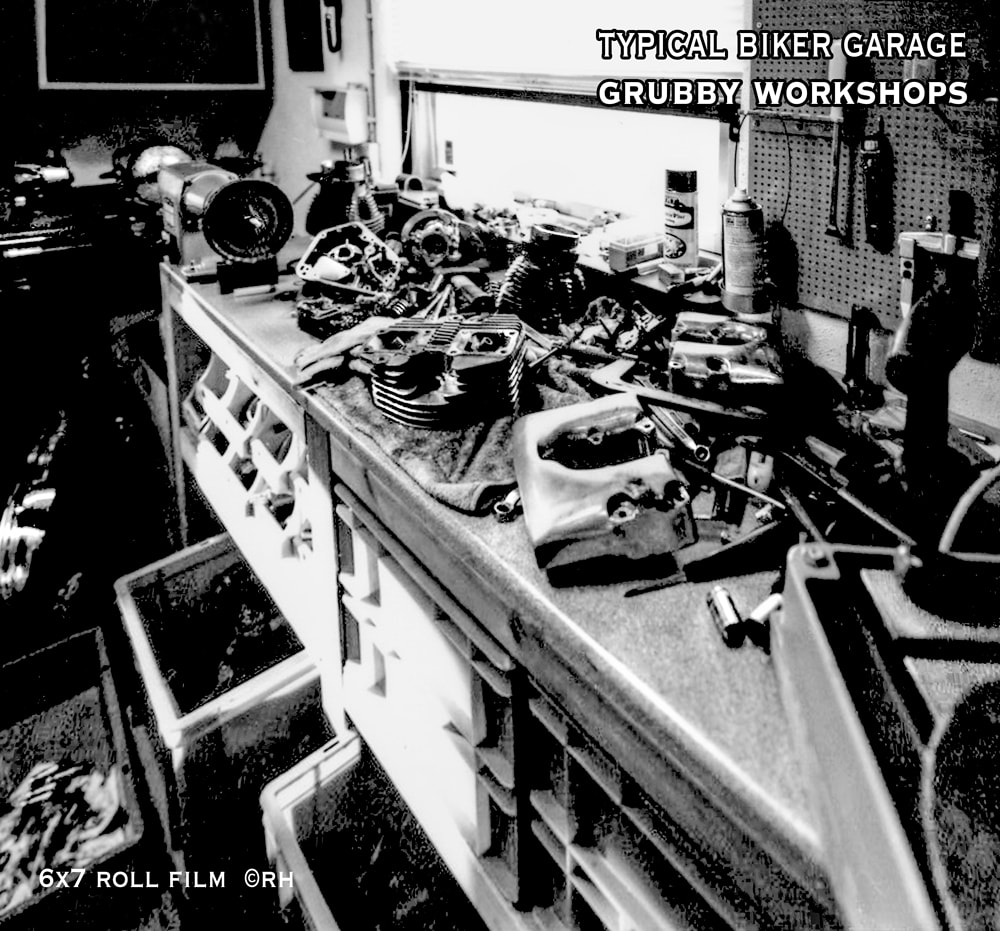
Garage Workshops - Scandinavia-NZ-Asia
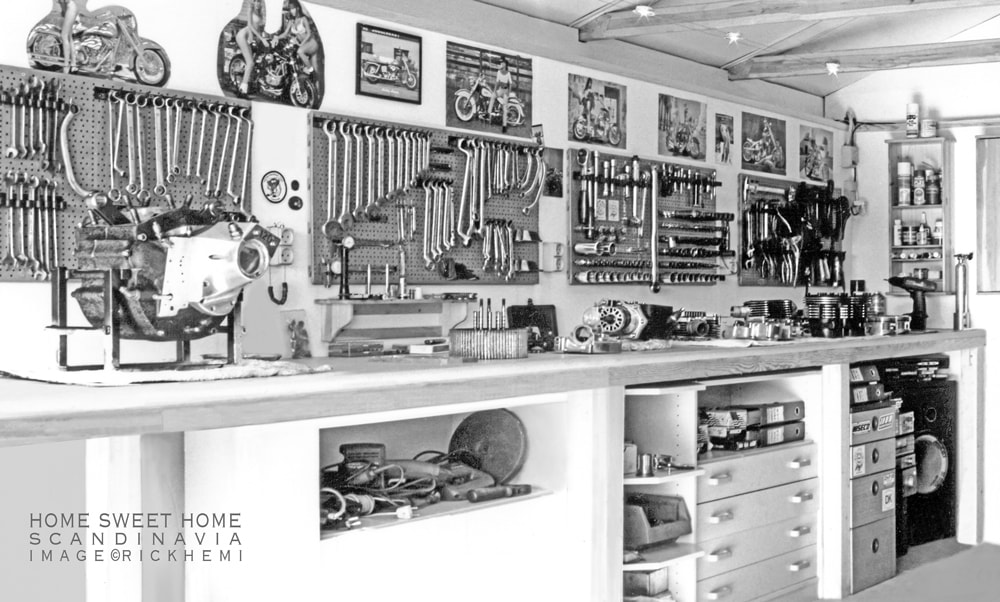
Having enough room to create a mess without having to worry about anyone screaming about the mess is always a bonus. DIY workshops have been many, mainly because of constantly moving or shifting off-shore. Some were poky little garages, while others had enough room to construct 10+ metre workshop benches.
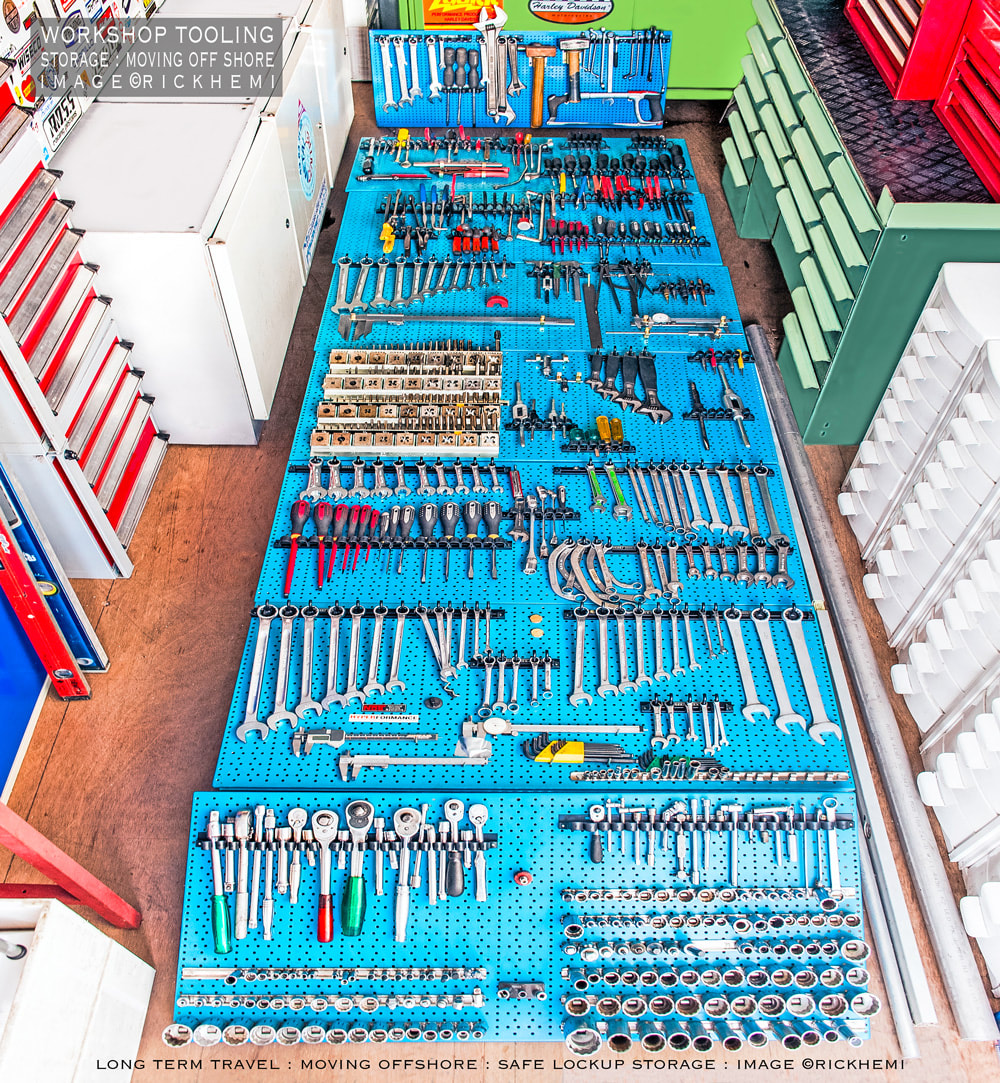
Quality workshop tools are addictive! Those shifting house, on the move, or spending considerable time off-shore - like myself, can always place their workshop tooling securely in lock-up container storage. Accumulating good tools can take years. Selling workshop-gear can be done in a day, but there's no reason to sell-off workshop equipment - unless retiring. Think before you sell stuff, you may regret it further down the road.
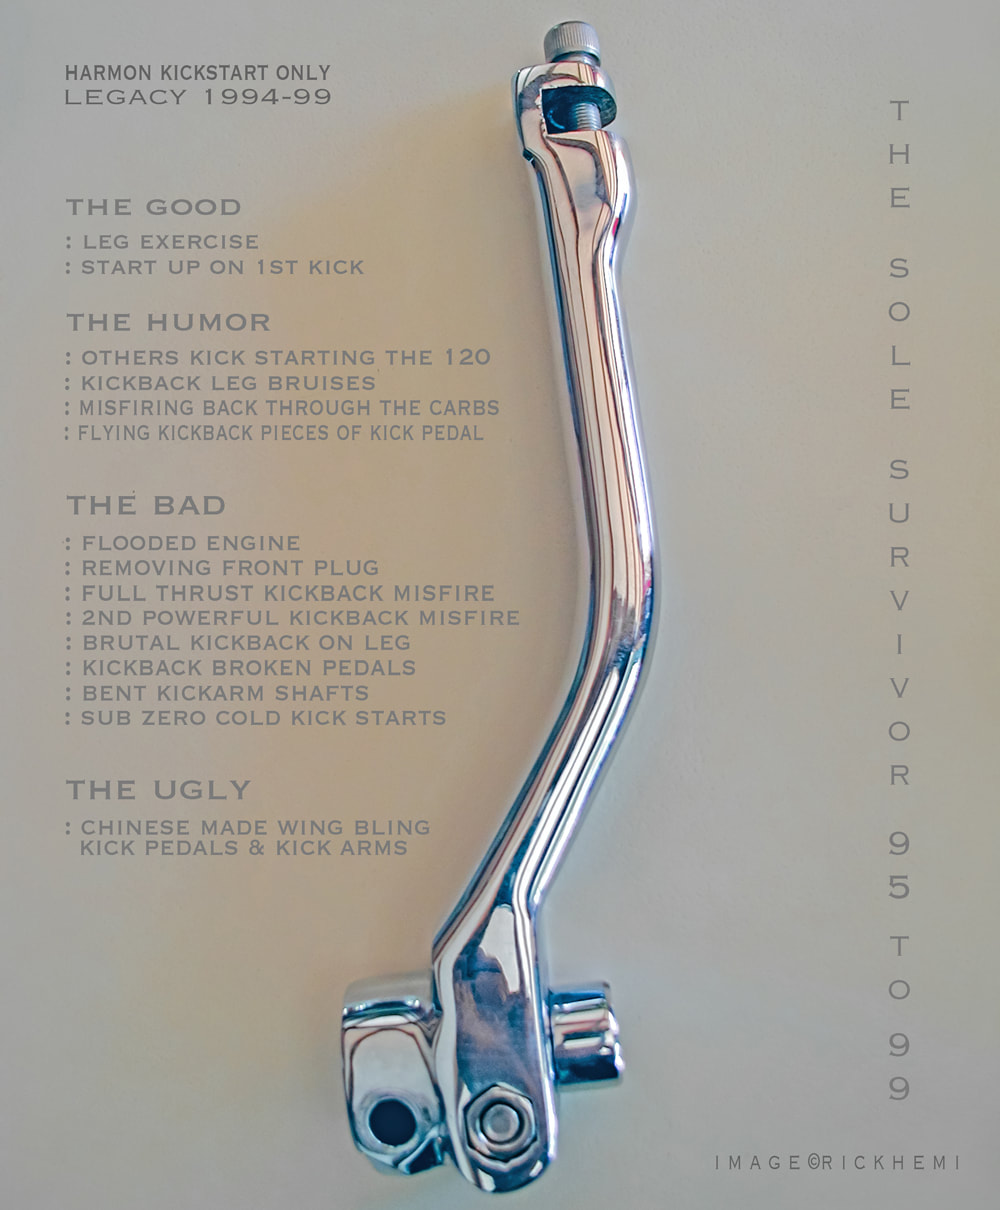
John Harmon 120 Shovel - Kick Start Only!
The kick-arm used on the Harmon was the tallest strongest solid design available on the market.
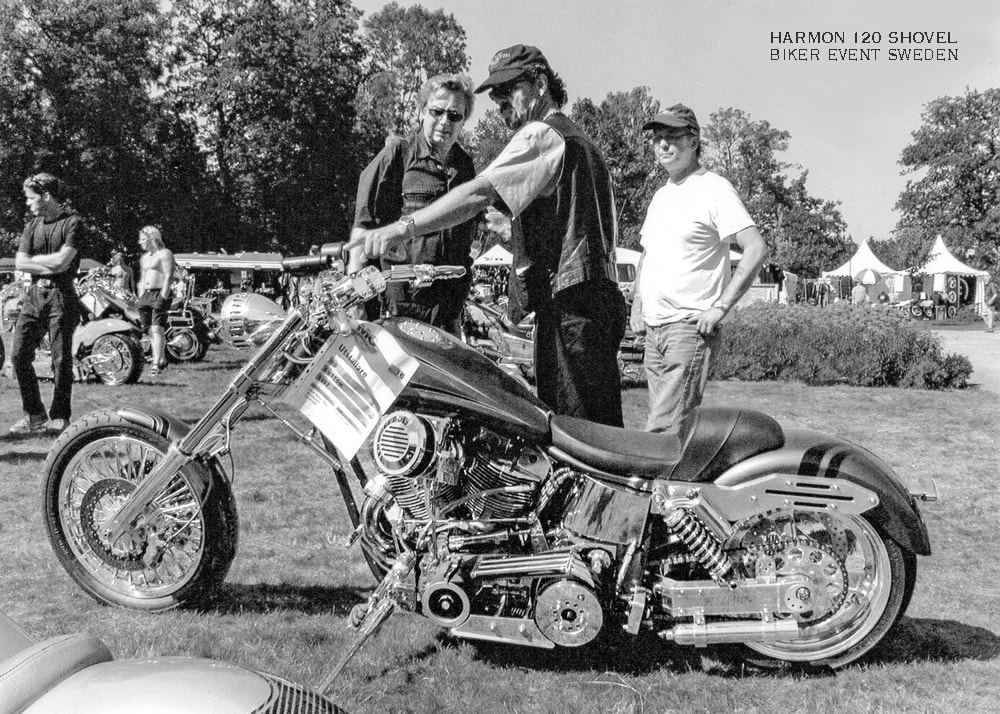
The Harmon had its off-days over the years, but when it was on the open road, it roared like a 70's Mack truck on steroids. At times, it was ridden and treated without mercy. The Harmon liked a quick twist of throttle through the gears all day non-stop. It didn't matter if it was snowing @ minus -5C or during the warm summer months - the engine ran! At night the red lava glow of the rear pipe scared the crap out biker friends. It was normal when idling for too long. The only part I ever regretted removing off the bike was the kick-starter. I used to enjoy watching others trying to kick start this "cold dragon" without warning them how painful it was to have the kick-arm pedal returning up faster than lightning bruising legs. Once, in the early years, the kick-arm pedal on the Harmon had actually hit my leg so hard, it shoved my leg up over the handlebars. I would normally kick start the engine with one knee bent up on the seat to get maximum height leverage. Below snap, the Harmon at a biker meet during the 3rd year of its 1st rebuild.
Today, kick-starting engines is a bygone era with only those having nostalgia classics from the 1970s and before who are left. The art and technique of kick-starting Big Twins certainly varies from engine to engine. The Harmon, when cold, would normally give a series of violent kick-backs to begin with. The single fire Vertex magneto was one probable cause for kickbacks. The engine didn't like to much gas pumped down the spigots either. Removing the front spark plug, and turning the engine over a few times evaporating gasoline was ritualistic with this engine when flooded. A hot Harmon is a good Harmon, the engine would normally fire up on the first or second kick using no gas.
Two meter tall bikers with plenty of muscle power even struggled kick-starting this Harmon up - including a few patched gang members who suffered some serious kick arm bruises. Being only 70 Kilos, I used technique instead. I would kick the engine over until the front inlet valve shut on the compression stroke, and then give the engine an almighty whack - which worked most of the time.
The tallest offset kick-arm made it easier to start the Harmon up. Powerful kickbacks were common on the Harmon if the front inlet valve wasn't shut on the compression stroke. Other biker friends didn't bother trying again, when they received brutal kick-backs from this engine. The kick arm assembly was removed and replaced with a low reduction starter after 6 years of kick-staring this cold dragon.
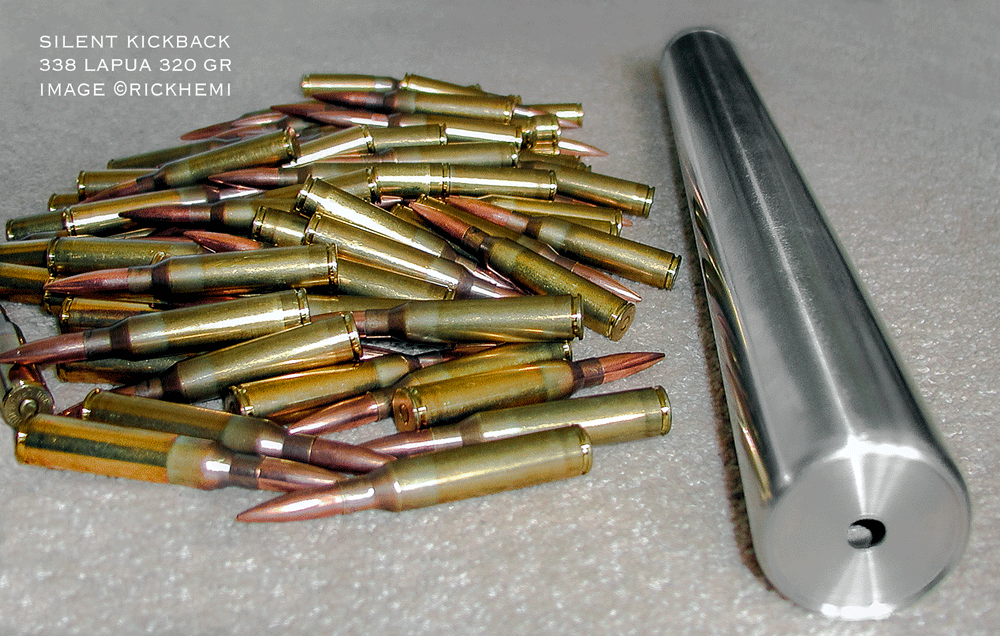
Above, I also got sick and tired from kickback using Lapua 338 Magnum 320 grain projectiles without a muzzle break. This custom 1/2 meter long American made stainless steel suppressor did the trick. Instead, it produced a more tolerant kickback with the bonus of being silent with no flash. The 338 Lapua, was developed in Finland to match and replace the 50 BMG, 416 Barrett and 408 Chey Tac, as a long range sniper round (338/416). Warning, long range rifles or any firearm aren't toys. First rule before pulling the trigger — identify your target.
John Harmon 120 Shovelhead - Rick Hemi
John Harmon's legacy still continues today even after 4 decades since his engine was first designed. Harmon engines hold their own special nostalgia because of its unique design. The 120 cube Shovelhead engines - even though the rarity of how many have survived through the decades are owned by biker enthusiasts around the planet. Data shows Harmon's are still blasting on highways through Scandinavia, Holland, France, UK, Japan, Australia, NZ and the USA.
The John Harmon 120 Shovelhead engine is classified as an old timer these days, but you'll be hard scratched to find any plastic, or any cheap wing bling bolt-on parts on these engines. Most Harmon Shovelhead owners take pride keeping John Harmon engines for what they were designed for - A 1980s muscle engine.
John Harmon 120 - Engine Specs
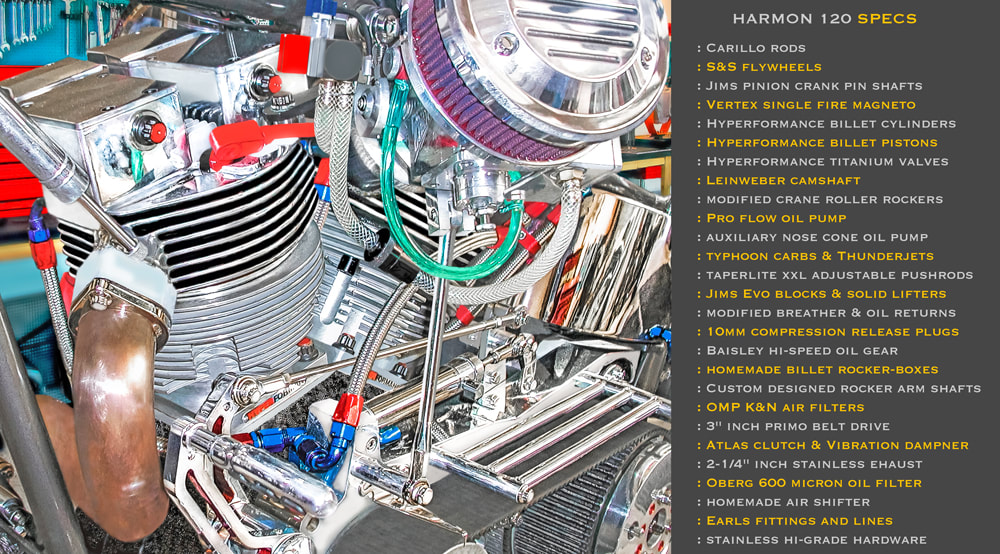
Most John Harmon Shovelhead engines through the decades have been modified in some form or another. Some have blown to bits, or have suffered engine failure due to maintenance issues. A few owners have even changed the engine design to run with one carb inside of two - Why? This beats the purpose of what the Harmon engine was known for, a two carb engine. One thing I can personally vouch for, a Harmon engine does run if quality parts are used, and if maintenance is kept up to scratch. The engine on this page clocked up thousands of kilometers from 1994 onward. The quick spec above lists some of the virus parts that have been used since it's first rebuild. All engine parts were either made in USA, Europe, or by myself, nothing Chinese! Below, the Harmon Shovel ran consecutively every year from it's 94 and 99 rebuilds. The Harmon won best in show Hell Angels Denmark in 95, and Best in show Filthy Few in 2002.
John Harmon 120 - Achievements
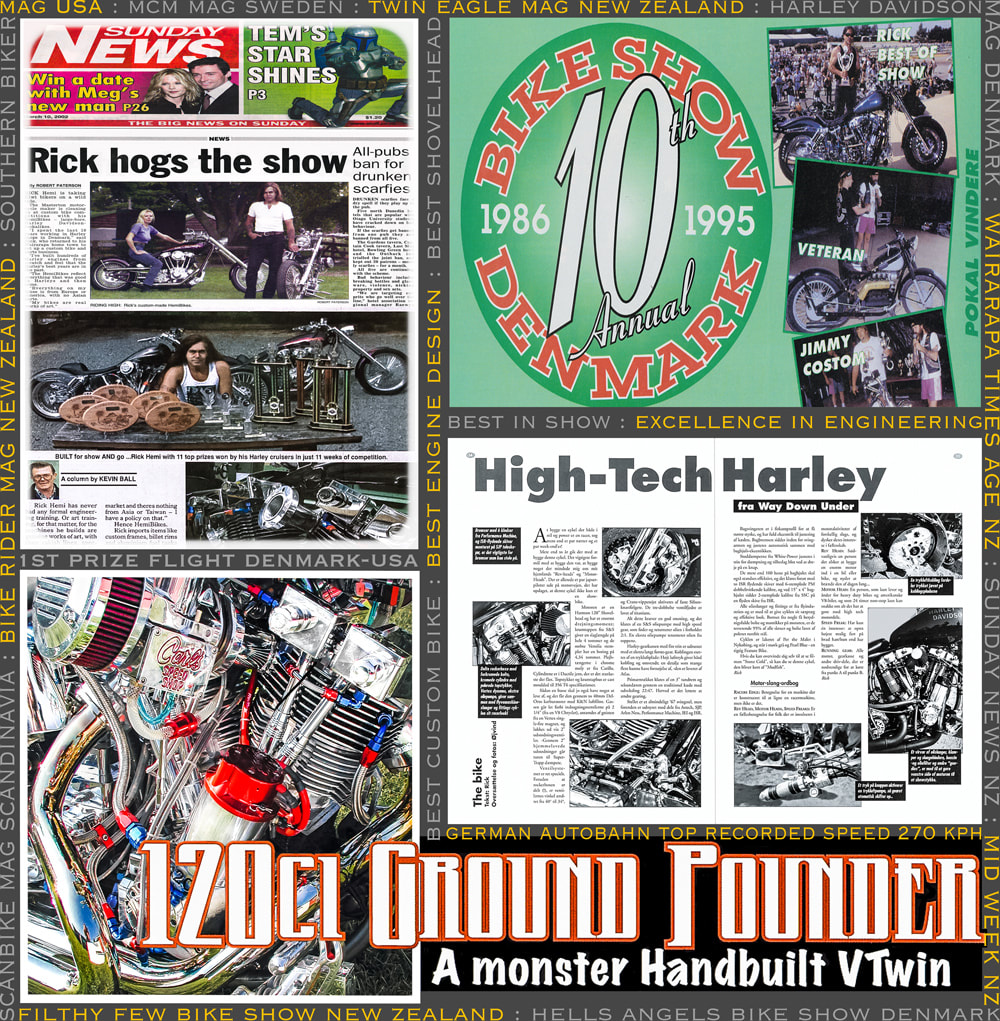
The Harmon cleaned up at this show - Best Custom : Excellence in engineering : Best in show
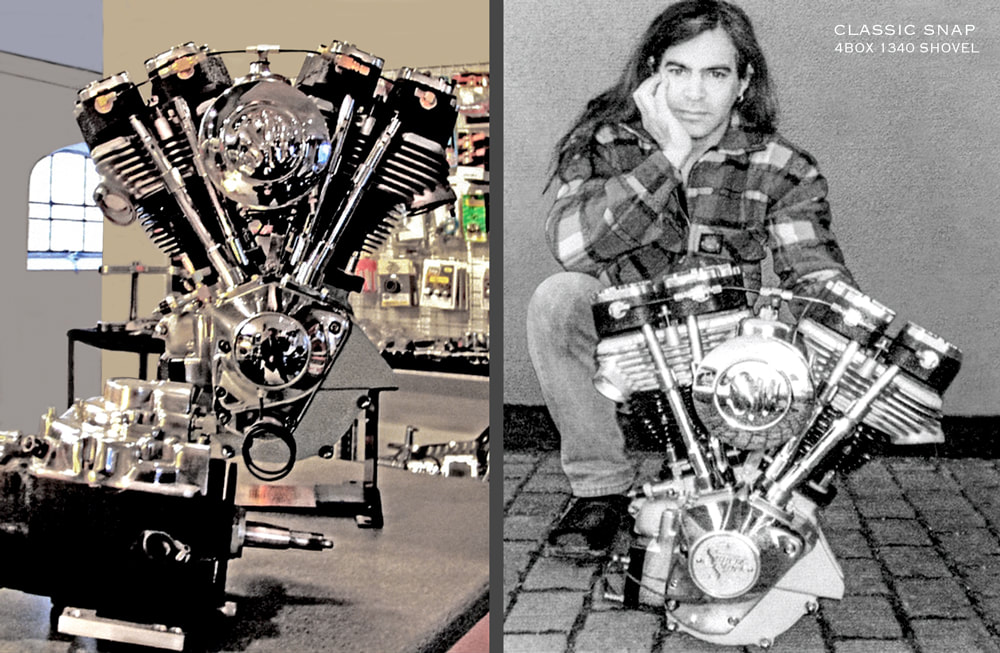
Back in the mid 90s, I didn't know the difference between a knucklehead to an Evo, or had ever owned or built any American V2 iron, only lots of different V8's. My 1st big twin was an early shovel, something I regretted buying a month later because it lacked power and was shoddy rebuilt with wing bling junk. It was imported from the States in 92. The 67 shovel had been used in the 1991 Stone Cold movie, ridden by actor Robert Winley who starred as "Mudfish" (deceased 2001). The bike was completely stripped down - engine and all, and modified and rebuilt. In the end, it was probably the best decision to dismantle and reconstruct the bike as a new project.There's no better learning curve than pulling something apart yourself and rebuilding it from scratch.
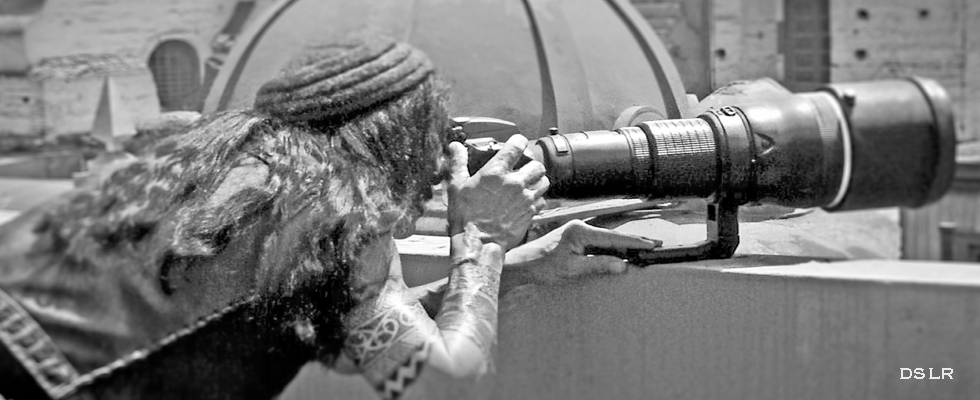
Below, as a street photographer since the early 80s, and still a street photographer offshore in the 2020s, using roll film medium format cameras in the 1990s was cumbersome, but worth the effort using them. Even this heavily cropped enlarged image, from an image (not the original negative) shows the power of medium format cameras. Best medium format cameras 1990s - Mamiya RZ67, Mamiya 7, Hasselblad.

With over 300+ Big Twin rebuilds, the classic Harmon Shovel 120 was the engine of engines.
Classic American iron, go slow engines, go fast engines. In 1990, David Campos held the world speed record using two Shovelhead engines for 16 years with a recorded top speed of 322 MPH (519 KPH).

Through the decades, biker's have used all types of different carburetors. Some worth mentioning with good results are S&S D&E, SU, Del-orto, and Quicksilver. The Harmon ran well with both 40mm Del-orto and Typhoon carbs.
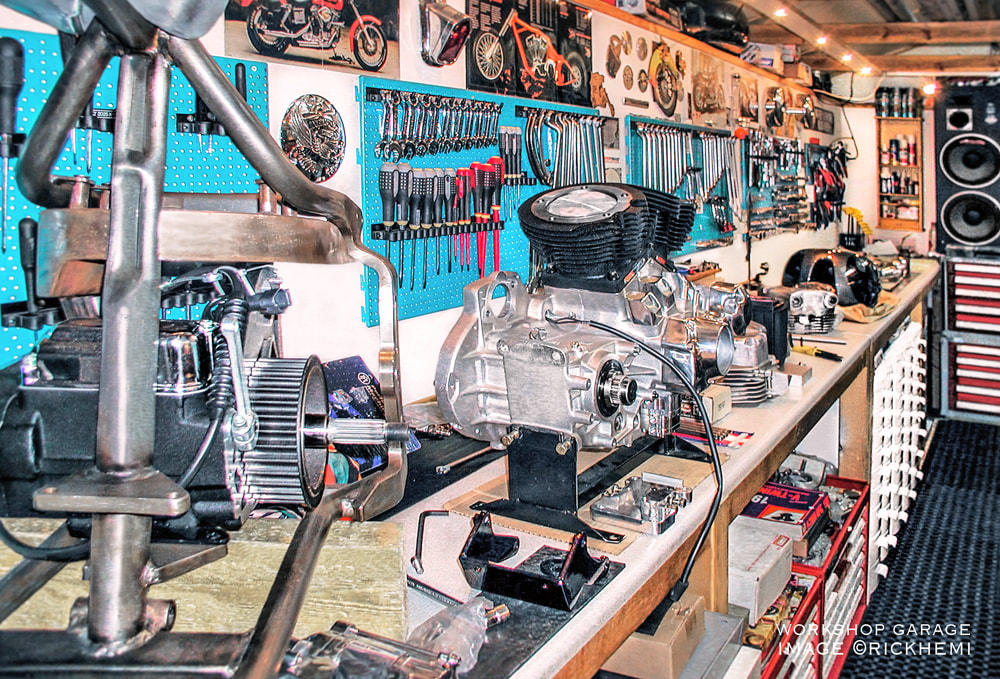
This is what you call a very typical garage biker workshop, a long table bench and engine tooling at a hand's grab.
The above Harmon engine had easily reached 275 kph at 3/4 open throttle and would have probably reached the 300 mark on full throttle. It wasn't a lightweight bike. Blue 242 loctite kept hardware intact. Vibration on this engine rolled in around 3000 rpm and dropped off at 3500 rpm. The shimming of the engine, and tranny to the frame kept the vibration level at a minimal. The engine performed well using tuned supertrapps or with straight pipes. There was zero valve train noise, and no piston slap like on other Harmon engines due to sloppy tolerances. The engine ran on single grade SAE 50 HD oil, and was automatically replaced after 3000 km of run time no matter how good the oil still looked. Oil is cheaper to replace than worn out overheated engine parts. Oil pressure remained constant at idled and high rpm. The engine through the years never dropped or leaked oil. The only hassle was when kick starting this beast, if the engine became flooded. Kickbacks by this engine were brutal. The removal and drying of the front spark plug, and few rotations of the engine was required. The Harmon would normally then fire up on the first kick with no gas. Compression release plugs were added after a few years. An electric starter was added after years of kick starting.

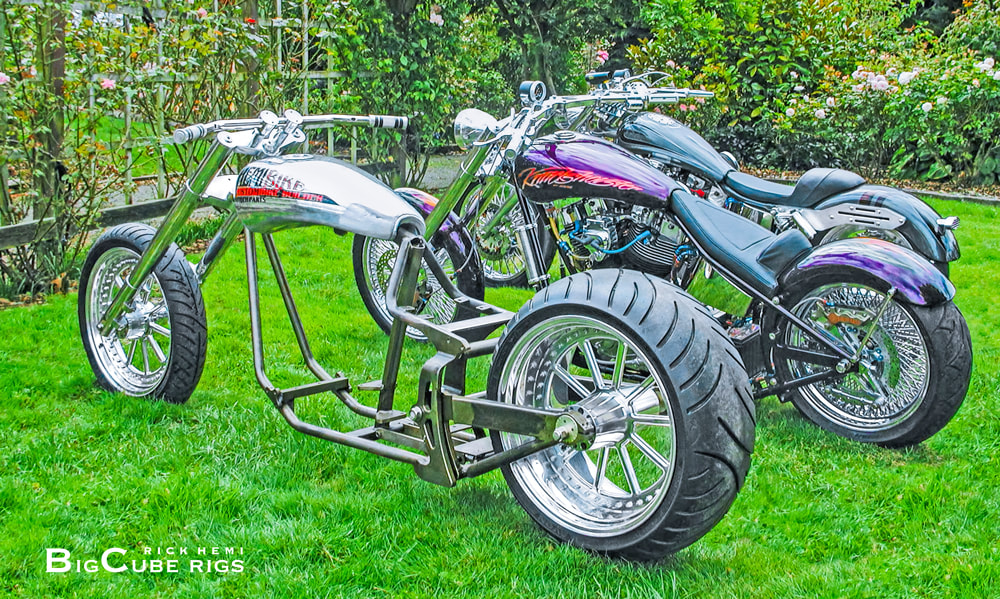
Shovster monster & aftermarket shovel sitting on my engine bench. Below, a low ride Walz frame softail, the rigid Knuckshovster and Harmon 120 in the back yard.
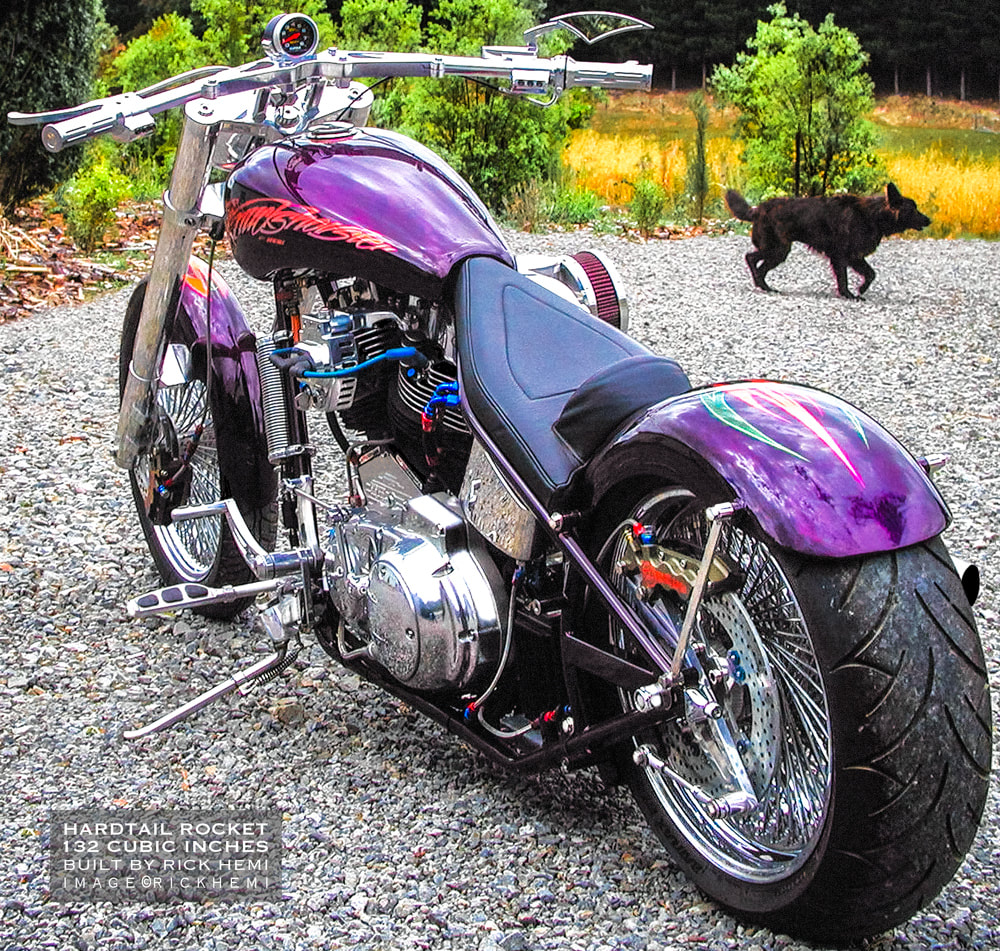
Hartail Shovelhead - Harmon 120
One of two John Harmon Shovelhead engines I had owned - It liked being thrashed and ran like a hot rocket.
Those who haven't kick started super Big Twins like these Harmon 120 engines probably steer clear of them using electric start instead. All I can say, I've had my fare share of Harmon kick backs over the course of many years. Nothing beats the adrenaline rush firing up these classic engines manually.
Wrinkle Finish - Respraying HD Engines
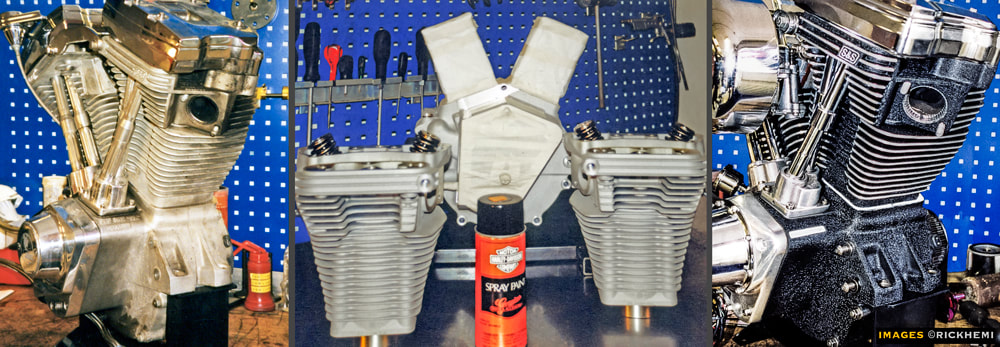
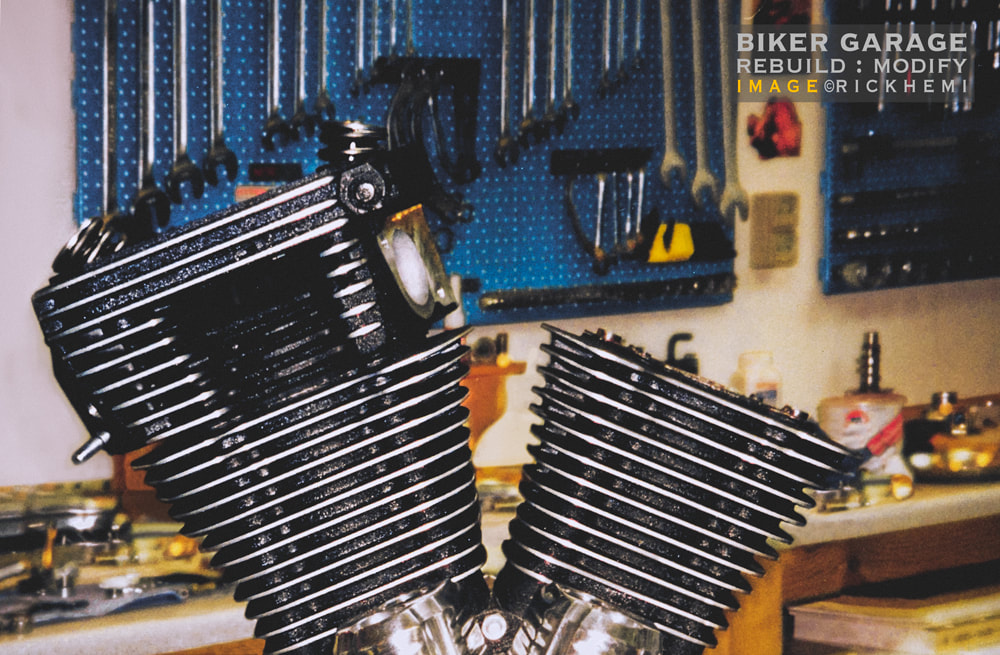
Masking and respraying engines is certainly an art in itself. Over the decades, I've seen some real shoddy resprays because of the lack of not putting some real effort to complete engine paint-jobs with a clean finish, and without peeling off in a matter of months. For instance, the Harmon engine only received one VHT black matt can spray job that lasted for 6 years without flaking. The cylinders and heads were thoroughly cleaned, and sprayed over a few days with several coats. The heads and cylinders were slowly baked in an oven for an hour or two which hardened the paint.
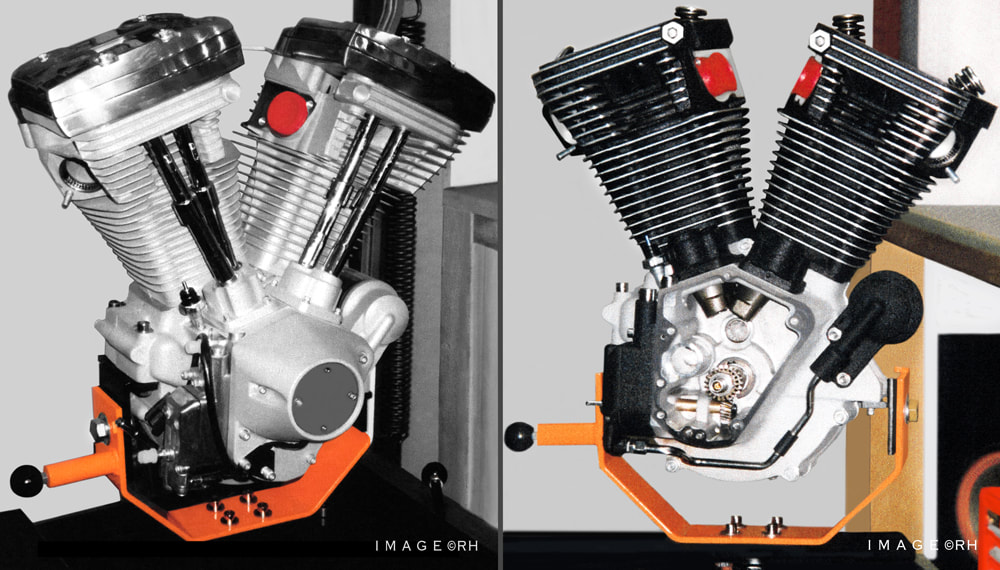
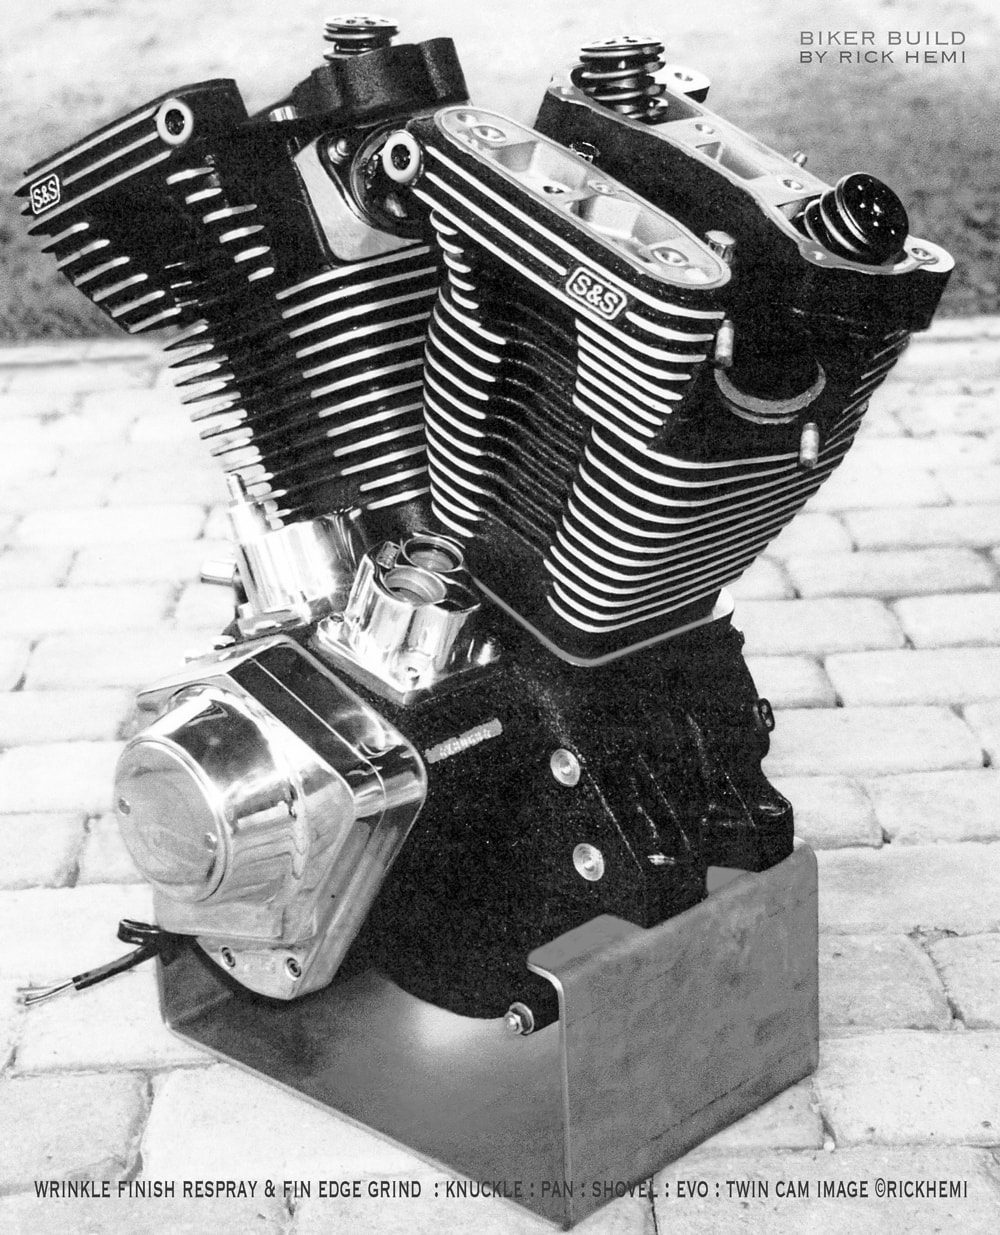
Plain Jane Evo 1340 before and after DIY wrinkle finish paint jobs.
Wrinkle finish resprays are easier to apply, but the trick to have an even finished look is by applying even light coats using VHT. Spraying heavy coats will cause the paint to run and sag. Spraying wrinkle paint on engine parts outside in sunlight also helps the drying process. A finished light coat should be sprayed when the previous coat has nearly dried. This will give an even wrinkle effect almost immediately in front of your eyes. Rotating the parts around in direct sunlight will ensure a 100% even wrinkle finish.
In the 90s, it was cheaper buying plain jane Evos doing your own DIY wrinkle finish paint jobs. I had extremely good connections in Milwaukee, where I'd purchase new plain jane engines, minus carb and ignition for under 2k shipped to Europe.
Above, a plain Jane showing the finished result. It gives engines a clean spotless cosmetic finish. Fresh coated wrinkle finish paint jobs should be untouched for at least a week, with engine parts placed and rotated in direct sunlight during this period. This allows the paint to harden properly before grinding head and cylinder fins. Baking wrinkle finish parts in ovens can be done, but the slow method of drying parts in direct sunlight for 5-7 days is recommended first.
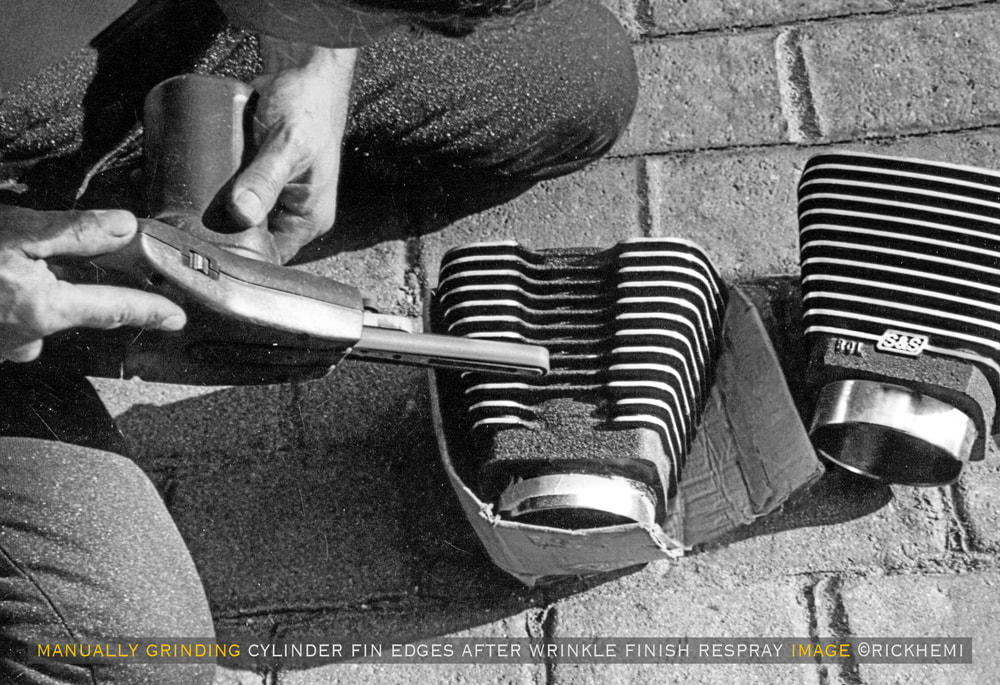
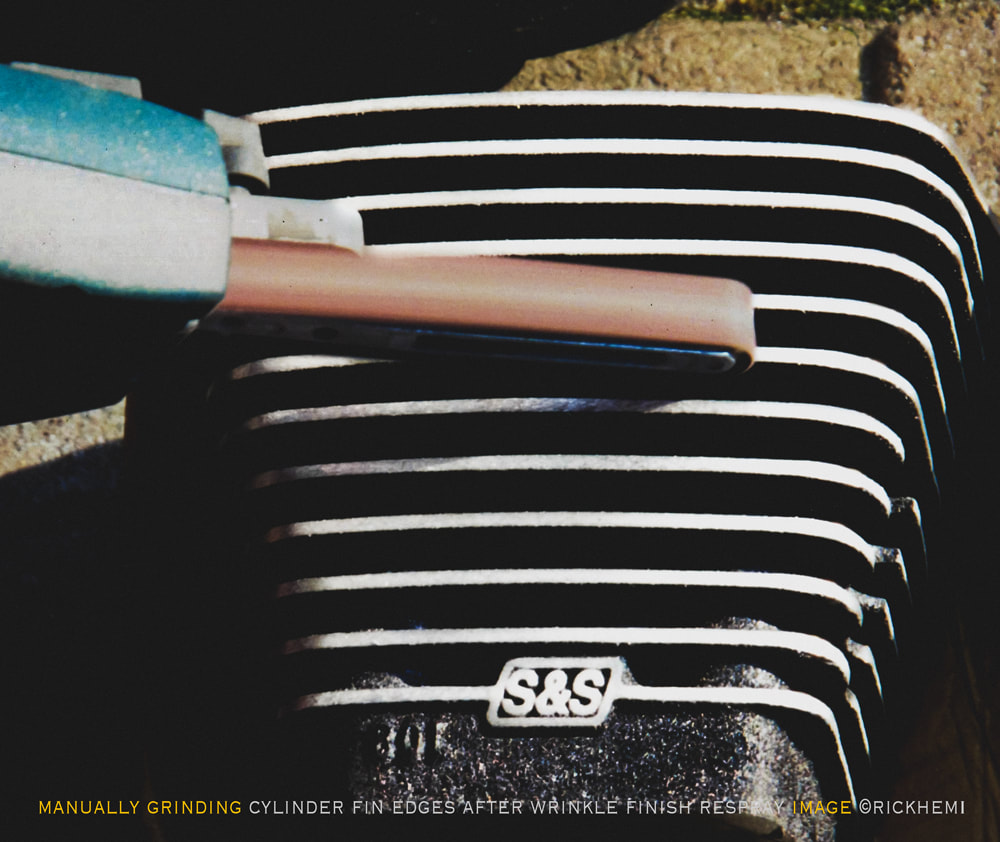
Grinding fins is a pain in the arse, but needs to be done to finish any resprayed engine. The cylinders should already be rebored or honed before spraying and grinding work begins. A small hand held variable belt sander is required, including a stack of replacement sand bands. Staring off with 40/60 grit, this will clean off wrinkle paint from fin edges. After cleaning off paint from fin edges, the art of moving the sander evenly around cylinder and head fins is with 100 grit. Placing each part inside a half-ripped up cardboard box helps angle and stability while grinding away. Shaping the width and getting even bends on fins is done on the final stages. Heads should be placed on cylinders to check that they have the same matching curves and widths. It's important to thoroughly wash down parts in kerosene, or other cleansing liquid, and air blowing until all alloy specks and grit sand is removed.
An S&S 113 Evo engine that had blown apart received a full rebuild with a wrinkle finish makeover. The following items are required to paint engines properly. Super sharp razor to fine trim masking tape along edges, quality grade masking tape, a hand-held variable belt sander, VHT wrinkle, matt or gloss heat resistant paint, sunlight, an oven for gloss and matt spray jobs, and most of all - some patience.
This old classic S&S 113 was in a shoddy state. A set of new valves, roller rockers with bronze bushings, lifters, pistons and rings, re-bored cylinders, crankpin, case bearings, camshaft case bearing, cone bushing, replacement oil pump, rebuilt carb, and a cosmetic wrinkle finish and hand done fin grind gave some fresh life to this engine.
Don't laugh at old stock 1340 engines - Evo 1340 rat bike chopper blows off Jap bike 3 times
Quality Made Parts - Versus El Cheapo

American and European replacement parts work! Avoid Chinese cheap wing bling made junk!
I've avoided Chinese made wing bling junk all my life. I'd sooner pay more for any product or part made in the USA, Europe and other Western countries. Many of those classic Big Twin parts catalogs like, V Twin, Chrome Specialties, and Custom Chrome were always filled with cheap junk manufactured from the far east. The blame is directly placed on those profiteering from their own designs using cheap Chinese labor, and then marking up retail prices earning substantial profit. Maybe that cheap crankpin, piston and cylinder set - made in China, were produced by Tibetan or Ughur slave labor. If your engine blows to bits caused by cheap Chinese wing bling parts, it's a payback curse from Tibetans and Ughurs.
I couldn't chop up these OEM Shovel rockerboxes in half. They came off an early shovelhead engine from Iraq. After the 91 invasion, I had a contact delivering an endless stream of big twin engines directly out of Irag from 1994-96. Imagine, early, and late shovel and Evo V2 engines flown onboard UN cargo flights returning to Denmark freight and tax free. This particular engine had never been pulled apart during its lifetime. Even the head cylinder bolts were untouched. The engine was seized, it required a long extension pipe and gas heat to unloosen the head bolts. With heads removed, a can of CRC and WD-40 drenched the top of the pistons for a few days. Back and forth movement using a pipe extension on the sprocket shaft with 3/4" tools freed up the rings seizure. Cylinder crankcase nuts also required gas heat. After removing both cylinders, the shock and awe set in. The bottom end showed no signs of rust or decay. There was no side play on the front rod. After splitting the cases, and flywheels, the crankpin and rollers on this engine were still in perfect condition with minimum wear. I did have image snaps of the pull down, if they turn up they'll be here.
As it is said, when you can build one engine you can build almost any engine. This is true, I myself can confirm that. Five things required are quality tools, workshop bench, quality replacement parts, engine manual, and some patience. Sticking close to minimum engine tolerances is key i.e. camshaft shimming, flywheel shaft crankcase shimming, ring gap, piston cylinder fit, breather side play, solid lifter adjustment, rocker arm side play etc.
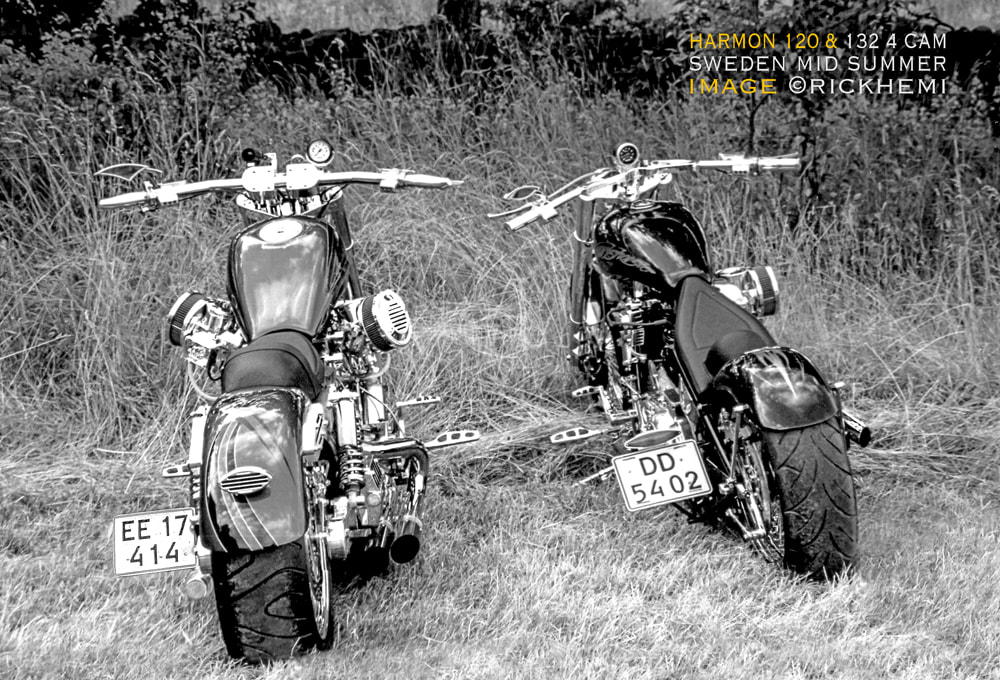
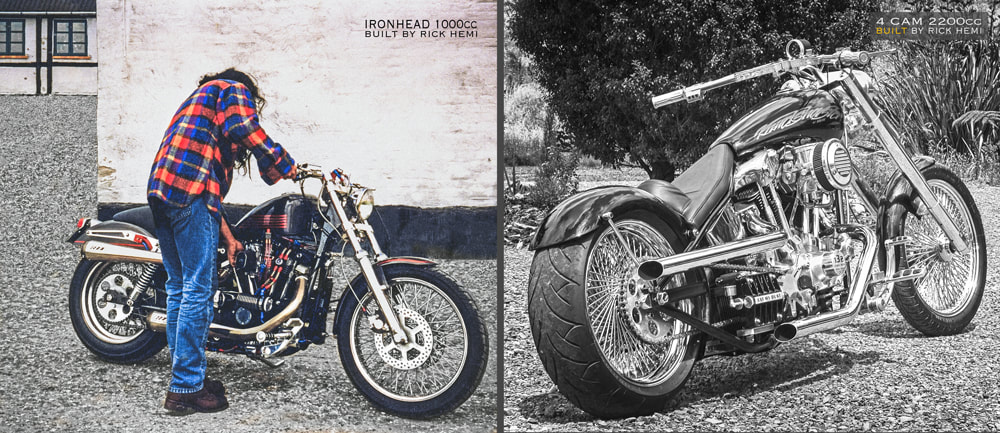
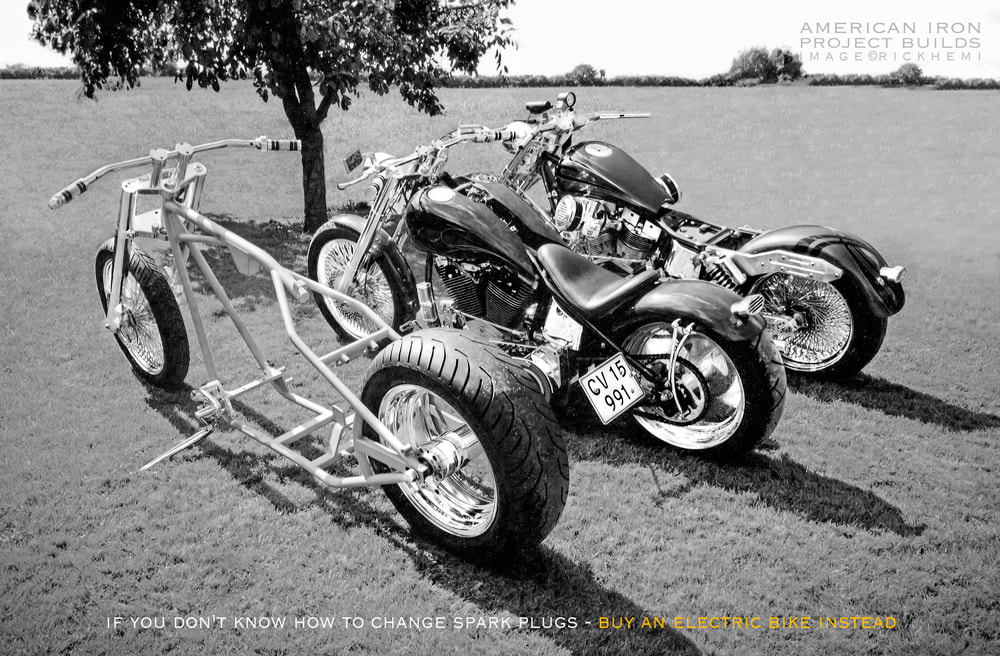
Classic style big cube gasoline V2 engines built with reliable American made parts. As the saying goes, if you want something to last, use quality products. Above 120 ci Harmon, 132 ci Knuckshovster.
Carb powered engine rebuilds. Non fuel injected V2 engines maybe old school but work. Carburetor engines are simple to repair when carb issues occur, which is relativity rare, but happens, usually caused from subpar engine building and poor maintenance i.e. fuel bowel adjustment, needle adjustment, gasket o-ring intake air leakage etc.
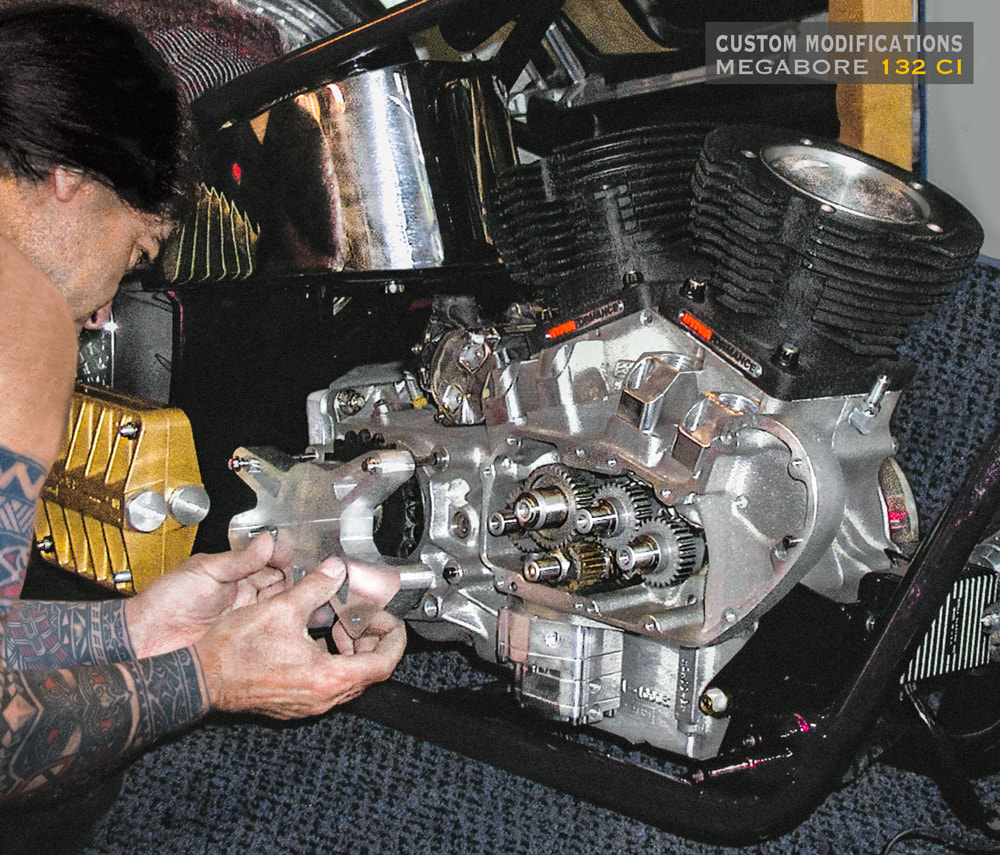
Working on the 132 megabore engine. Andrews high lift cams, Proflow oil pump, S&S crankcase, Hyperformance ductile cylinders and pistons, Jims solid lifters, Orberg oil filter, 5 liter stainless oil tank.
Above, all American Euro made parts right down to the last bolt guarantees satisfaction with long term reliability. Using cheap wing bling made junk manufactured in the far East should be avoided, even if it's parts for lawn mowers.
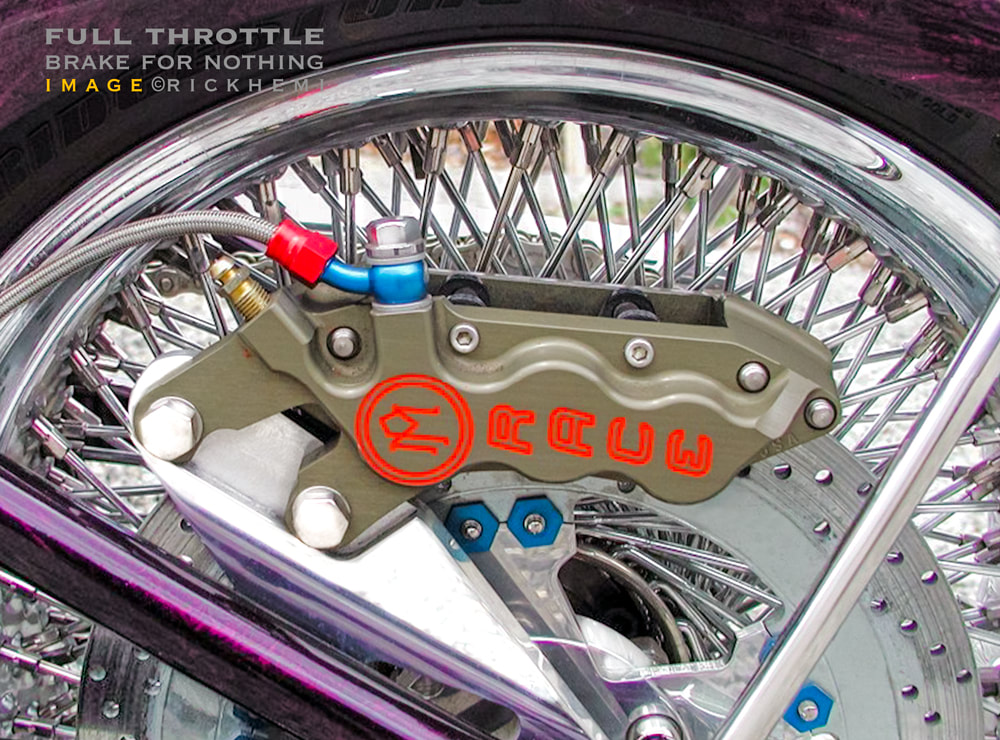
Anyone remember those fancy mat finished colored PM 6 piston race brake calipers from the '90s? The 132 rigid ran with two of these brake stoppers. It seems this model is now discontinued.

In the 2020s, people rave about their 40, 50, 80 megapixel cameras. How about stepping back in time about 25+ years looking at their roll film snaps they've taken. The above image was captured using a Mamiya RB 6x7 120 medium format roll film camera in the mid-1990s, how about that? As they say, once a photographer, always a photographer.
Workshop garage with numerous engines scattered on benches. The separation of greasy pull downs and rebuilds kept things in order.
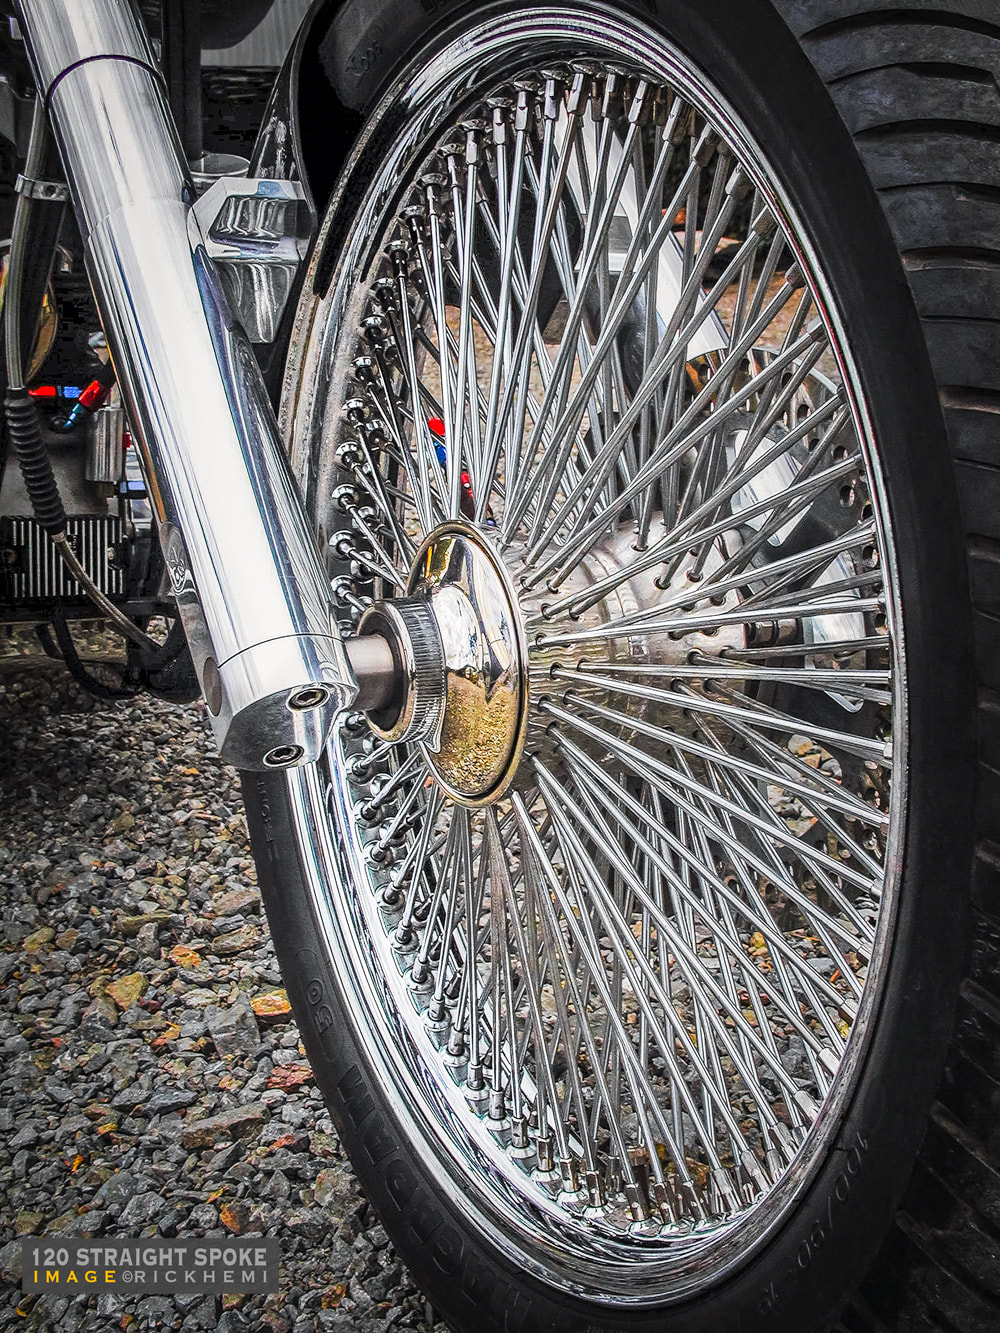
Because I lived in Scandinavia for some years, it was more logical to purchase European made parts for Harley projects. Below, an Erickson 120 straight spoke rim from Sweden bolted to an 8"inch over 6 degree rake fork from SJP. All engine and tranny parts are sourced from the USA. The only issue having so many spokes is when they need to be cleaned.
Like workshop tools, quality made Big Twin parts from reputable aftermarket suppliers will outlast anything produced from the far east. If engine parts don't have small print where they were originally made, it's guaranteed a wing bling product from some Chinese factory using recycled car wreck metal and cheap labor. The quickest way to destroy an engine is by using low grade engine parts. For example, using cheap camshaft cage needle rollers instead of Torrington cage rollers can suddenly collapse, and grind down the cam damaging the camshaft lobes, the lifter rollers, and cycle specs of metal through the entire engine wearing out surface harden moving parts beyond repair. Below quick snap, one of the lowest softail project Big Twin rigs I've owned.
Building big twin custom bikes can take up to 1000 hours from start to finish. It's all about how much work is involved. There's no escape ordering parts from various suppliers offshore. Normally, frames come from the US and EU, engines and running gear from the US. Most other accessories like gas tanks, forks, lighting, electrics, fenders, and forward controls are sourced from reputable suppliers. Everything else is custom made.
Hardtails will always be the iconic symbol of all custom big twins.
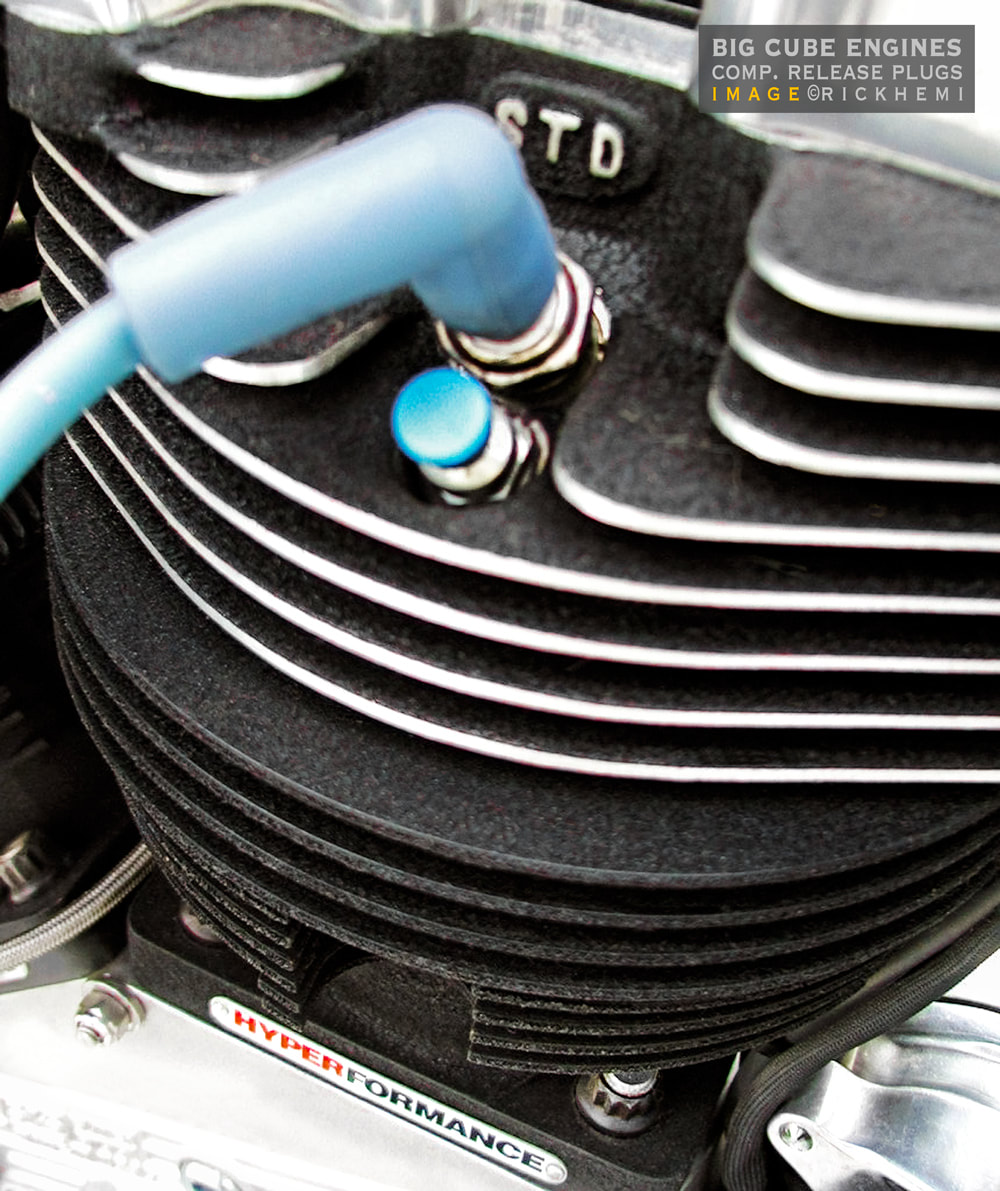
The ease of crank starting hot engines is with a set of compression release plugs. I had first used comp. plugs on a Harmon 120 kick start only engine with positive results. Below, 10mm compression release plugs on the 132 cube engine.
Below, a totally rebuilt refurbished big twin shovelhead engine with custom German designed four piece rocker boxes
What's a fully rebuilt engine? Crankpin, sprocket and pinion replacement, bottom roller and taper bearings, conrod bearing and bushings, pistons and rings, valves, valves seals, valve guides and seals, rocker arm bushings, camshaft, camshaft cone bushing, cam case bearing, oil pump rebuild, valve seat replacement, lifter block and lifter replacement, carb rebuild, ignition replacement, new gaskets.
American Iron 10/10 : European Iron 9/10 : Japanese Iron 7/10 : Chinese EV Imported Junk 0/10
Fastest recorded time pulling down an Evo - 45 minutes : Quickest Evo rebuild crankcase up - 3 hours : Favorite engine rebuild - Anything : Rebuilt Big Twins - 100s : Rebuilt engine failures - None : Automotive background - Self-taught.
Top left, an XL Ironhead that received a full rebuild during the mid '90s. Above, the 132 4 cam bolted in an Atlas frame.
The more cubes the better! I built this rig in Scandinavia as a second bike with top American and European parts.
Above, this classic XL Ironhead received a few modifications to get it running as a city hack runabout. Was it worth it? At the time it was, but as most already know, these XL engines have limited top end power compared to big twins.
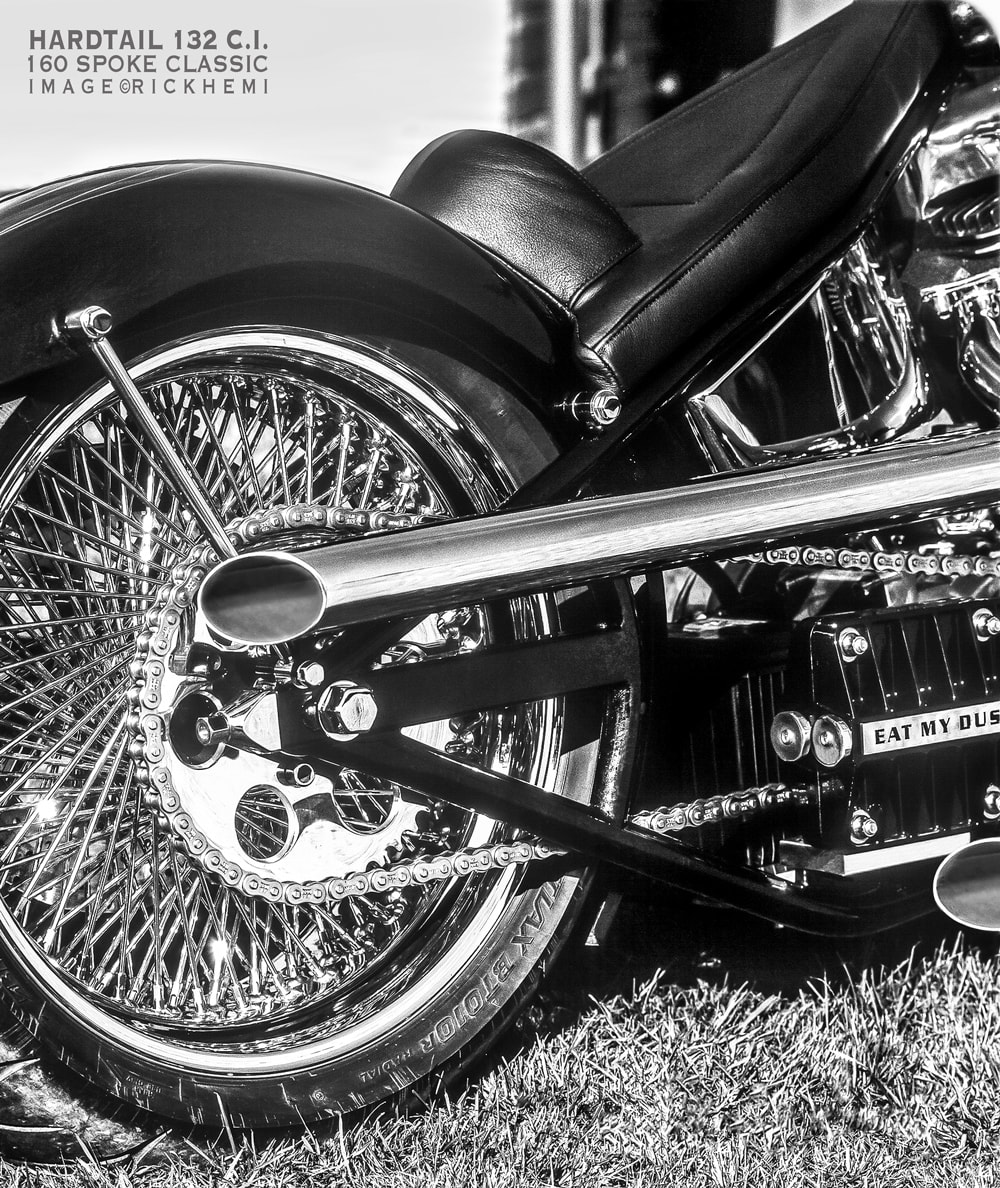
Why use 40 spokes? This 160 rear spoke rim made the 132 hardtail more classy giving it the nostalgia look of yesteryear.

German frame, German alloy oil and gas tank, Dutch front end and forward controls, stock Evo V2 and 5 speed, 230 rear.
By 2030 images like this will be banned off the internet. Gasoline is already a dirty word, so enjoy running around on anything that requires fossil fuel. Riding gasoline MCs will become nothing more than past pipe dreams. The squeeze is already here, the parrot propaganda machine from all sides of the globalist hierarchy want us to have nothing, own nothing and be happy about it.
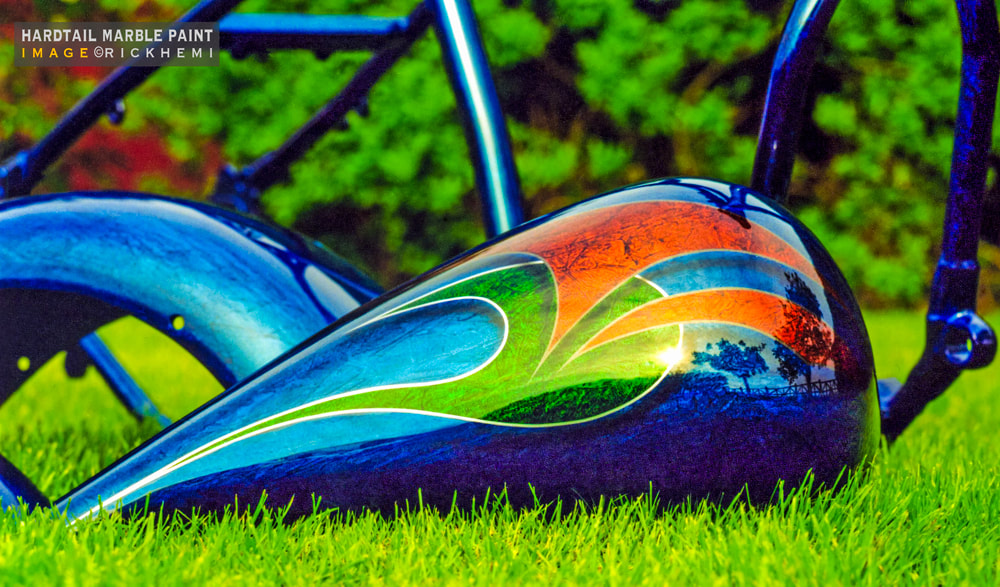
Custom Harley paint jobs through the 90s were mostly done by Kent Customs in Sweden. Below, a sample of his marble finished artwork on a rigid hardtail project.
Below, self-designing creating your own cosmetic custom biker stuff begins with a thought. It only takes limited time rough sketching basic designs on paper to become reality. The alloy tube belt guard was one of them.
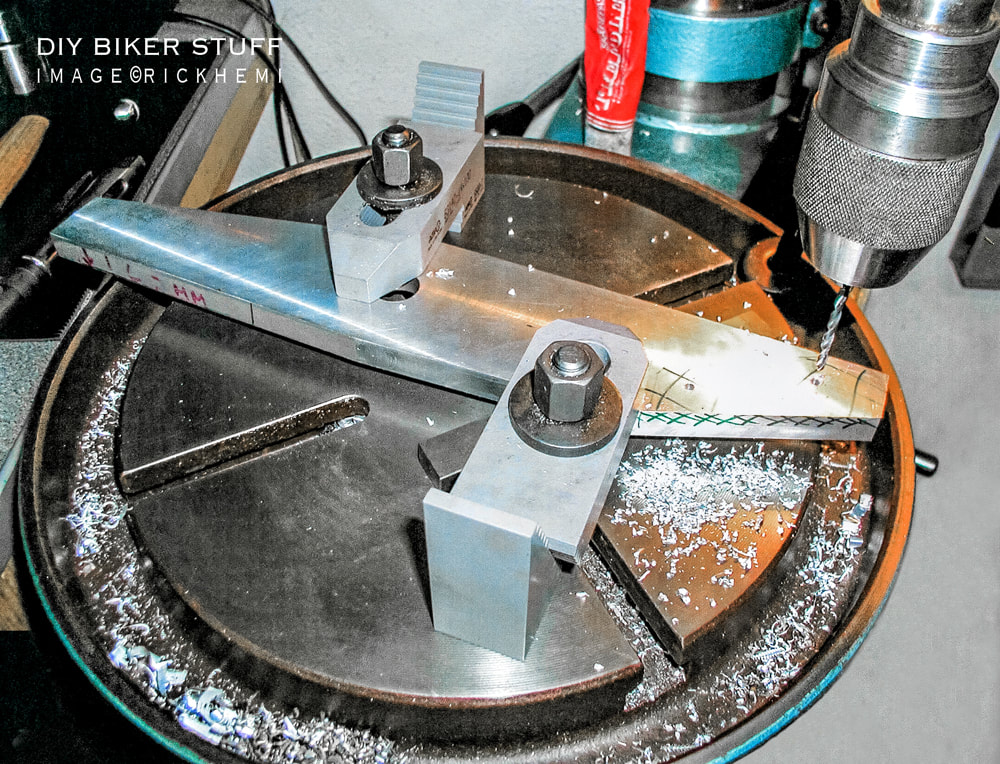
Making your own custom biker stuff requires machine shop tooling. A large Strand gear box model floor drill press did all the drilling.
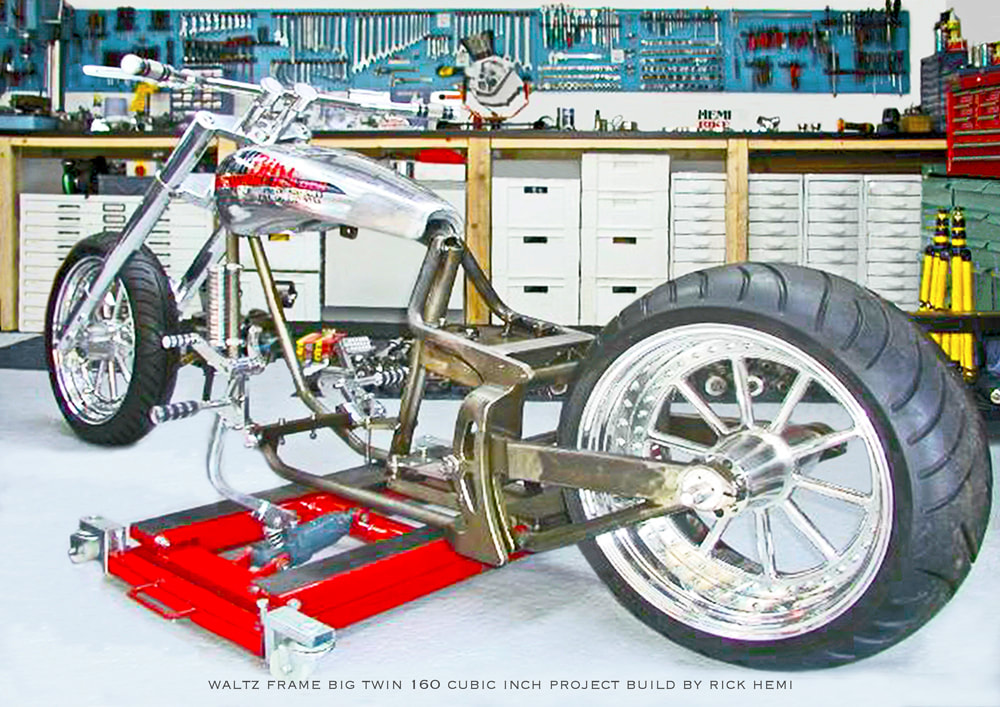
Below, Atlas Coyote hardtail frame, custom made five litre stainless oil tank, 6" Racor-Orberg oil filter, and the 132 c.i. S&S mega bore case. Cylinders & pistons are from Hyperformance with Jims Machine and S&S bottom end. Not the best garage point & shoot snap, but then it's better than nothing.
Building this rig took around 500 hours with endless smoko breaks and countless cartons of Scandinavian ales. After run in, the 132 hardtail ran and sounded like a rocket on steroids. The engine, like the Harmon, had compression release plugs to ease starting. The Carls Speed Shop Typhoon carb functioned extremely well on this engine. The 132 never missed a beat, never leaked a drop of oil, and had zero valve train and piston noise. The engine didn't use head gaskets or o-rings. The 5 liter oil tank, and Oberg screen filter took care of lubrication. The 132 engine design is still the only one of it's kind worldwide - Now that's something.
My first Big twin was an early shovelhead. It leaked oil, and ran like a worn out flathead. Oil leaks were coming from everywhere, mainly from
the primary, rocker boxes, pushrod covers, oil fittings, and the tranny. The previous owner spent more money on oil top ups than gasoline. These two builds shown above and below were the opposite. They never leaked a drop even with double the amount of lines and fittings.

Harmon first build : Kick start only : Oil pressure 60 PSI : Oil leaks - Zero : Go power 10/10 : Vibration - Plenty
Harman 120 Typhoon carbs received third fuel circuit Thunderjets. One issue with original Harman inlet spigots is the angle. New designed spigots were positioned at lower angles to keep fuel bowels more level ensuring constant fuel bowel gas fill. It only takes a few seconds for piston tops melting down caused by insufficient gasoline.
I was called a nutter, insane and crazy by friends when I had first told them I was considering to construct a megabore 132 cubic inch 4 cam engine into a hardtail frame. Most were riding softails, and wouldn't even think riding rigid bikes. The comfort, and smoothness of twincams is hard to beat. Hardtails on the other hand are for old school freaks - like myself, and used to kick starting 120 c.i. Harmon engines for years. Was it worth building the 132? You Betcha, and I'd build another rigid with even a larger displacement at the drop of a hat. A 160 c.i. panshovster sounds good, who knows, let's see what the future holds past 2024 if cheap gasoline still exists. Maybe moving to Venezuela is an option, I've traveled through Venezuela twice on different journeys throughout the country with no issues. One thing Venezuela isn't short of, is dirt cheap 97 octane gasoline, and American cars and pickups.
Below, the V2 132 cubic inch engine in its final stages before being transplanted into an Atlas Coyote hardtail frame.
Money For Nothing!
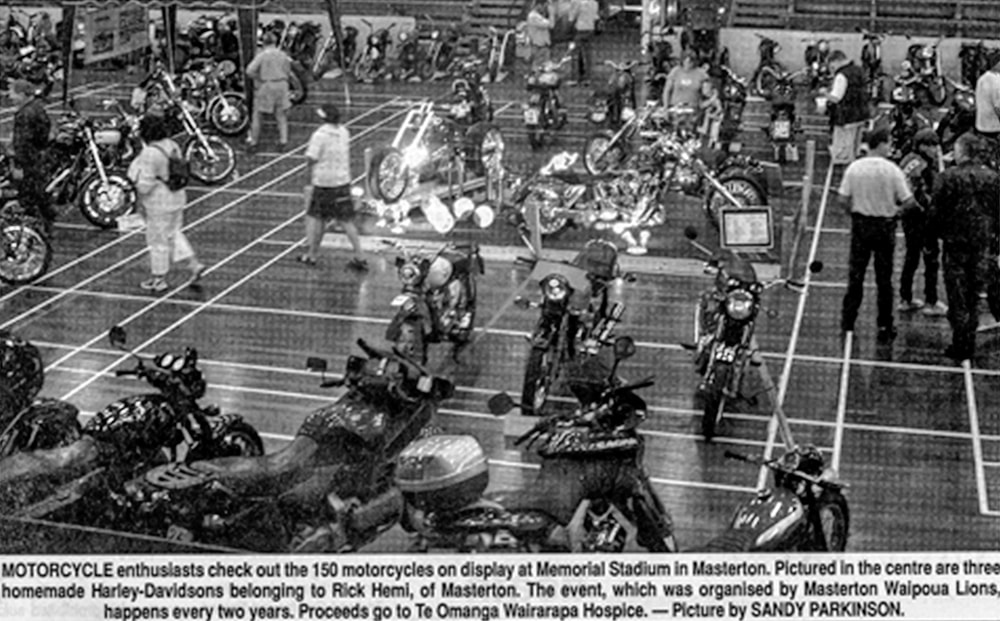
I've had plenty of requests to bring my custom bikes to bike shows & fundraisers.. The above fundraiser, organized by Waipoua Lions Club had a full on event who requested I participate in. My bikes were the center attraction, even advertised through radio as the center attraction. The sad disappointment of this fundraising event, was the organizers. They couldn't even be bothered to offer a cup of coffee, a cake, a sandwich - Nada, Nothing! But hey, they themselves made plenty of money through the entire day. This post is only here for that reason.
HD Memorabilia

American MC automotive decals - Top parts used - Zippers, Jims, Riveria, Hyperformance, Crane, Andrews, Carrillo, PM, Red Shift, S&S.
Dual wall hanging workshop cupboards, my collection of automotive biker decals from different kinds of quality American made products that were used on bike builds and projects. The best biker memorabilia one collects are parts that were actually used on engines and bikes i.e. case cones, blown cases, cylinders, rods, pistons, primary covers etc etc
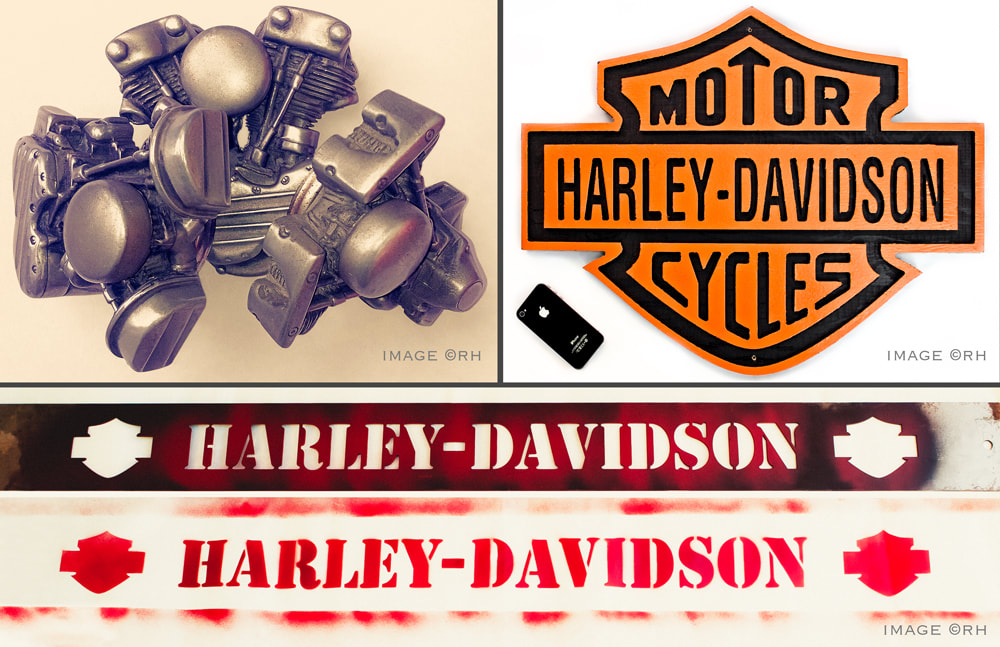
Imagine having an HD biker garage without having any biker memorabilia hanging on walls. Used engine parts are always a favorite, with primary and rocker boxes coming in a hot second. That 1995 Daytona beer finally got consumed a decade later, it tasted like 20 octane gasoline.
An early first version of chopped rocker boxes. On one lazy Sunday tinkering around the workshop, I pulled out a set of OEM rocker boxes, originally off an Iraqi early shovel engine, and gave them the chop. It began as only a prototype not really caring about the outcome. The end result was usable ending up on the 120 Harmon. They were later replaced with my own custom billet machined boxes. The first version hung on the wall for some years, but whatever happened to them is anyone's guess.

The late-1990s — filtered Colombian coffee, Motorcycle Storehouse catalog, Motorola V3688 GSM cell phones.

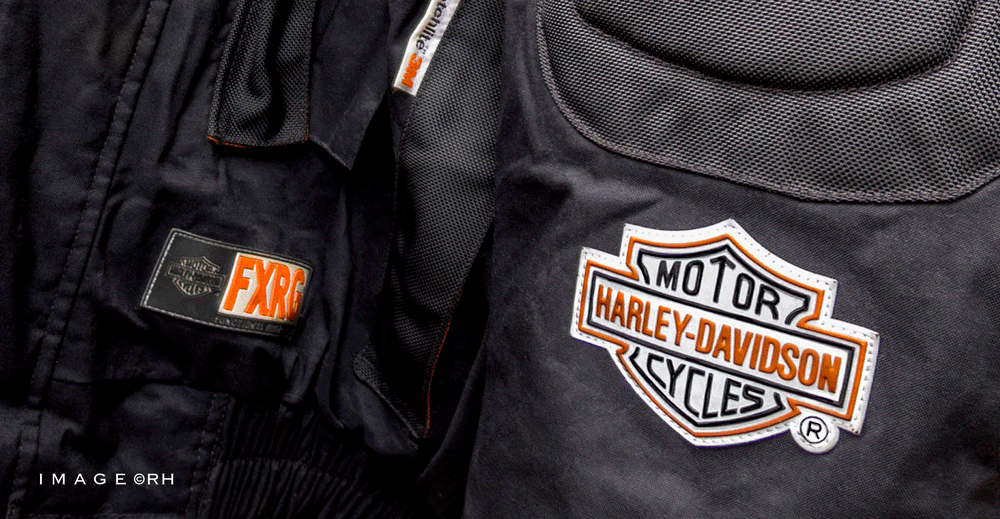
Logos on 1999 HD OEM jackets. Most of the Harley Davidson clothing was already being mass produced offshore in Asia to keep all the manufacturing costs to a minimum, and still retain maximum gross profit.
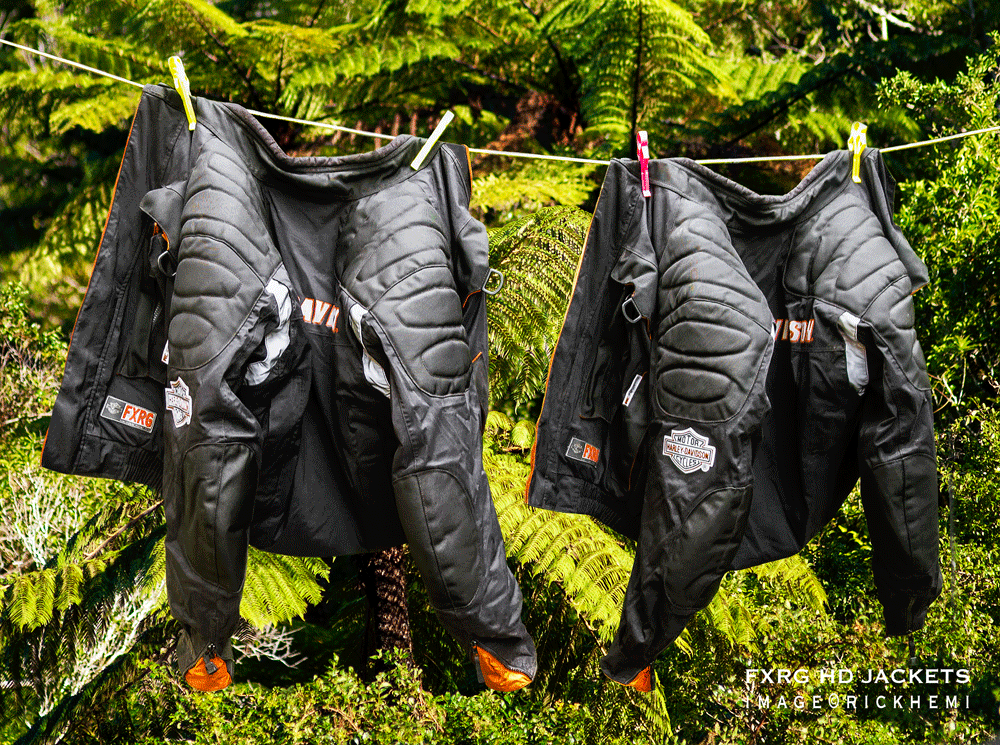
Hanging out at a remote location air drying jackets after a hard rain in New Zealand bushland.
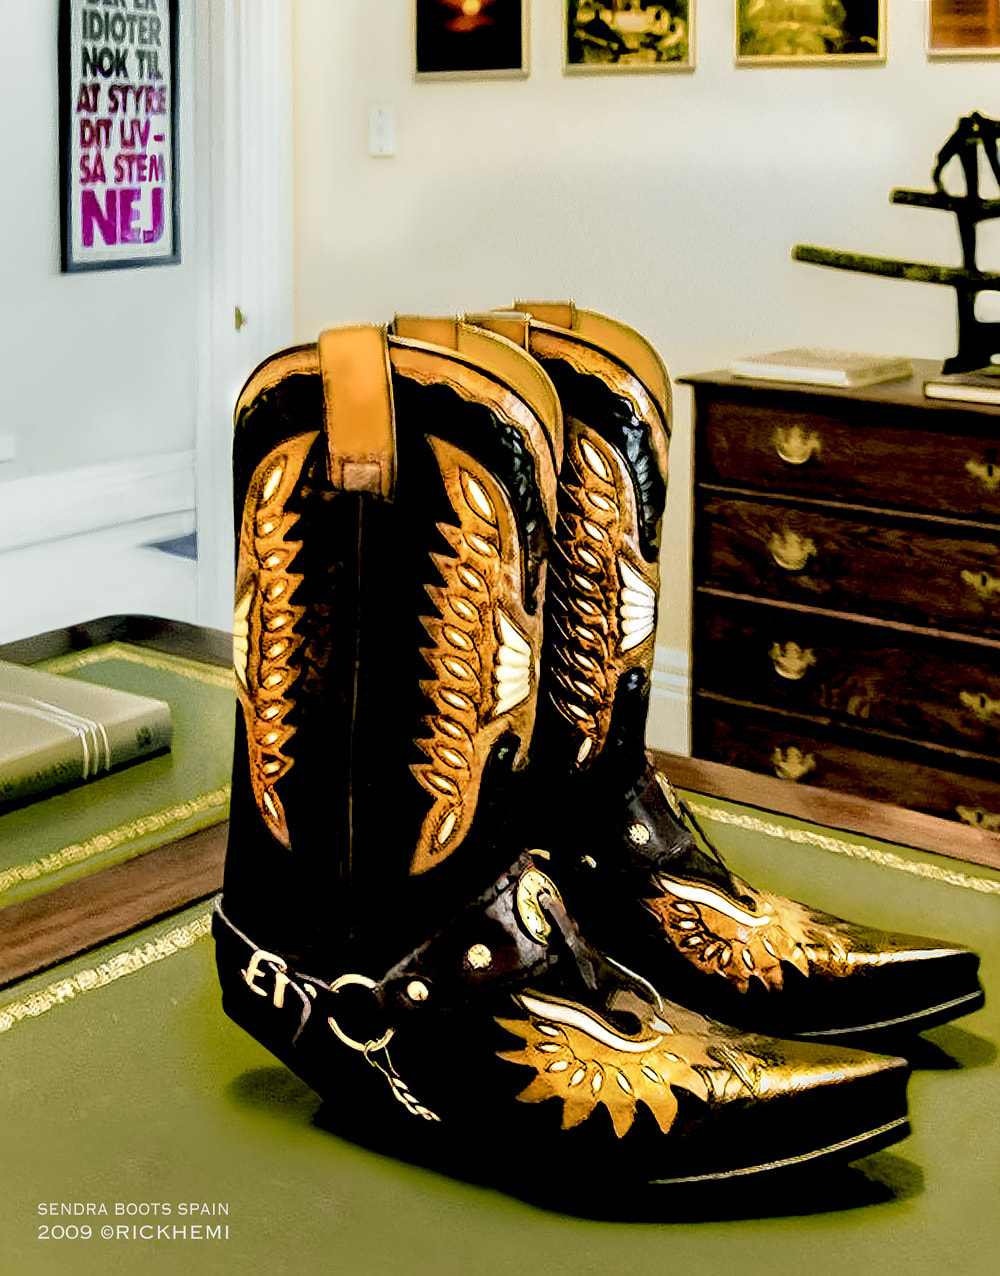
Below, Sendra biker boots still being worn in the 2020s, first purchased in 1993. They've done some serious big twin kick starting, and have been worn through South America, Africa, Europe, and Asia. If these boots could talk of what they've done and where they've been, they'd easily write a book. Comfort 10/10 Design 10/10 Reliability 10/10 Sendra boots website

Below, a second pair of quality made Sendra boots purchased in '09 used for occasional outings.
Below, an image of a canvas I had recently gifted to someone of the 120 Harmon. The engine was originally captured using medium format roll film camera gear. Now looking back, designing, building and photography are still favorite pass times in the 2020s. The 30x30 inch (76x76cm) canvas was the perfect gift to someone who fully appreciates it.
Once Upon A Time - Down Under 1970s
Need A Break? Hillbillies and bikers — Moonshine Highway movie : BayTown Outlaws movie : Stone Cold movie
In Aussie during the '70s, classic American cars, Aussie assembled V8's and big twin Harley MC's were cheap and plentiful. Gasoline was nine cents a liter, the weekends were free, the beaches packed out, and the sound and roar of V8s, hot rods and Harley's were heard up and down streets. Rent was cheap, food was cheap, employment was plentiful, and Aussie beer tasted great (VB, XXXX & Coopers).
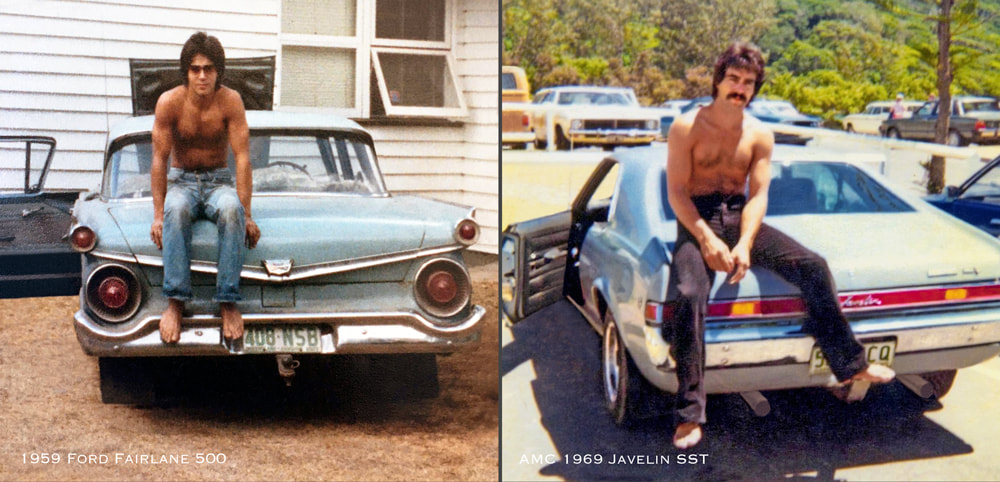
During the late 1970's, I had owned a few classic V8's at one time, '69 Javelin coupe. I transplanted a 340 W2 Mopar V8 SB under the hood. The engine used to scream from Brisbane to Cairns and back again without blinking an eyelid. The gas price back then wasn't even something worth debating about. I used a '59 Ford Fairlane sedan as a daily city slow runabout. It was purchased for 400 bucks off the side walk at the traffic lights. A 57 Ford Mainline V8 was another project bought from an old timer for 500 bucks, also from the pavement. It ended up with a BB 428 engine.
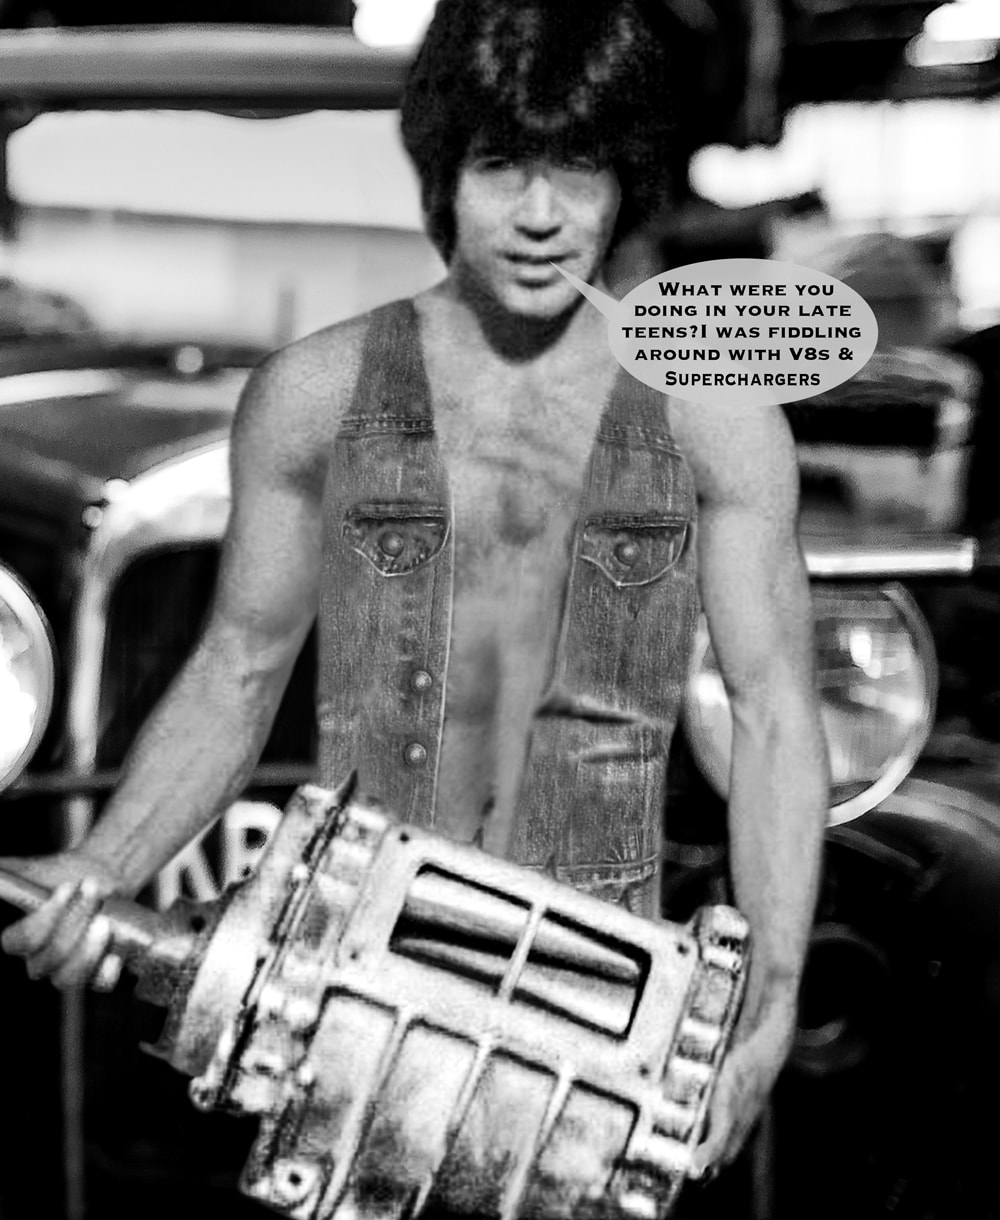
During the late '70s I was a V8 rev-head Down Under before I began my solo overland travel adventures around the planet. It was a time when there was plenty of work, good pay, prosperity and total freedom. It was a time without internet, wifi, smart phones (hell phones), narcissistic selfies, and online trolls. The cries and screams of wanting Socialism within the western world was still under the rug - except Sweden, that has now become a failed Socialist program. In the '70s, if one wanted to debate on any particular subject with others - you'd do it face-to-face without spitting or triggering on each other, and walk away in a non-hostile atmosphere. Universities back then had just begun their campaign agendas to dumb their students down as we see the outcome today of so many useful woke idiots. An off-spring of generations of totally dumb down indoctrinated people with fried brain syndrome with induced delusional psychosis. Today universities no longer provide knowledge, they destroy knowledge. I'm fortunate, I didn't go to university, my brain and self-critical thinking is still intact.

Many I meet ask why do so many Americans hate America? Why do Americans hate themselves for who they are? Who and what caused the dumbing down of Americans?
Where did the root cause originate from?
In Moscow, in the 1920’s, the KGB had special schools training professors to infiltrate into Western European colleges and universities. They trained college professors specifically with techniques and abilities of structured social engineering and brainwashing, which manipulated their students minds to auto convert to communism and Marxism aka the Zionist Bolshevik war and slaughter. American prisoners of war in north Korea had also received indoctrinated communist brainwashing.
They then began the set up process, by infiltrating into the West by setting up their first group think headquarters at the Frankfurt School of Germany through the 1920’s. They were given the boot out of Germany in 1933.
It was here where the first Group Think Critical Race Theory was hatched.
The majority of Frankfurt school communist college professors became best selling authors. They moved implanting themselves to other locations throughout Europe, and eventually arrived in to the USA and taught in the finest universities.
Their goal was to ignite a Communist Marxist Socialist program, by creating a cultural revolution, with change of language, art, film, theology, etc.
These college professors became intellectual celebrities – they were all agents of the Frankfurt School.
When Hitler rose to power in the early 1930’s, the Frankfurt School of Marxist professors packed up and fled to America, where ‘mysteriously’ by some invisible force were hand picked, and given top positions of the highest academic honor. They became tenured professors in the most prestigious schools and universities across America.
What’s happening in the USA in 2022, is the exact repeat of the Communist Marxist Revolution that enslaved Russia, creating it into a totalitarian controlled state. Any nation divided from within will eventually collapse and fail its economy as seen through recorded history.
The Frankfurt School Communist playbook principle formula uses psychological warfare to stir the envy, to arouse the jealousy, to promote anger of those within populations who feel disaffected – To Hate Their Country, to rebel in woke minority groups against each other i.e. the race card, anti religious backlash. Many are woke triggered and fueled with indoctrinated delusional psychosis and they don't even know it.
Instead of facing reality, the delusional person would rather live in their world of make believe. But in order to keep faking reality, they must make sure that everyone else around them also pretends to live in the same imaginary world. In simpler words, the delusional person rejects reality. And this rejection of reality, others have to play along with how they view the world, otherwise their world will not make sense to them. It's why the delusional person will get angry. upset, become triggered when they face someone who doesn't conform to their world view.
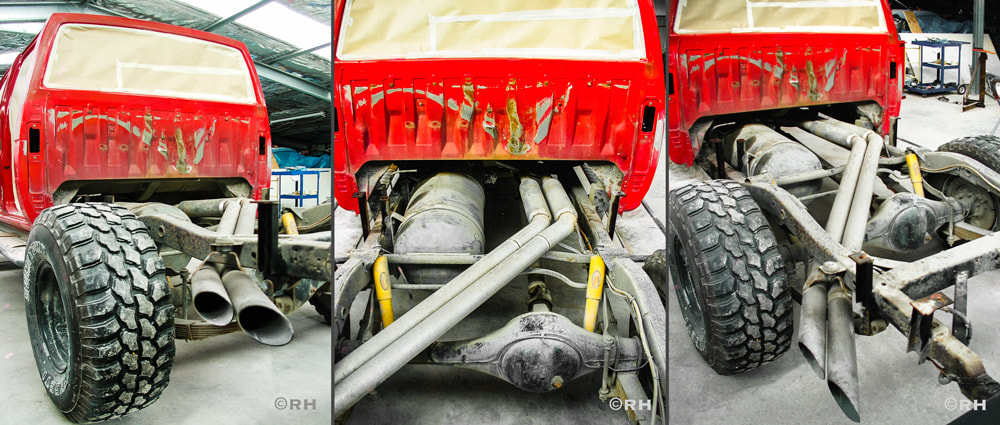
Nissan 94 Double cab : Patrol running gear : Extended front end & chassis : King cab tray : Dedicated LPG Chev 5.7 V8
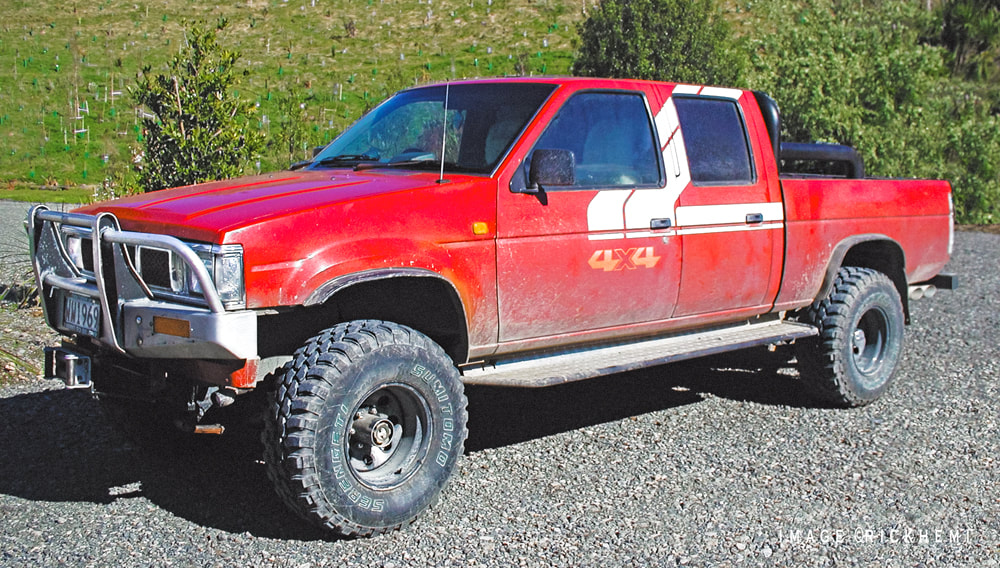
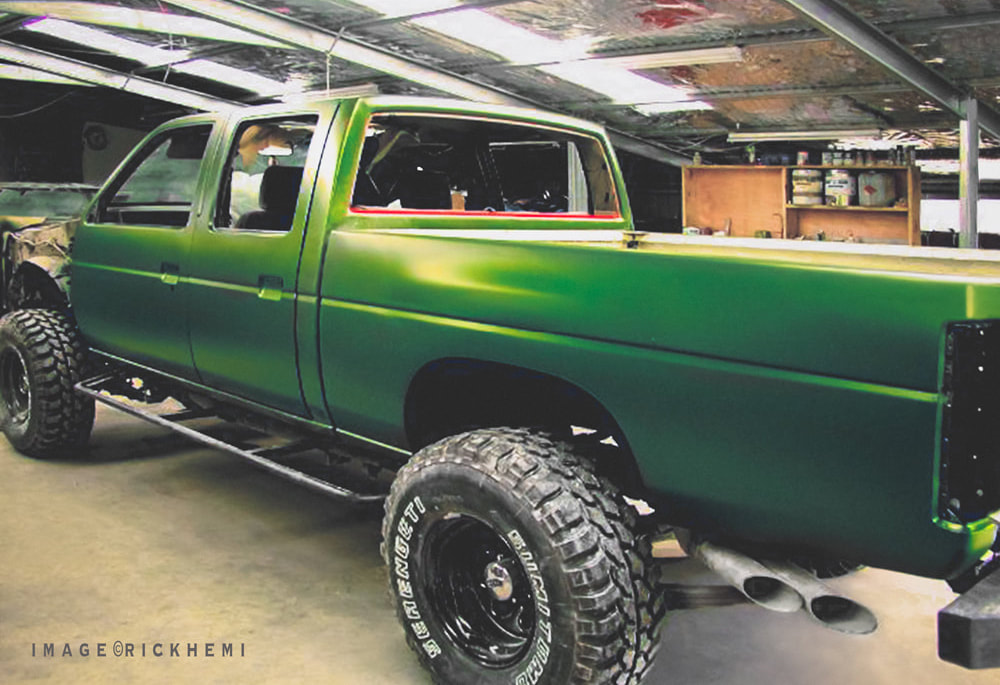
I bought the above 4x4 Nissan double cab for a slow towing runabout. The double cab shell had been placed on an early Nissan Patrol chassis with an added one meter extension. The front inner and outer fenders and bonnet were extended six inches to accommodate a larger radiator to cool the 5.7 V8. The rear tray was from a Nissan king cab. As usual, I couldn't help myself adding a few light modifications to an already heavy modified vehicle. The engine got a Mallory electronic ignition, high output alternator, K&N carb filter and dust cover, headers and twin exhaust, 33" Serengeti rubber on 15" inch black 12 slot rims, slimline custom made alloy running boards, rear 4" custom made roll bar, and an industrial mat sprayed paint job. The V8 never missed a beat. The rear diff was massive, it looked like it came from a truck. I was fortunate enough to find 2 rusted out wrecks of the same model Patrol on a farmers property. For a carton of beer, I took both front and rear crown wheel and pinions, axles, and transfer cases.

The only panel replacement required was another king cab tray. These were already like hens teeth, almost impossible to find, but I did manage to get a clean non rusted non dented tray. The small block Chev V8 ran well on cheap LPG, almost half the cost of 91 octane gasoline.
Industrial paint job. outer floor boards, 33 inch terrains, full length dual exhaust, 4" inch dia. tray roll bar, led lights, winch, alloy bull bar.
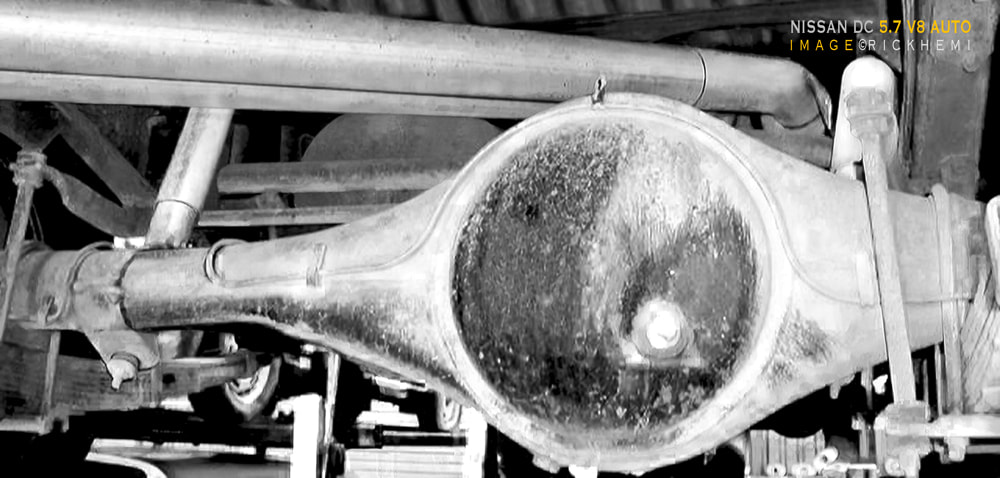
The G60 diff housing built like a truck with solid large diameter axles. Transfer case 2.264/1 Rear diff 4.1.
Frankfurt professors were trained to reprogram students minds regarding the history of their nation, their culture and race, history of religion, history of the world – their historical foundations of life by subjected mind control thought.
Just go on Social Media, the Internet, turn on TV, what is being taught at schools up to PHD level – everything today is nothing but social engineering indoctrination.
Freedom in America is in total free fall. Canada, Australia and NZ are close behind. Europe is already done and dusted.
Students are taught and brainwashed to view their societies, their life through the lens of communist indoctrinated Socialism and Marxism.
The majority of the global middle class today have no clue having zero knowledge of history or factual data. People have been deliberately dumb down to the point of no return. People have become social media junkies. Believe me, there's more to life than wasting it away on social media platforms.
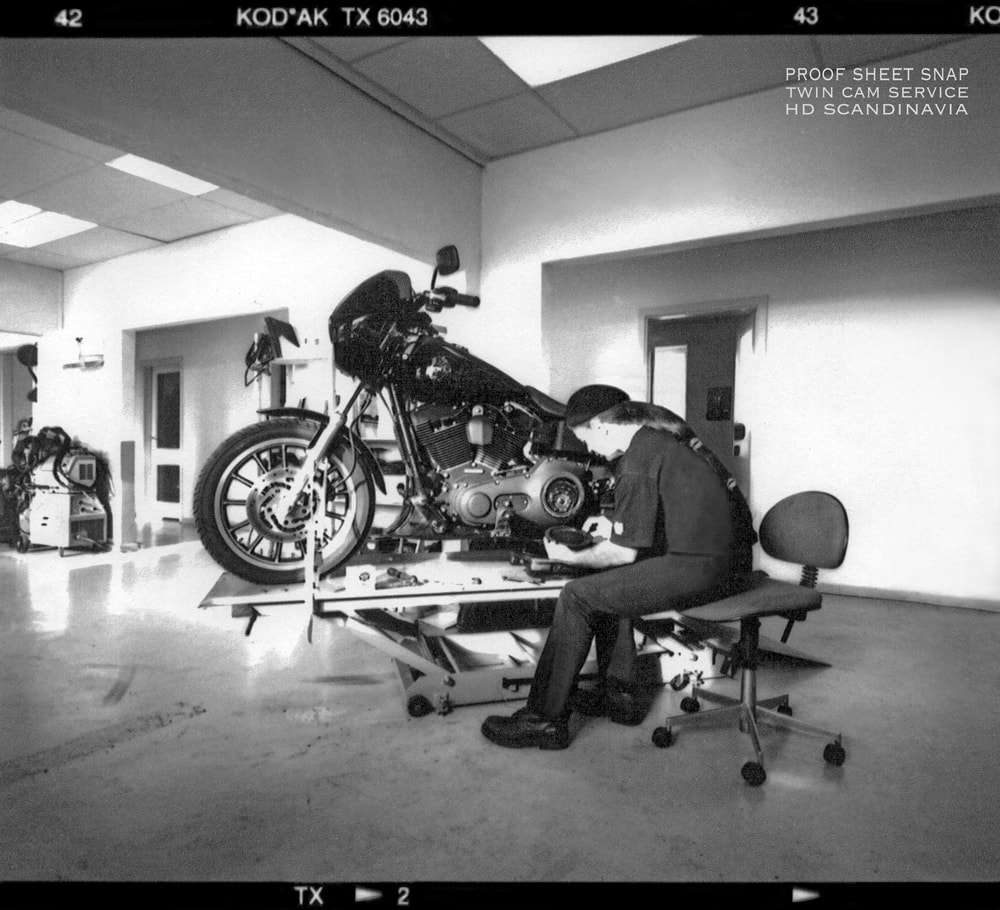
Classic biker workshop snaps are only here because I worked in a few of them during the 90's. Notice the Shovelhead engines sitting on pallets. They were trade ins, no one wanted them, you couldn't even give them away. I built the Evo hardtail for a customer taking 200 hours. Projects like this were in demand during the 90's. Bikers wanted affordable custom rigs with stock engines. I had good contacts in Milwaukee drop shipping plain Jane Evo engines, primary gear and 5 speed trannies for 3k. Below, servicing a Twincam at another biker shop.
For those having high regard to Socialist/Marxist/Communist values - Just try living in Cuba, Nicaragua, Bolivia, China or in Venezuela as an average peasant, and see how that works out for you. Probably not long, maybe a month? maybe not. Experience all those Socialist promises that were actually "made up lies" by using deceptive tactics. This certainly doesn't hurt Socialist regimes ruling over their populations by using an force necessary.
Modern society today is fully controlled and manipulated by puppet WEF Globalists, MSM, social media platforms and Goolag. Within a short time period from now, even silent free thinking will become outlawed. People growing their own vege crops will be snitched on by their neighbors. Food will become controlled under the state, Nothing will be left, people will become desperate before 2030, it's already been planned and openly published, but the Western world has been fast asleep living the dream - Agenda 2030.
Overthrowing western values and capitalism has been in the works for decades - what a plan yes? A global controlled Socialist/Marxist system (UN Agenda 2030) with promises of free benefits for everyone living under a slave controlled system full of snitches snitching on one another. What happened to Venezuela is a dire warning to all western nations - Hello, wake up out of dream state!
Everyone creates their own accumulated storage dump. Just look at piles of shoes and makeup women collect. Garage bikers are no different. Boxes of used Harley parts never go to waste. Below, during the seventies, New Zealand's used American V8 auto market was plentiful. Every man and his dog had one. '57 Ford Customlines could be bought for under 400 bucks, and Ranch-wagons were giveaways. When I was sixteen, my first passenger road trip though the South Island was in a '56 Ford V8. From the Bluff to Picton, the 272 V8 never missed a beat. Hitching lifts as a teenager through the 1970s was common practice.
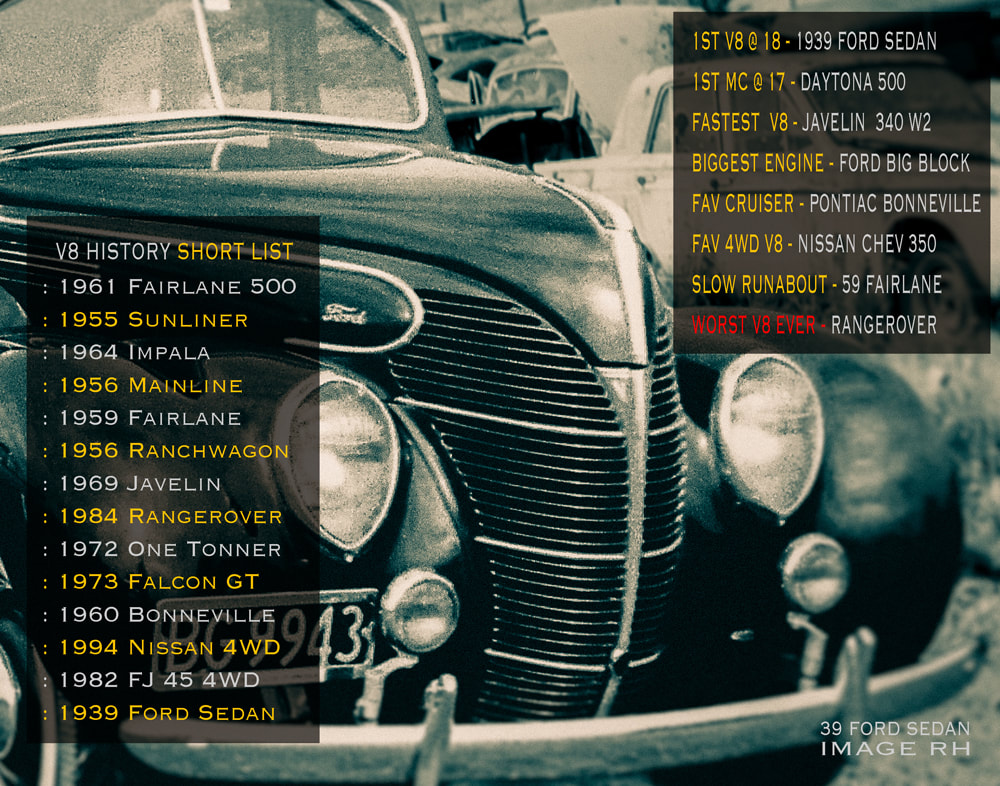
Socialism has in-fact a 100% failure rate. Excellence is achieved by productive competition and internal manufacturing. When competition is removed, the population relies on Government to be the dictator of your mind. They end up controlling and manipulating people's minds to their full advantage. Historical facts don't lie. Under Socialism, social justice disappears - freedom of speech disappears, critical thinking vanishes, the right to bear arms disappears, including freedom of religion - all down the toilet.
Marxist Socialism leads directly to hardcore Communism - It never delivers what it promises ...the latest terminology "Democratic Socialism" uses the exact promises as other drained Socialist Marxist countries have used through history. Its glossy sugarcoated to dumb people down! Are you dumb down? Maybe you don't even know you're being dumb down listening, and believing "useful idiots" on the Socialist bandwagon? It's all about control and power.
There is no such thing as free benefit handouts - The cash has to be extracted from somewhere. Employed working populations end-up paying through high rip-off taxation - How's your gasoline tax? cigarette and alcohol tax? income and import tax? One look at the Scandinavian tax system shows where the cash is being squeezed out from. I was paying 55% tax from my monthly salary in Denmark. 25% tax on anything bought, and employers preferred hiring those who had a mountain of debt. Scandinavia is used as a Socialist model, but in fact they're not! They all work on capitalist values.
Be a good slave now, and work your bone piece off! Don't complain, just be a good citizen and shut up.
Decriminalizing cannabis sounds great, another agenda ploy to dumb down youth populations. Most who have stoned brains don't even know what's happening around them, let alone what day it is. Smoke that weed man, and collect your free monthly benefit handout without worrying who's paying for it! Like in ancient days, Rome used sport to pacify their population, nothing new here under the sun. Netflix will finish you off sucking out the last bits of your brain replacing it with a liberal mindset - Got It?
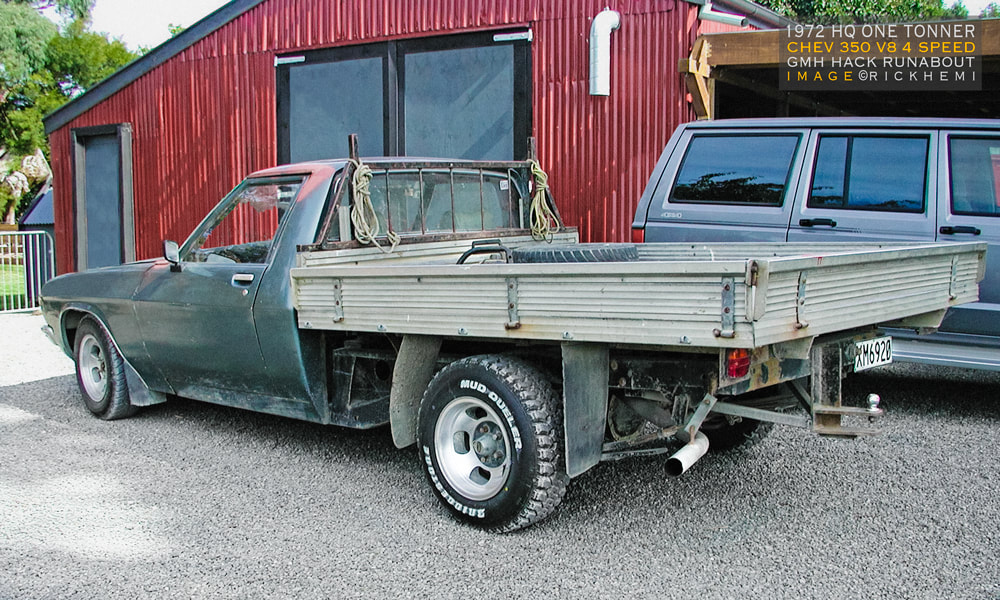
1972 HQ One Tonner. It was parked up in a farmers barn in the middle of nowhere for some years. The Ute originally came with a straight 6 engine. Sometime during its life, a cast-iron Chev 5.7 V8 and 4 speed was bolted into it. The one tonner was used as a runabout. It got a pull down, chassis sand blast, and sold as an unfinished project with a Statesman Caprice front and spare mint cabin. One Tonner history
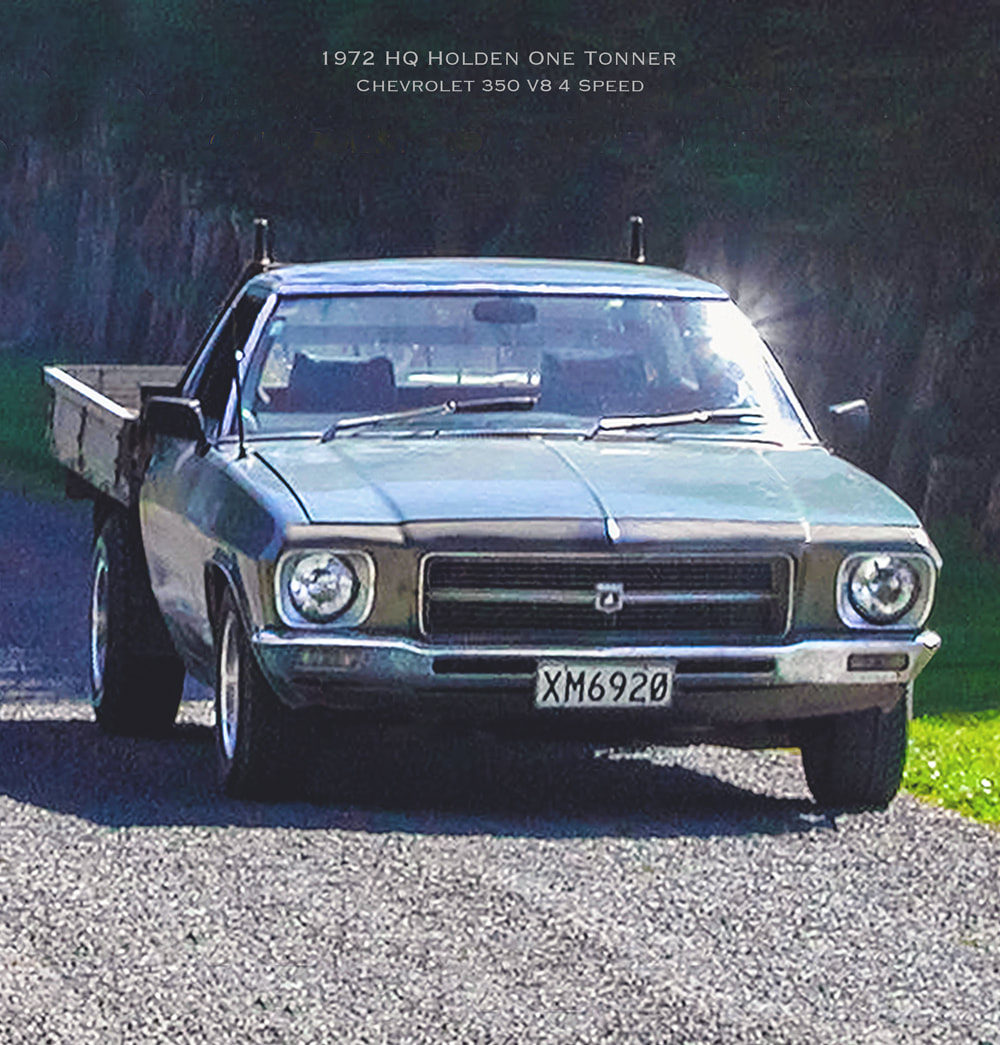
Climate Change Propagandists - Luxury Coastline Living
Just think how rapidly Western countries have self-dissolved within a mere four decades. No matter with how much new technology we own and use. Global control over all the land, all the property and over their populations has always been the final agenda. Those believing in the Climate Change narrative really need to do a self-reality fact check...
: Al Gore purchased an $8.9 million dollar ocean front villa in Montecito, California in 2009.
: The global banking industry is still selling 30 year mortgage beach front properties in the 2020s.
: Bernie Sanders resides in a $3 million dollar beach front property.
: Zucherberg paid $49.6 million for 350 acres at Pila beach, and $53 million for 600 acres at Larsens Beach.
: Trump owns multi-million beach front resorts in Florida.
: Dicaprio owns multi-million dollar beach front properties in Malibu and owns Blackdore Caye Island in Belize.
: John Kerry owns an $11 million dollar beach front property at Marthas Vineyard.
: Bill & Melinda Gates purchased a $43 million dollar beach front property in 2020 at Del Mar near San Diego.
: Obama resides on a $14 million dollar beach front property at Marthas Vineyard, and another $8.7 million dollar beach front investment located at Oahu coast, Hawaii.
The Great Deception - EV Clean Energy
Contents Of One Single EV Battery - Data Facts
30 pounds of lithium, 60 pounds of cobalt, 130 pounds of nickel, 90 pounds of cooper, 190 pounds of graphite, and approx 500 pounds of steel, aluminum, manganese, plastic, and other minerals.
All materials are derived from mine extraction using fossil fueled vehicles and machinery.
Where is lithium mining taking place for your EV? Third world countries with no regulations i.e. DRC, Afghanistan, China, Vietnam. Western nations have limited or no resources extracting the above minerals.
The majority of nickel mining production comes from the rain forests of Indonesia. So to extract nickel, rain forests are destroyed, localized biodiversity impact is totally destroyed. Pollutants contaminate air and water, causing cancer and lung infections, mud erosion runoffs directly clogging and polluting rivers, streams, creeks and coastlines, eradicating fertile fishing grounds.
It is already fact, production of raw materials like lithium, cobalt, and nickel that are essential to EV technologies are often ruinous to land, wildlife, and people.
Land, water, wildlife, and people are the exact four things government lobbyist and clean green environmentalists have no concern for.
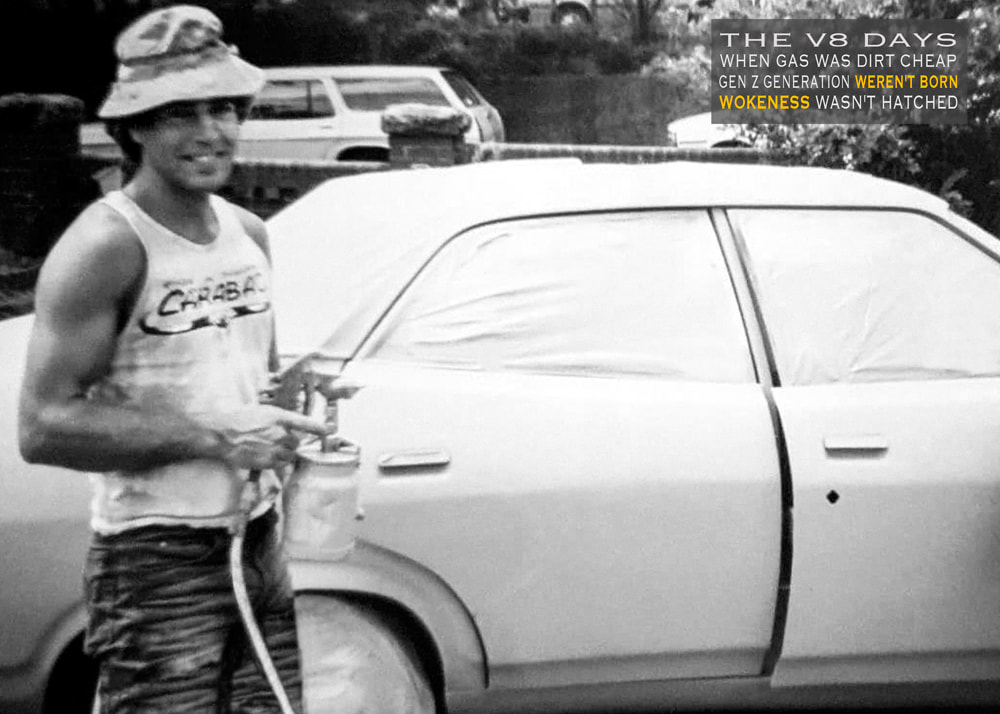
Honestly, the western gimme gimme spoilt entitlement Gen Z generation is the most dumbest generation of all human history. They wouldn't have a clue how to dig holes planting trees, hand milk cows, plant vege crops, built fences, hunt for food, or survive on next to nothing. The Gen Z generation are an embarrassment to mankind. Wokeness brainwashing has replaced all self-critical thinking. The above judgement is based on hundreds of Gen Z'ers I've met, all with the same results - Brain damage. Who is to blame? Parents, the heavy indoctrinated educational system, legal pharmaceutical depression drugs, toxic social media platforms, hive mind group think, fake MSM news streaming 24/7.
Above and below images, the land of plenty 1986, when V8's were a dime a dozen and high grade gasoline was 19 cents a liter. This classic Ford XA GT 351 V8 received an engine overhaul, and was resprayed on the front lawn in Bellevue Hill, Sydney. I did have some really good shots of this vehicle, maybe they'll show up in an old hard drive.
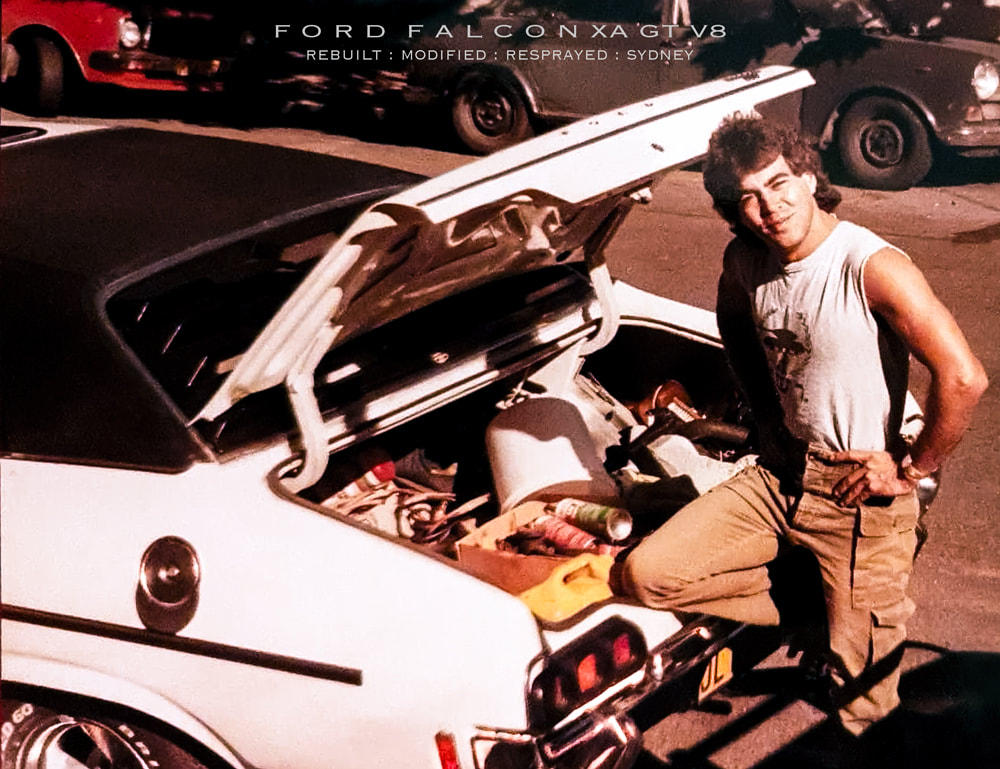
Older V8's weren't so complicated. All they required was a healthy set of points, condenser and cap, non-leaky leads, a set of new spark plugs and coil, a non-leaky carb, and a reliable starter motor. That's it. Filling up with gasoline and cruising down highways enjoying the sound and rhythm of V8's is pure bliss. Those days are over, the globalist cabal want all of us to ride on mules and donkeys instead.
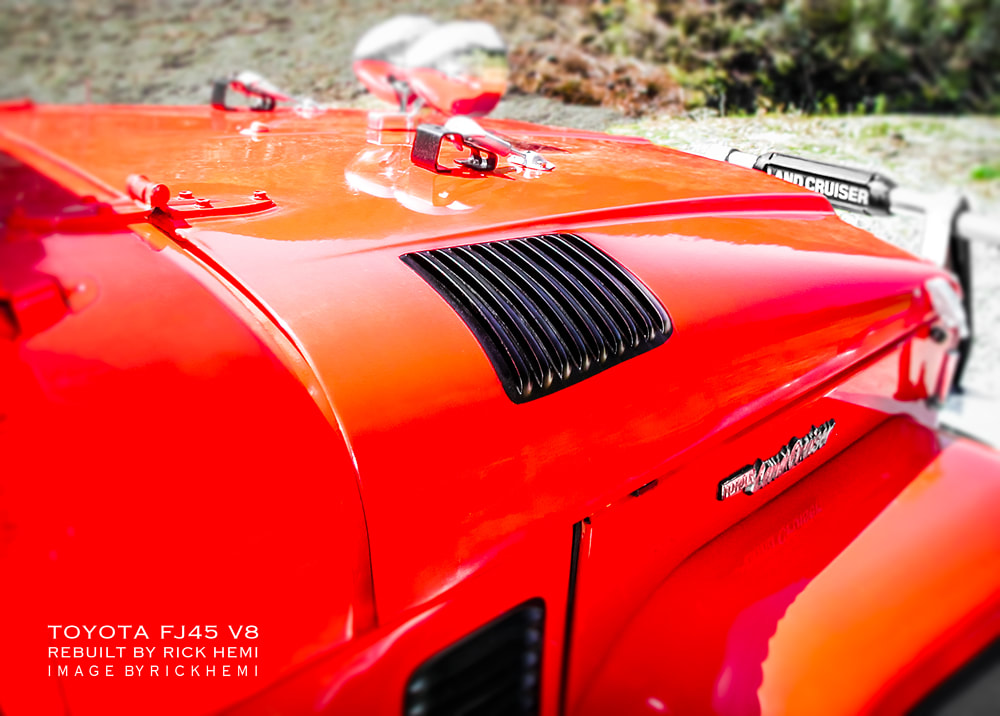
An FJ45 1982 landcruiser 4WD I had rebuilt. It ran with a hot cast iron 5.7 Chef V8 4 bolt bottom end with beefed up high/low transfer gears, 35" inch all terrains, double pumper 4 barrel carb, electronic ignition and tuned headers. This classic flat deck got a new lease of life. It ran and handled the way it looked.
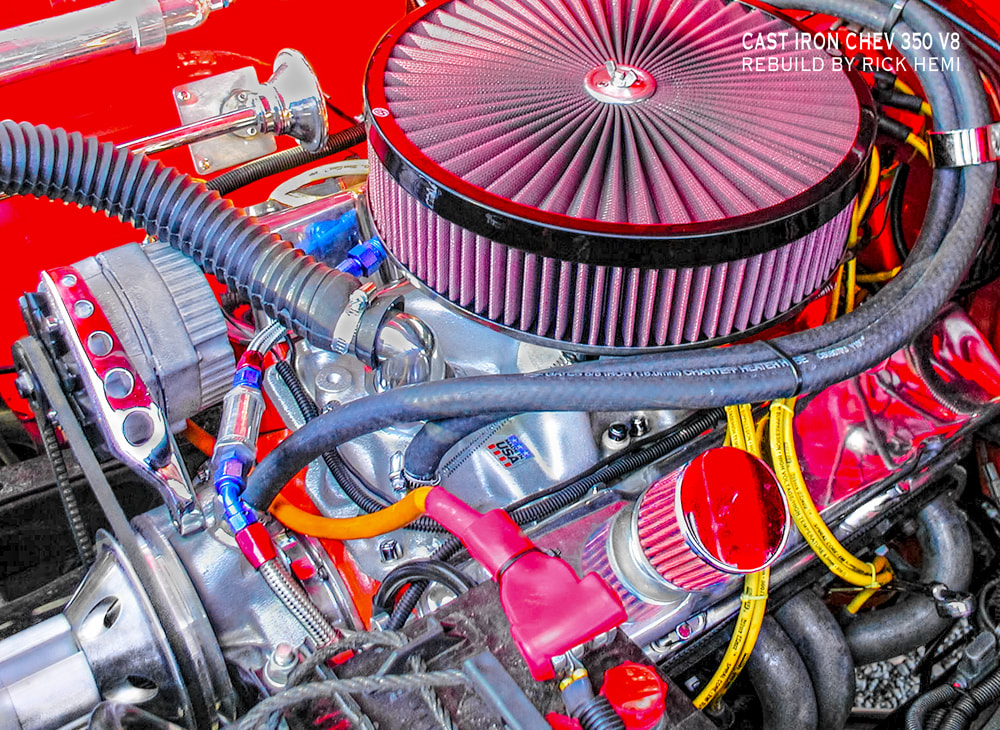
The small block Chev gobbled up the same amount of gasoline as some big block engines I've had in the past. The engine had zero issues with overheating, valve train noise or oil leaks.
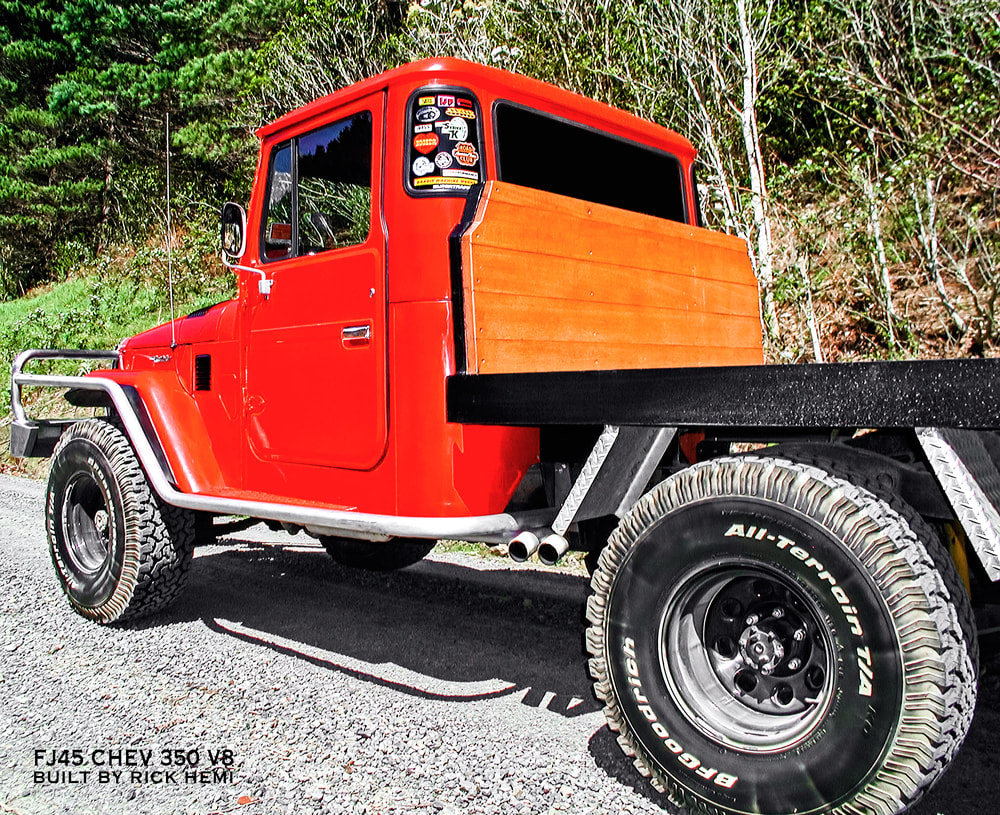
Anyone can make, create and design stuff if they focus their minds to do it. Nothing is impossible. It starts by a mere thought, a vision, a concept design scribbled on paper to turn into reality. The important factor, is to finish whatever was started. People who normally give up half way through any project big or small, will never finish completing anything through their entire lifetime. It's all about the finished product, the expertise of something personally created using your own ideas. It could be automotive, property development, landscaping, design furniture, leather work, or the artistic side of photography, drawing and sketching. Through the decades, I've personally learnt to follow my own instincts - not others. If someone says "hey that can't be done, it's impossible", I will proceed no matter how long it takes just to prove a point it can be done. A quick example, is designing a gasoline carburetor engine to run on 90% water. All one requires, is to build a multi-rod cell chamber, a powerful alternator, an LPG carb base plate, one way check valves, and stainless heads and valves. The cell rods must be as close as possible to one another. Rods require cleaning from time to time. Heating water extracting hydrogen gas is nothing new. Researching data from the 1930's reveals this. Those out there with some intellect no doubt can easily figure out the rest of the design to fully function and operate. Whatever you do, avoid going down the path fiddling with acetylene water designs - It's too volatile.

Open your mind, why follow the crowd? Create, design your own biker stuff. All it takes, is a little enthusiasm to get motivated.
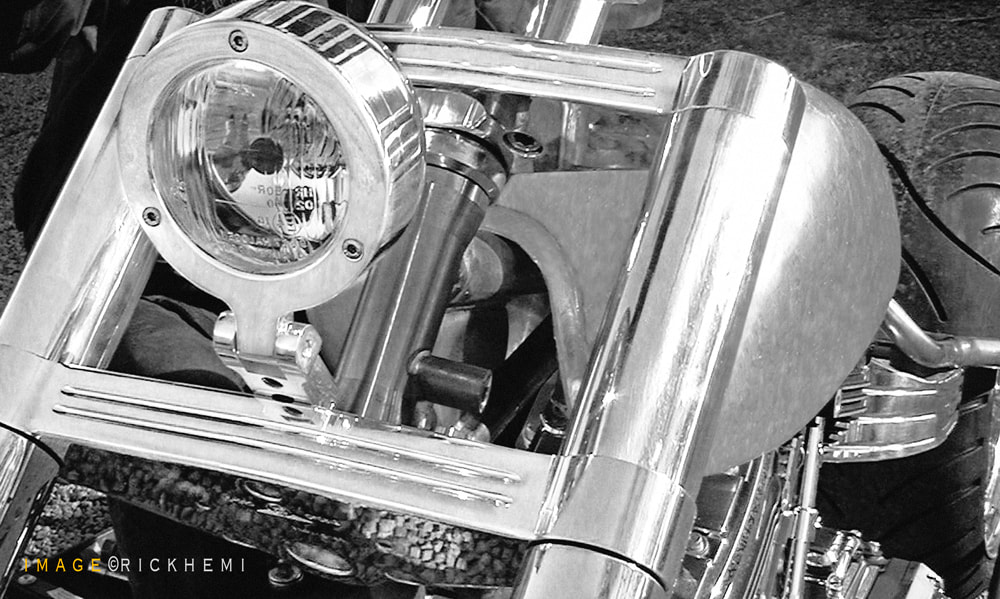
Below, these don't care grainy subpar roll film snaps have more value looking at them now than when original taken decades ago. A vertex magneto powered 1340 Evo. The engine received the usual modifications i.e. pistons, valves, re-cammed, carb change, Jim's lifters and rockers,, taperlite pushrods, breather, oil pump and high speed gears etc.
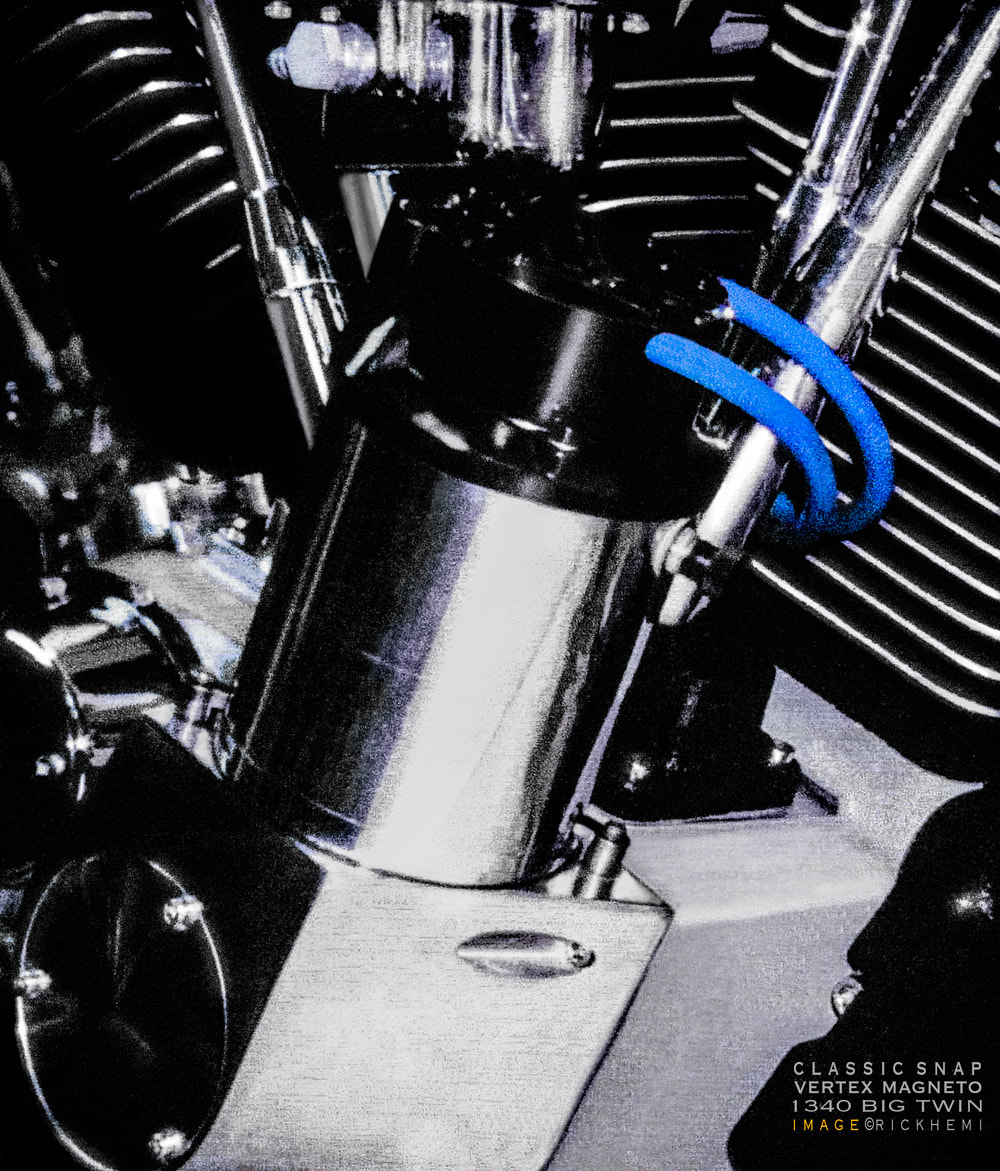
Never Judge People By The Way They Look - Big Mistake!

Not so long ago, while in New Zealand, I was looking for a vehicle to travel through the country. While in Wellington, I had done the usual walkabout through used car lots scattered in and around Basin Reserve. An Audi A4 coupe caught my eye. The paint job and fancy wheels made it stand out, with an asking price tag reasonable. I slowly strolled around inspecting the Audi looking for defects, like previous hidden accident damage, scratched paintwork, ripped seats, cracked dash and worn cosmetics. There were none, so I was interested.
There were two salesmen sitting at the back of the car yard outside their office enjoying some sun. They saw me, but never got off their butts to assist or help. At the same time, a Pakeha (white kiwi) strolled in and was casually looking at another vehicle at the same lot. He was well-dressed, carrying a briefcase. The fast response and assistance by these car yard owners was impressive. They were eager to sell. They even gave the dude a business card before he vanished down the pavement. As for me, I was invisible. They weren't interested at all giving me the same treatment. Maybe it was my long hair, the tattoos, the colorful Colombian mochila and buff hoodie that put them off, or maybe it was because they classified me as a daydreaming tire kicker?
A few days later, I purchased the below RCZ —New. The car dealership, Armstrong's was a street block away from the previous car lot where the Audi was. I decided to pay a quick drive-by visit before leaving the city. When I drove up onto the car lot, the Audi was still there. The same car lot sellers were sitting in deck chairs at the rear of the lot. When they saw the RCZ stop, they got up and approached it as though they had a guaranteed sale. When I got out of the car, they recognized me by the way I looked. With a grin, I said "You guys remember me from a few days ago looking at that Audi, yes?" They both nodded heads, I then said "Both of you rushed to the dude wearing a suit and tie carrying a briefcase, and totally ignored me even though I was there before him. I was really interested to purchase that Audi — Big Mistake — Big Mistake" "You see this RCZ, I just paid cash for it, have a nice day" As the saying goes, never judge someone by the way they look, especially complete strangers — Got It? And the plate ain't fake.

The Gasoline Days Are Over - Agenda 2030
So it begins — California to restrict travel for classic cars older than 1978 (motorbikes will be included)
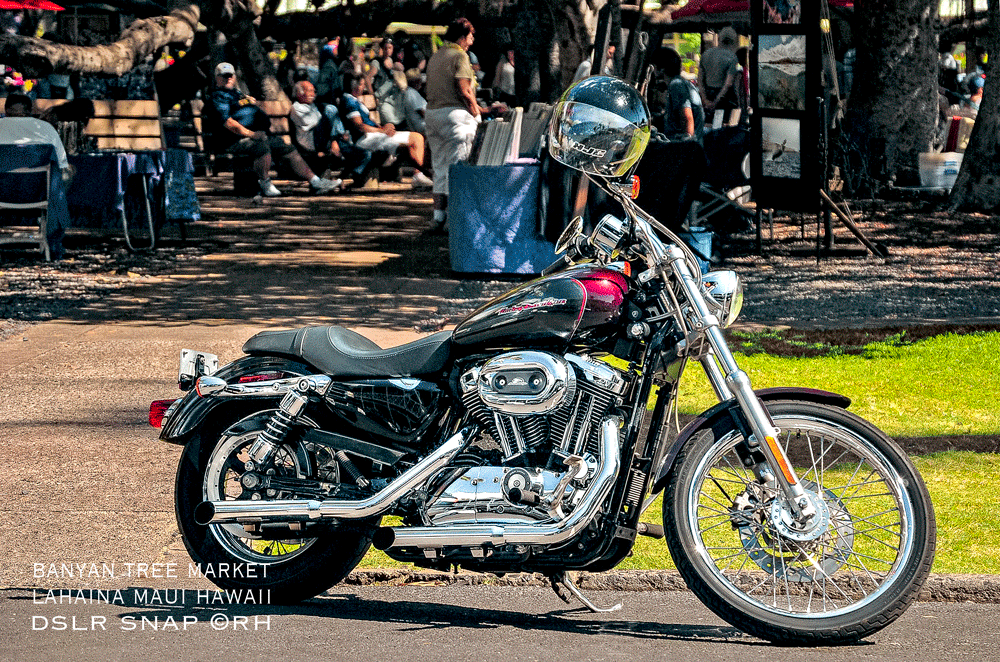
When Lahaina, Maui was a bustling vibrant abode. An image snap taken at the Banyan tree market. The destruction of Lahaina and high casualty count of hundreds of victims (mainly children) could of been prevented — If the power had been switched off, and needed water was supplied. In the 2020s, nothing is coincidental when trees combust from the inside. This could suddenly happen at your location without warning, especially in isolated regions within forest and bushland. The Globalists want us living in 15 minute smart cities prisons instead. A quick side note, Asphalt melting point 343 °F (172 °C), Aluminum melting point 1218 °F (659 °C) A whizz kid DIY direct energy laser gun experiment. What melted car alloy parts into liquid form in Lahaina, but not asphalt having 3.5 times lower melting point? More on global reset agendas in the live links page.
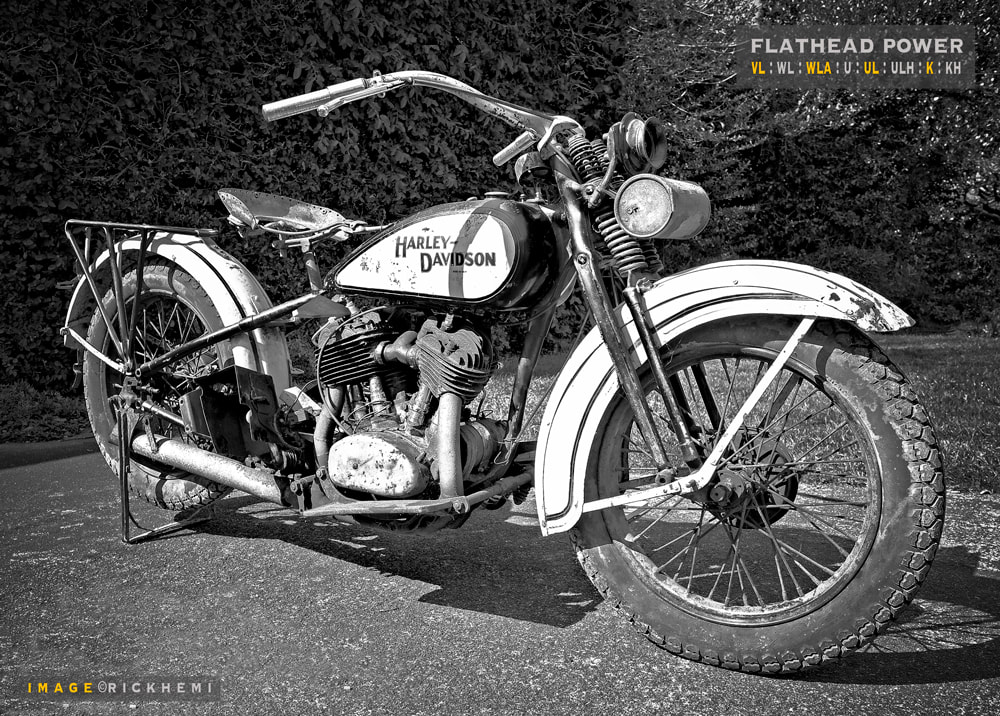
Tick Tock - Before Agenda 2030 fully kicks in - Sell Off Unwanted Junk Before It Becomes Worthless!
Jumping fast forward, most reading this in 2027, will certainly remember the days when gasoline powered vehicles were cheap and plentiful in previous decades. Gasoline operated machines in 2030 will become nothing more than expensive garage and furniture ornaments. Selling off unusable junk, and getting rid of debt burden is where it stands in 2021. Those who think differently will only suffer worse off than others who did so.

Still plenty of salvageable parts on this desert wreck — 1951 Ford V8 pickup, image snap by Rick Hemi
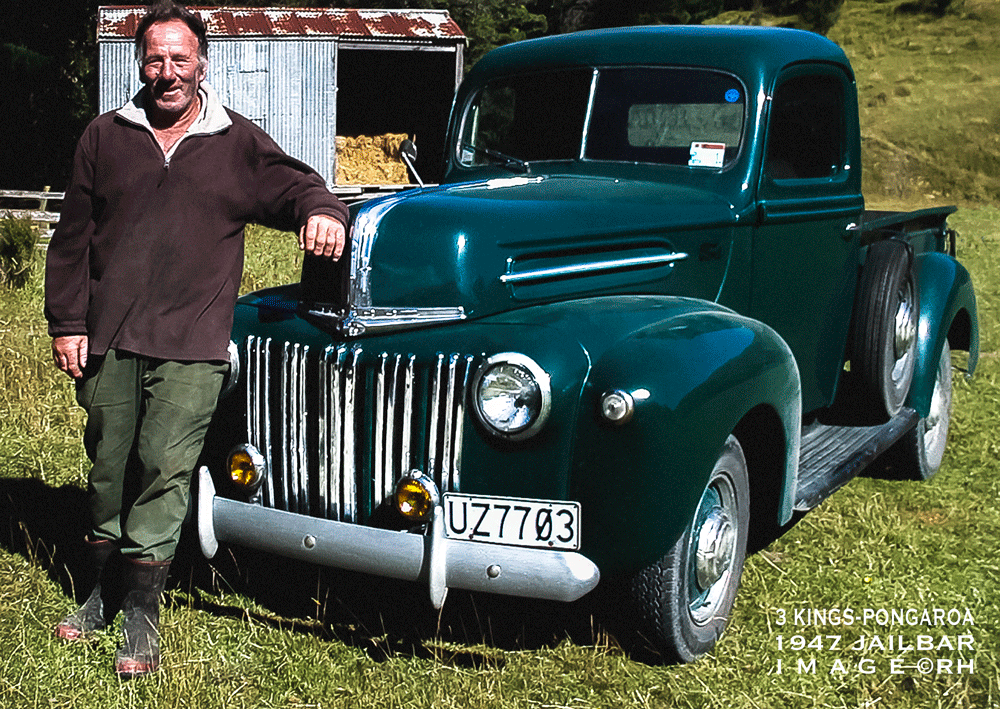
47 jailbar with Alistair Thomas at 3 Kings, Pongaroa. Point and shoot snap by Rick Hemi
Survival in Western countries beyond 2025 will become like existing within the Real World. Smart cities, QR-code scanning, smartphone tracking, Iris scanning, CBDC control, and endless vaccine shots within a world of fake meat and wokeness becomes reality — Climate change aka "global boiling" will be penetrated into already brainwashed populations. EV versus Gasoline vehicle in mileage towing test - Who wins hands down?

The days of yesteryear when everything was in slow motion — no internet, smartphones, or wokeness, the Gen Z weren't born yet.

Point and shoot snaps taken in the late 1970s, 80s & 90s end up looking like this without using original negatives.
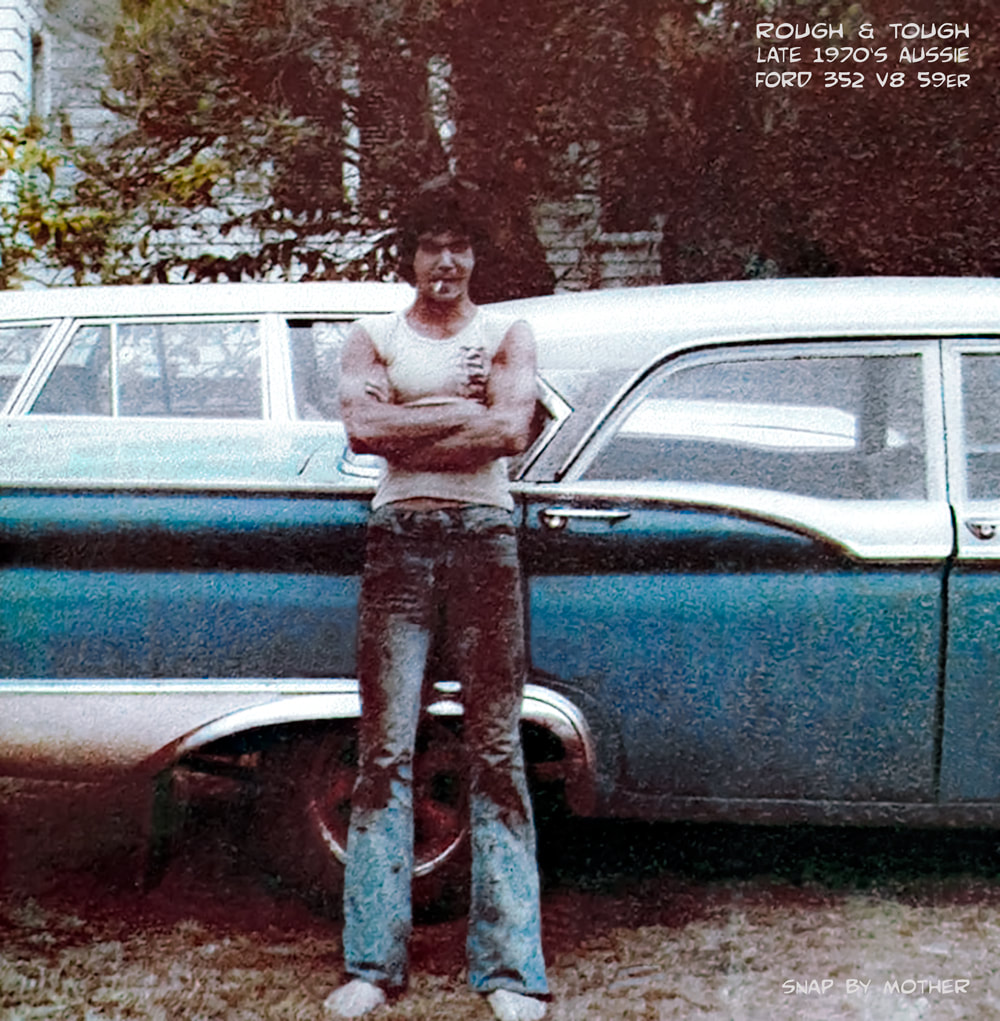
In the 1970s no one cared how they looked, or how they were dressed, and what they drove. As long as you could self-repair your own vehicles, and get to work on time. Original non-washed jeans were fashion, the dirtier the better.
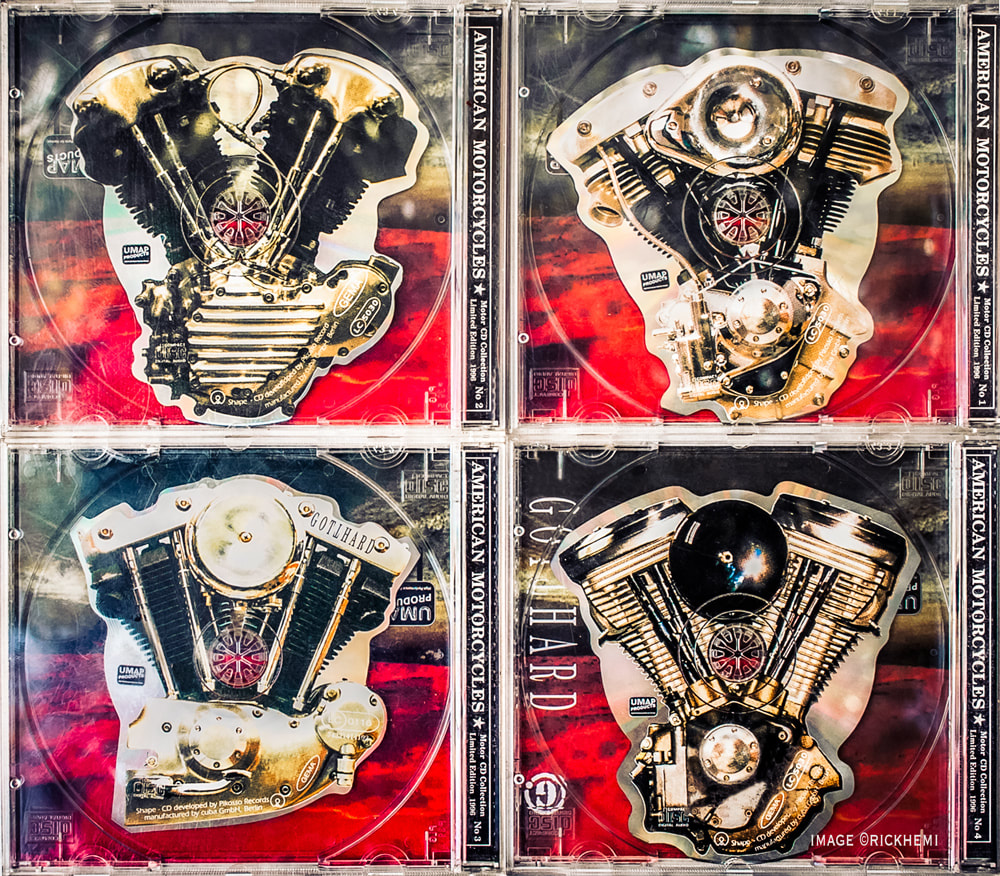
Anyone remember the CD days? Each of these engines above sounded great at full volume. I had purchased the CDs back in '96 when high octane gasoline was still cheap and plentiful. In real time, I rebuilt countless amounts of these engines for customers. It was an era that most of us thought would never end. Thinking about it, If I could stick one of these engines up a anti-fossil fuel Globalist rear end sideways - I would do it.
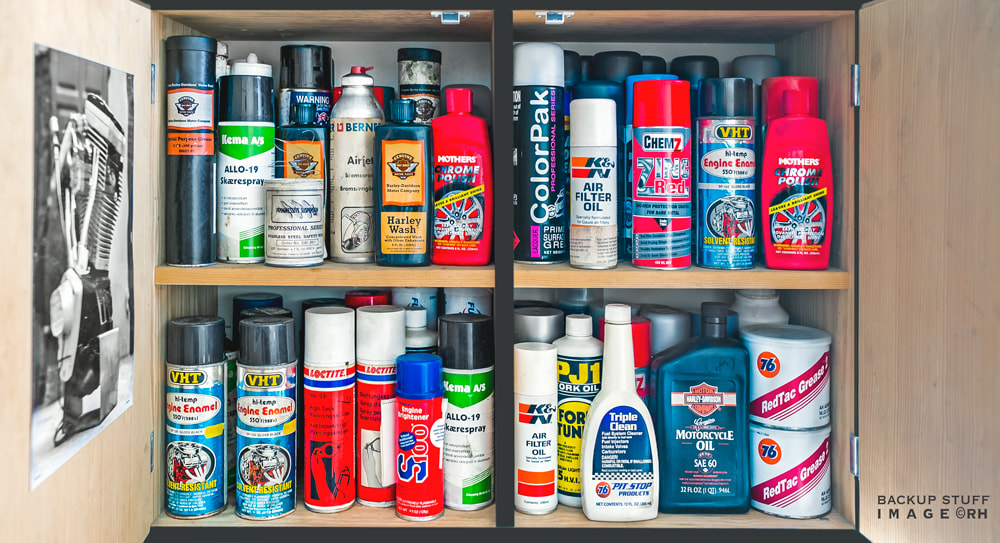
One of the wall hanging cupboards plastered with decals full of necessary backup liquid stuff. Those with wisdom will have the same supplies heading towards the WEF-UN anti-fossil Agenda 2030. Stuff like this will become very expensive, or even impossible to get by 2025.
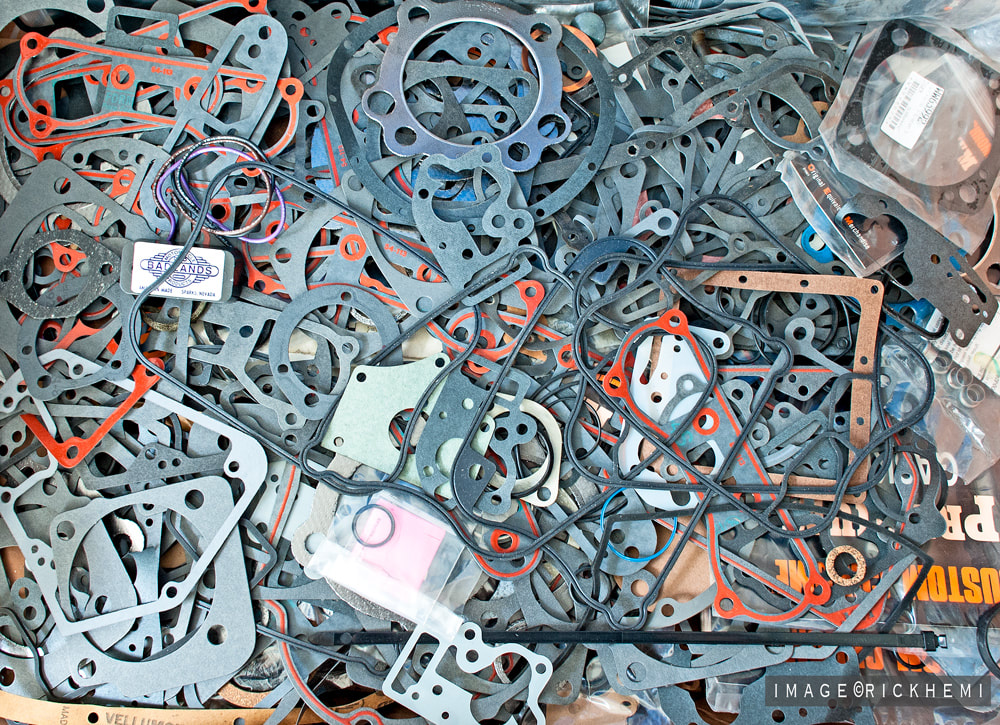
Having your own supply of backup stuff like a pile of gaskets is where it stands in the 2020s
The accumulation of gaskets in the 2020s is imperative when engines require replacement gaskets. Such simple rebuild items like gaskets will become hard to get due to purposely planned break down supplies. Those owning older HD engines like Flatheads, Knuckle, Panhead, Shovelhead and Evo should seriously think stocking up with their own supplies.
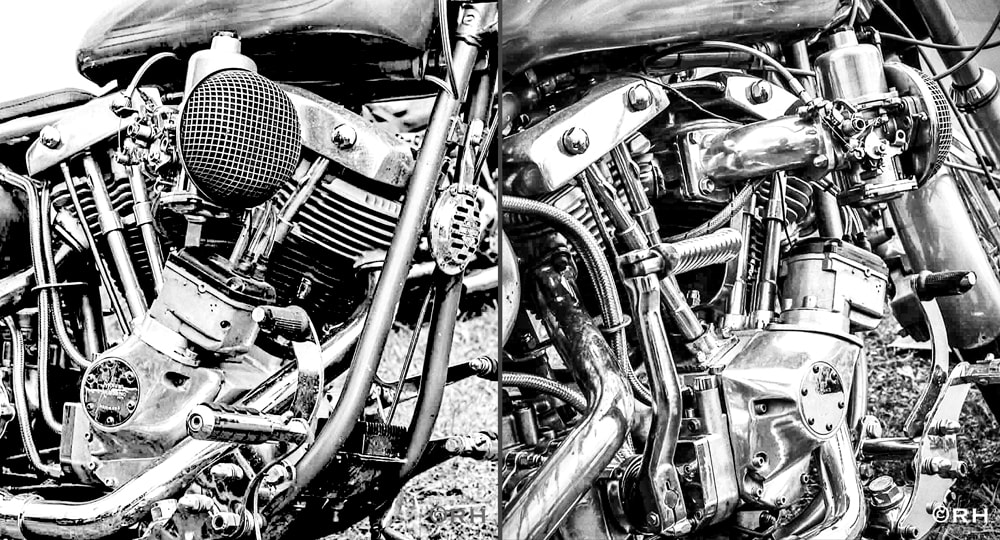
Classic mid-1990s SLR roll film snaps, 1340 kick start Shovelhead, SU carb, Morris magneto, stock frame, turtle top 4 speed, Swiss plates. Below, German 1340 stroked Shovelhead, Zodiac dual plug heads, Nitrous, Recor Oberg oil filter cooler.
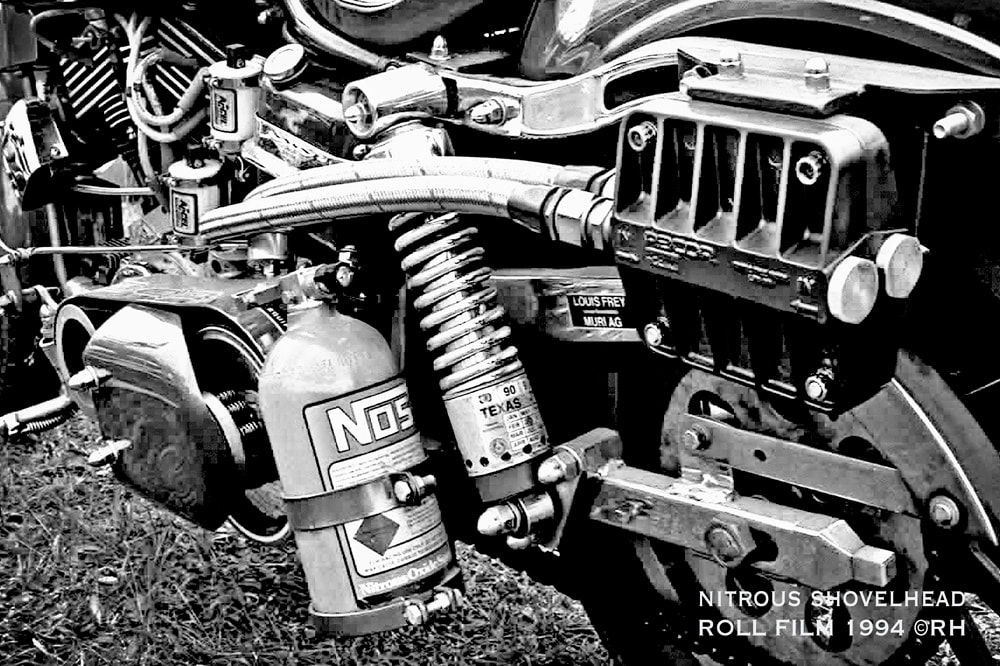
Earls AN fixed and swivel fittings get a 10/10 rating for reliability — American made top quality product!
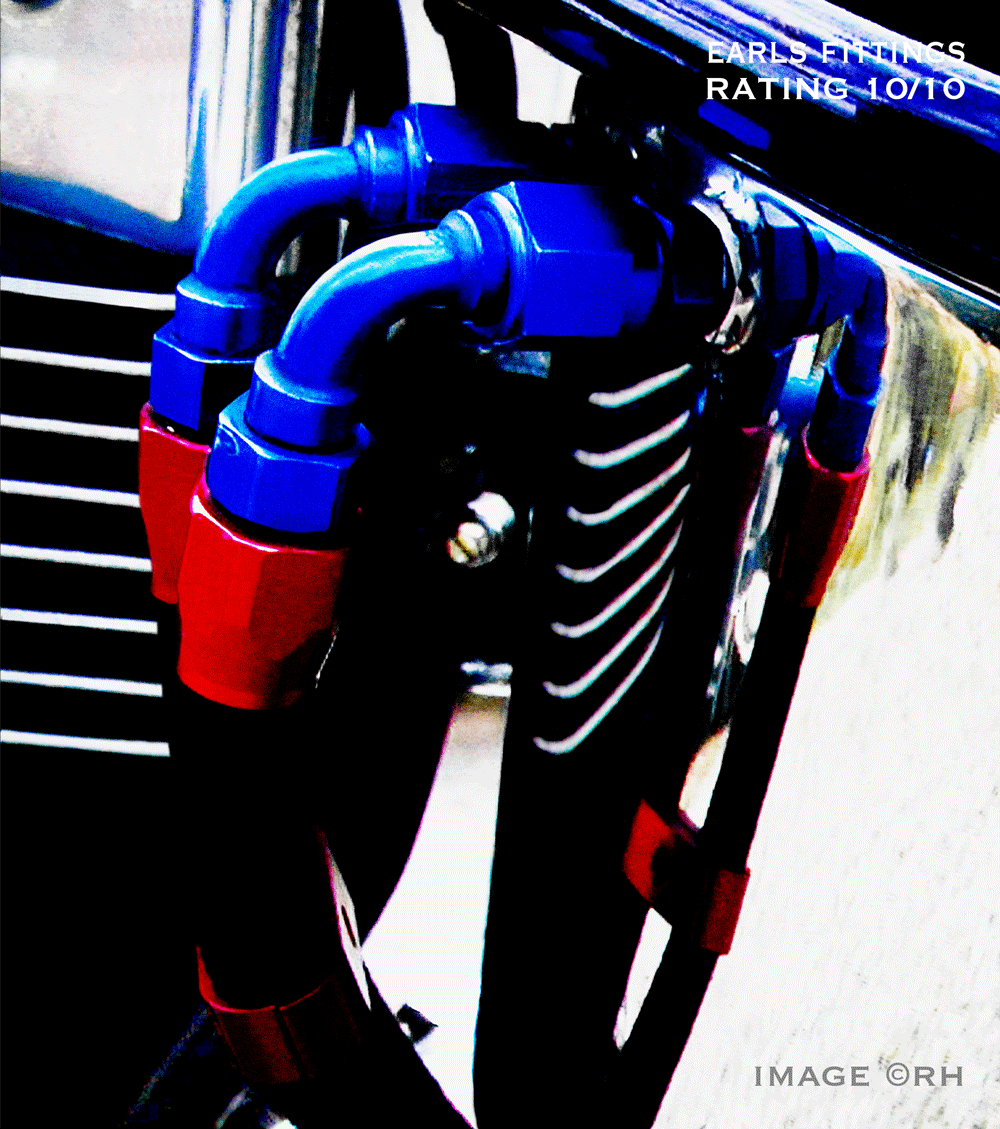
Yes folks, many bikers in the 2020s don't even know what a Shovelhead is, and if they do, these nostalgic engines are scoffed at, as outdated dinosaur engines. Let's not forget the 1990 dual shovels breaking 322 MPH, and holding the world speed record for 16 years — six years after the twin cam was already in full production.
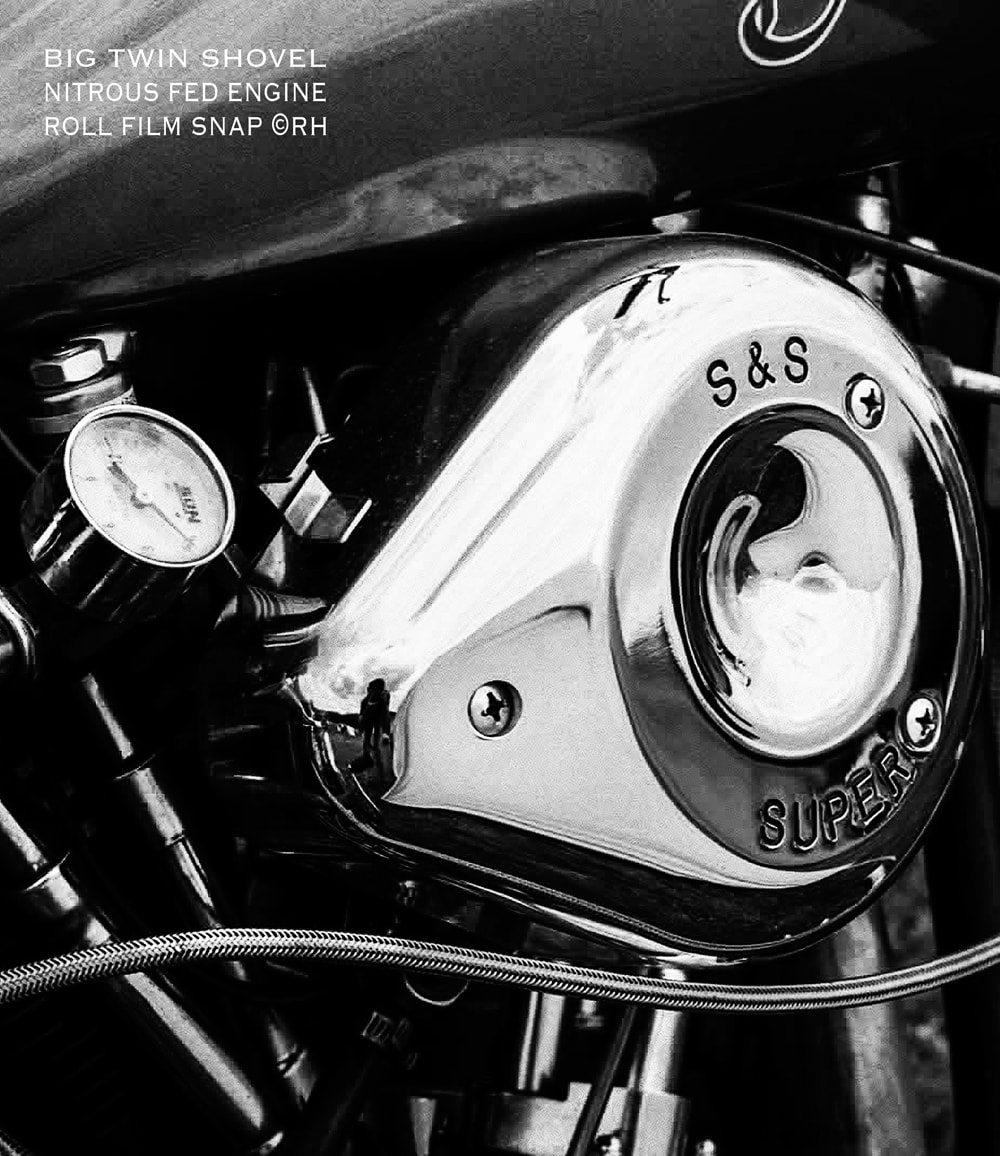
Those out there clinging on to the good old days of cheap gasoline, cheap oil, and endless supply of automotive parts, are blind to the fact this won't exist by 2030. Most of you riding your MC's, driving V8's and hot rods ignored all the warning signs 20 years ago. At least stock up accumulating your supply of needed backup parts while they still exist i.e. spare lubes, cables, clutch, cams, bushings, valve components, inlet spacers etc. The squeeze by pro-Globalist anti-fossil fuel governments will no doubt add massive GST and other increased taxes on gasoline automotive products.
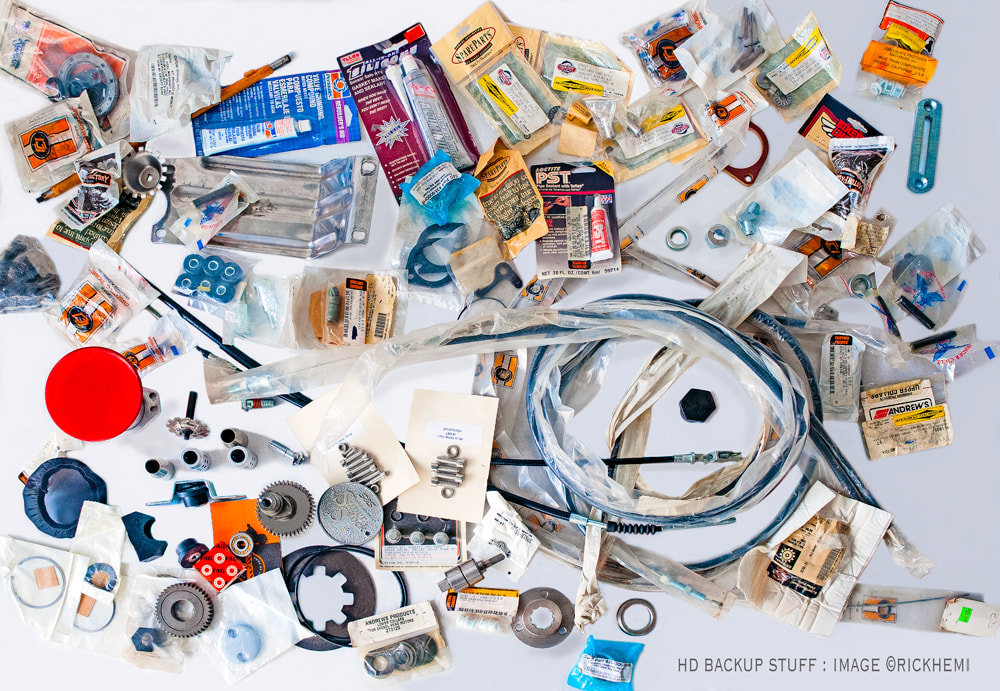
The entire global automotive parts industry is about to crumble and no ones talking about it. Imagine if your fossil fueled engine requires rebuilding, or maybe just replacing a blown head gasket, a burnt valve or leaky cylinder base gaskets. The globalists and pro globalist anti-fossil fuel governments around the planet will ensure replacement parts for fossil engines will become unaffordable or even worse - obsolete. Individually stocking up on automotive parts now will at least keep engines running until gasoline is totally switched off.
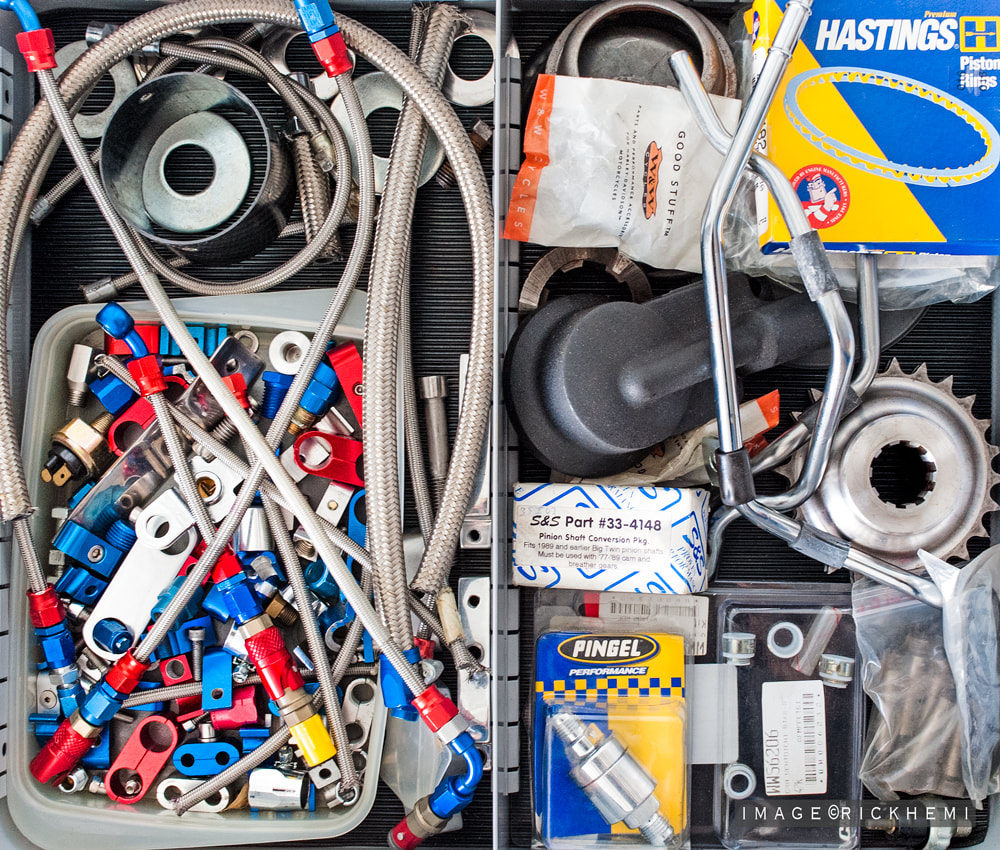
Spare backup biker junk that will become impossible purchasing including rising costs speeding towards 2030
The globalist reset was already in motion to eradicate gasoline vehicles, middle class businesses, and cash to reestablish their initiatives for full power control over populations. Your own government has probably already been heavily influenced and controlled by the UN and WEF young global leaders i.e. Ardern, Trudeau, Marcon etc, who were placed there for one reason, and one reason only - To destroy their nations freedom and prosperity ushering in the skeleton framework of the NWO aka build back better, using global boiling 15 minute smart cities as a key component to reform the planet under their full control.
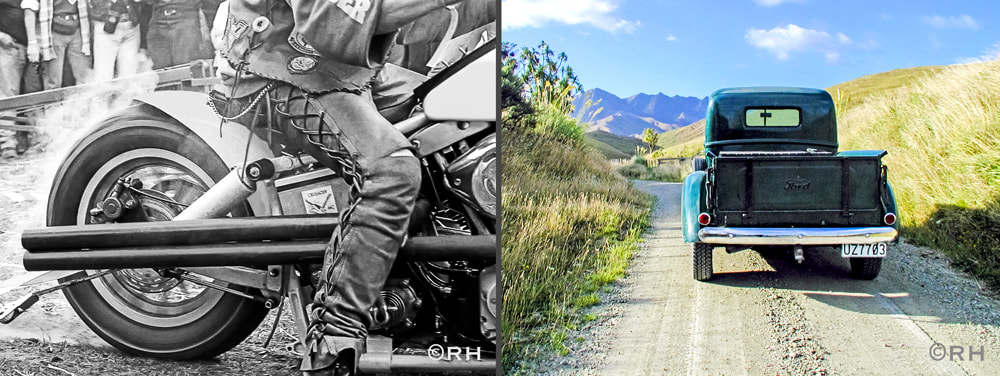
It's coming - The end of days of gasoline fuel are over! Sell off all those weekend auto toys for boys while you can!
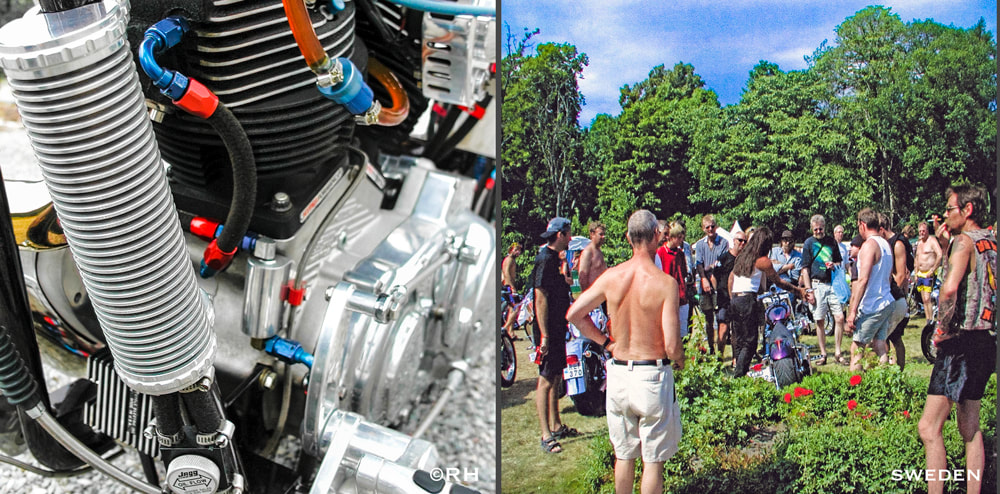
132 cubic inch hardtail front mounted oil cooler : 132 hardtail startup HD biker event, central Sweden.
The push for electric vehicles in the 2020s is now in top gear. The globalists and their useful idiots around the planet would prefer to have all of us riding push bikes rather than filling up gasoline powered transport. There's nothing better than smelling the fumes of 97 octane while filling the tanks of a Big Twins and V8s. Gasoline by 2025 will become unaffordable for most. Best advice, sell off whatever is sitting in storage to get maximum return before fossil fuel automotive become worthless pieces of metal.
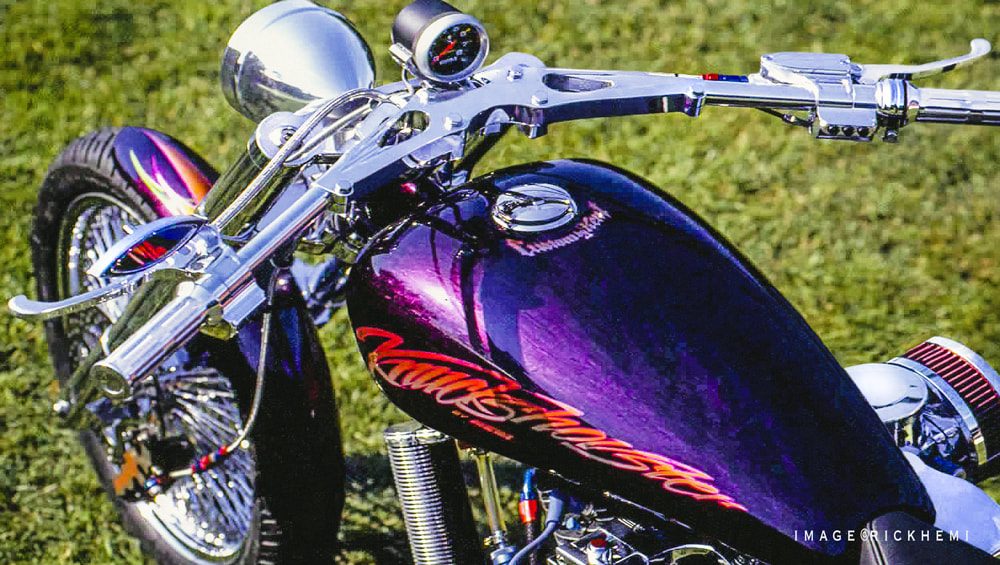
It's close to the end of pump gas petroleum as we see it, unless one is lucky enough to be living in Venezuela. Instead, the crazy planet will bow to China, who are ready to export millions of EV batteries filled with ingredients from the northern regions of Afghanistan. The truth is, the globalists and bankers have put all their golden eggs into China, and fund both sides of the coming chaos and Western upheaval. It's as though the world is hypnotized by saving the planet from fossil fuel production, but then re-polluting the planet with used toxic batteries, and still using fossil fuel to charge EV junk. Mining for future precious metals certainly won't be achieved using EV machinery - Got It?
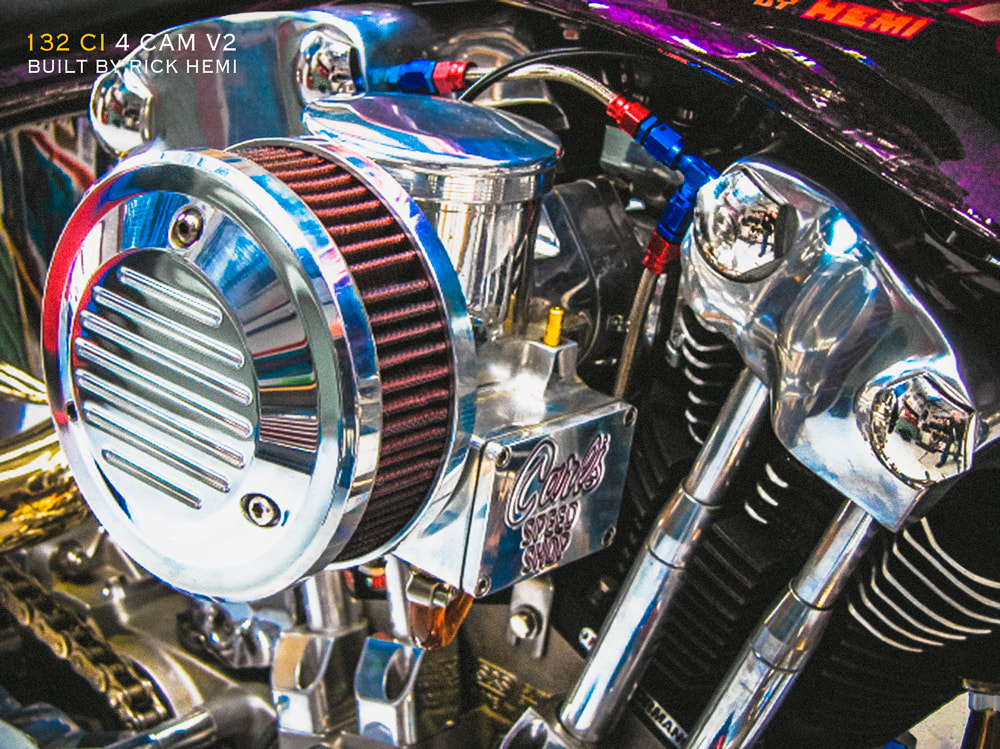
My Scandinavian biker buddies laughed at the idea of building a one-off hardtail with a 132 cubic inch 4 cam case engine. They didn't laugh when this rig fired up. Instead, they were on fire, totally hypnotized listening to the sound and power of it. Engines like this are impossible to find, you have to build and design your own. S&S Case, CNC Ductile iron cylinders, STD port & flowed heads, Andrews cams, Crane roller rockers, Jims solid lifters, Tapperlite pushrods, Proflow oil pump, Andrews transmission gears, Earls fittings.
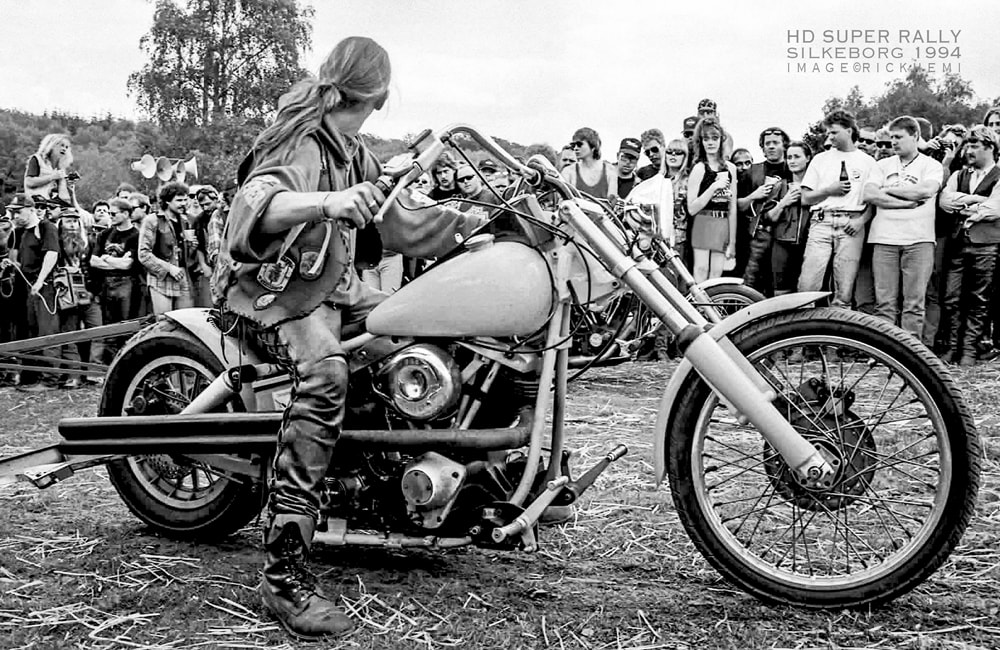
Classic snap mid 1990s, sled pulling Harleys, 1340 Shovelhead.
I was fortunate enough to have been born in the right decade. Since the 70's, I've owned, built and driven countless V8s, Big Twins and 4WD's while residing in different locations around the planet. It's now the early 2020s, take some good advice, sell off all those gasoline vehicles that aren't being used, get rid of all debt burden, and downsize to an affordable lifestyle. Things are going to get tough, real tough, so don't delay - do it today!
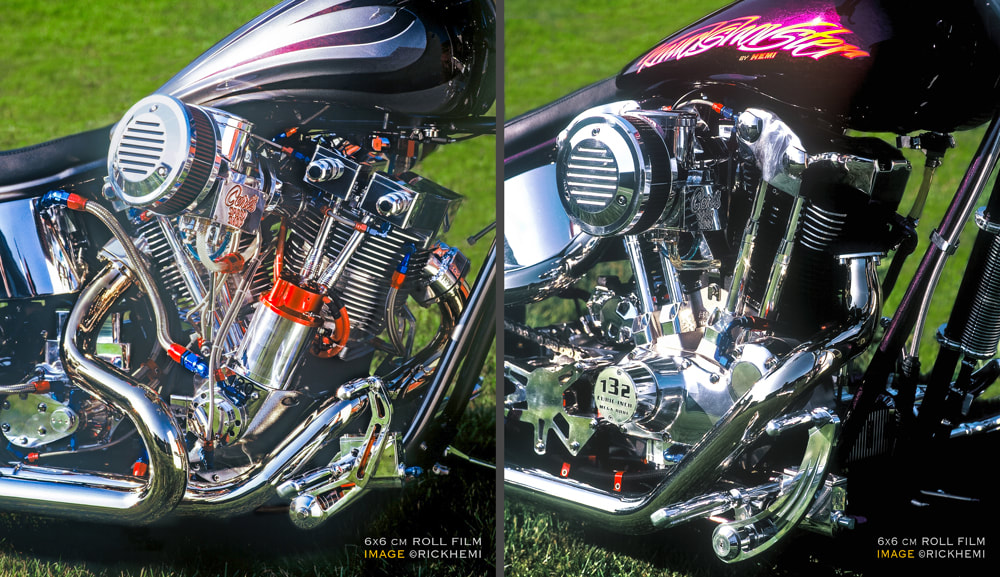
John Harmon 120 Shovel and 132 4 cam photographed with medium format roll film cameras.
My own V Twins loved running on high octane gasoline. I even dropped a portion of 120 leaded avgas in the odd tank refill to clean the valves. Both engines ran like hot rockets, sounded like helicopters on steroids and guzzled gasoline like the tap turned on. The day gasoline becomes banned and controlled rationed becomes the end of all freedoms as we knew it. Enjoy riding those gasoline rigs while you can, time is running short. By 2030, gasoline will be erased for public use if the Globalists get there way.
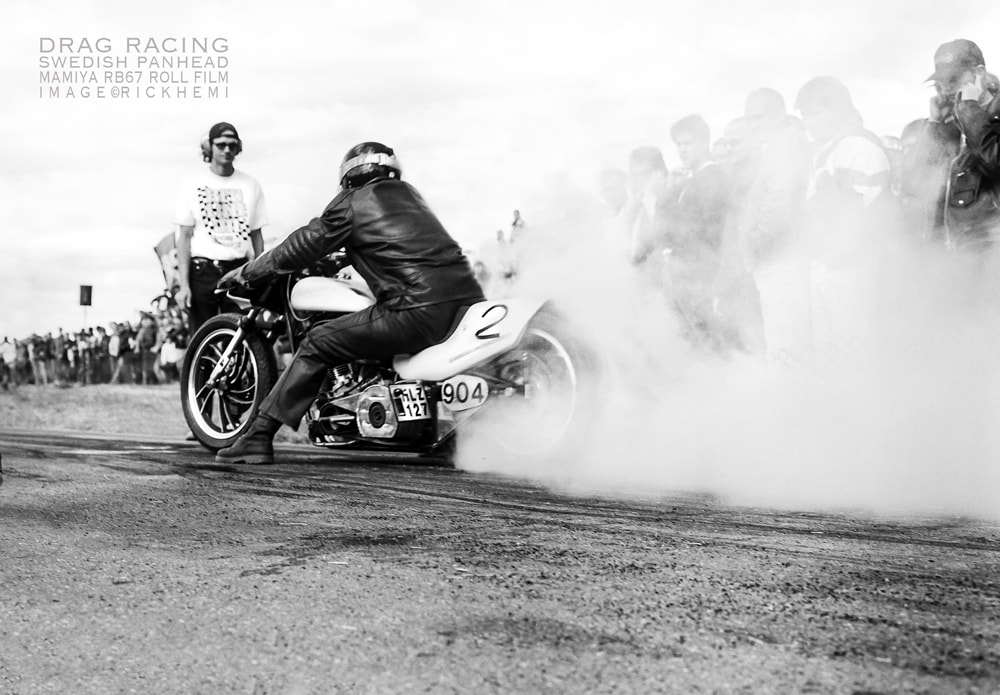
I not only built big twin V2 engines and custom bikes, I also photographed them using medium format cameras i.e. Mamiya & Hasselblad.
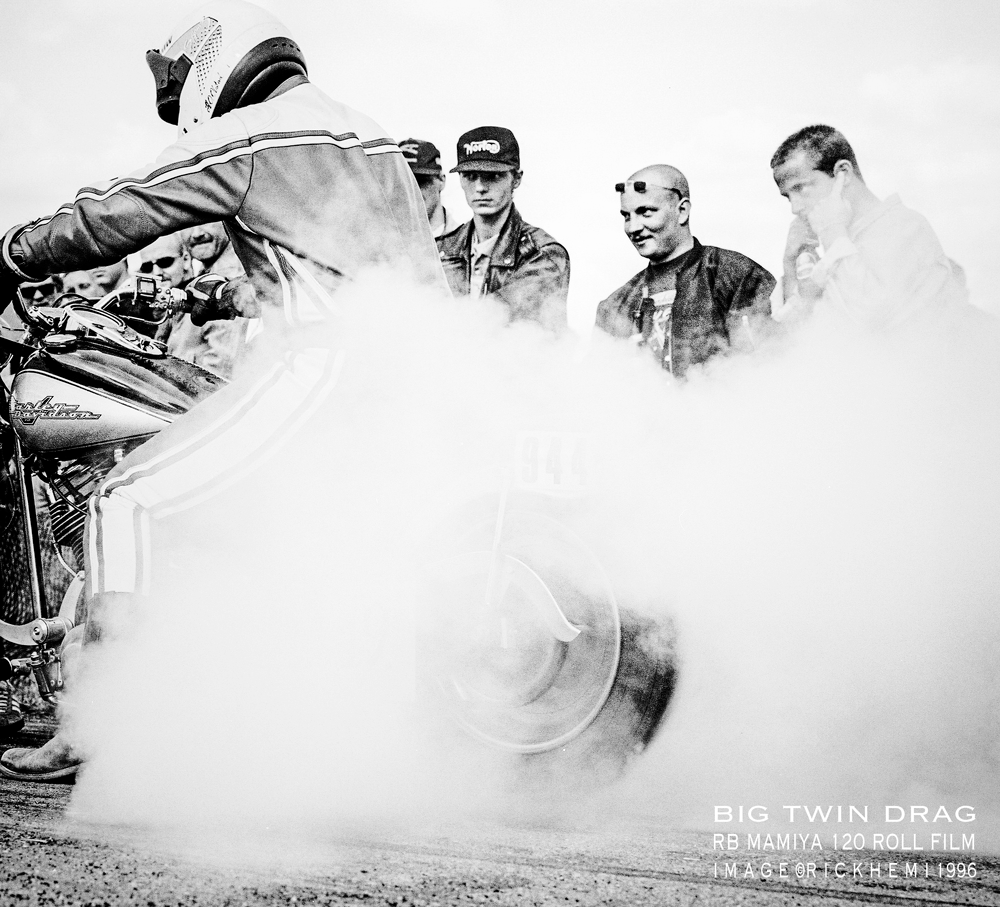
The great leftist socialist global experiment, is in full swing. SARS-CoV-2 mRNA jabs has created global populations into live lab rats. It's nothing more than a Beta test for even greater upcoming scheduled plans. Brainwashing indoctrination is at all time highs. Doctors have become yellow cowards, while MSM pollute the internet parroting the same lying jargon. Gasoline has now become a dirty word, the gasoline days are over, enjoy using it while you can. Maybe when the increase of more sea and land volcanic eruptions begin pouring massive amounts of sulfur fumes through the atmosphere at unprecedented levels, the wearing of masks will then make sense.
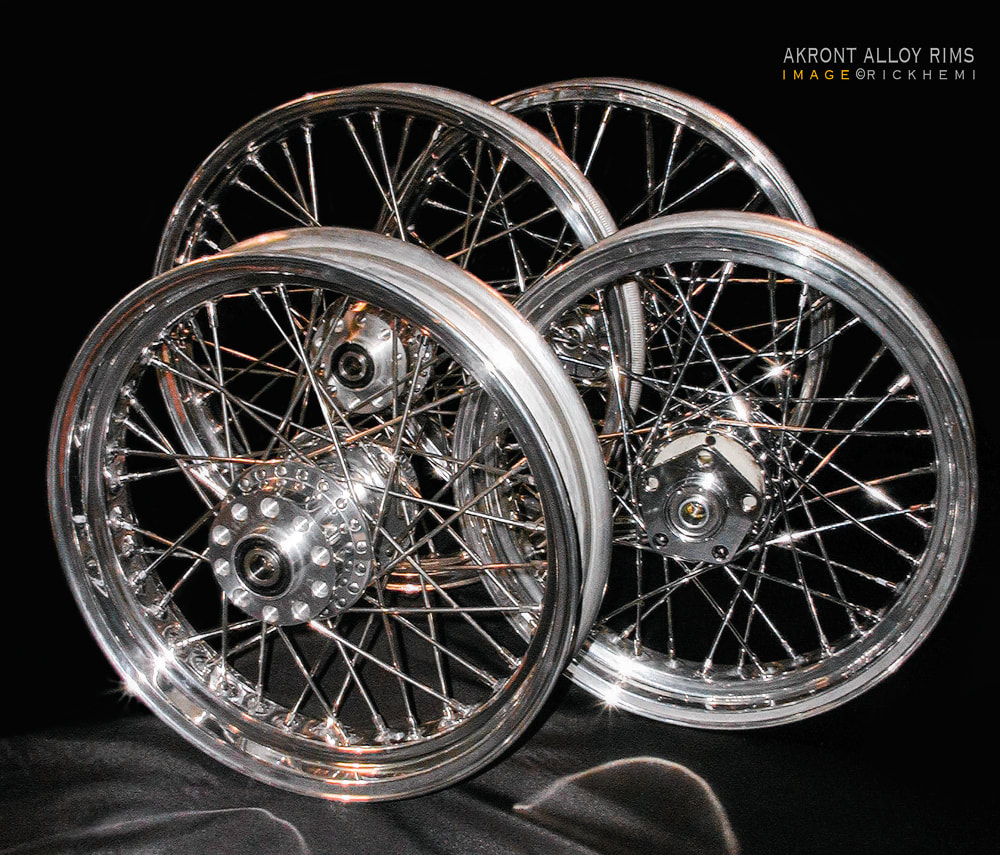
Akront 40 spoke alloy rims made in Spain. An image I took decades ago taken with SLR roll film. These classic rims sold like hot cakes in their day. They were affordable, easy to maintain, and most of all - Reliable.
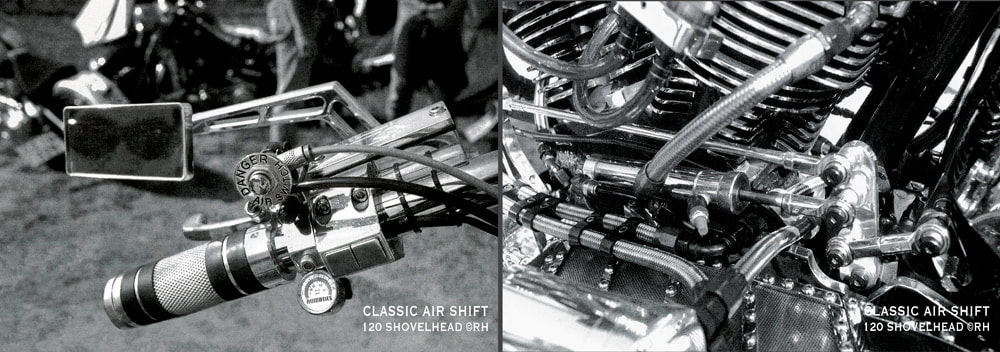
An early first version air shifter used on the 120 Harmon Shovelhead. Did it work? You Betcha. The rear dual selector arm on the gearbox was later re-modified with a beefier arm support design and bearings.
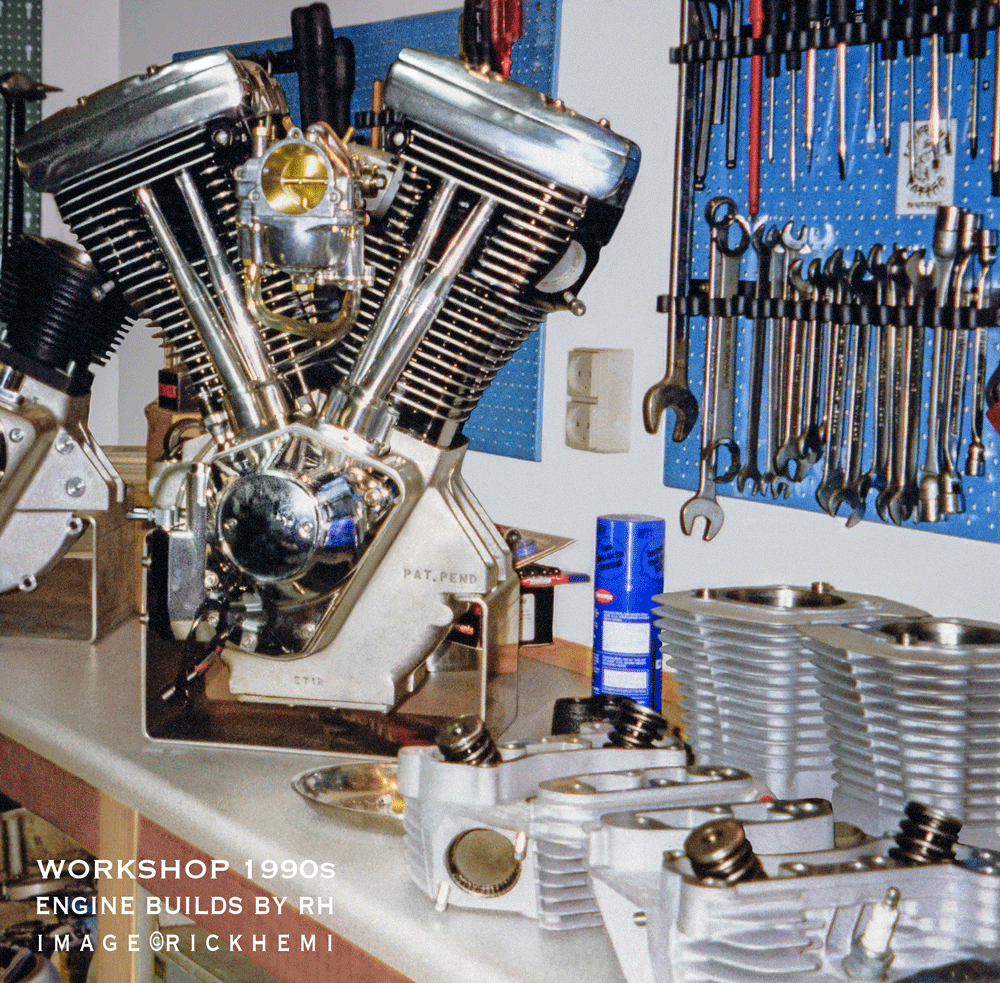
An Evo 1340 with rebuilt internals, resprayed cylinders and heads, and Delkron case — Mamiya 7 roll film enlarged crop, mid 1990s
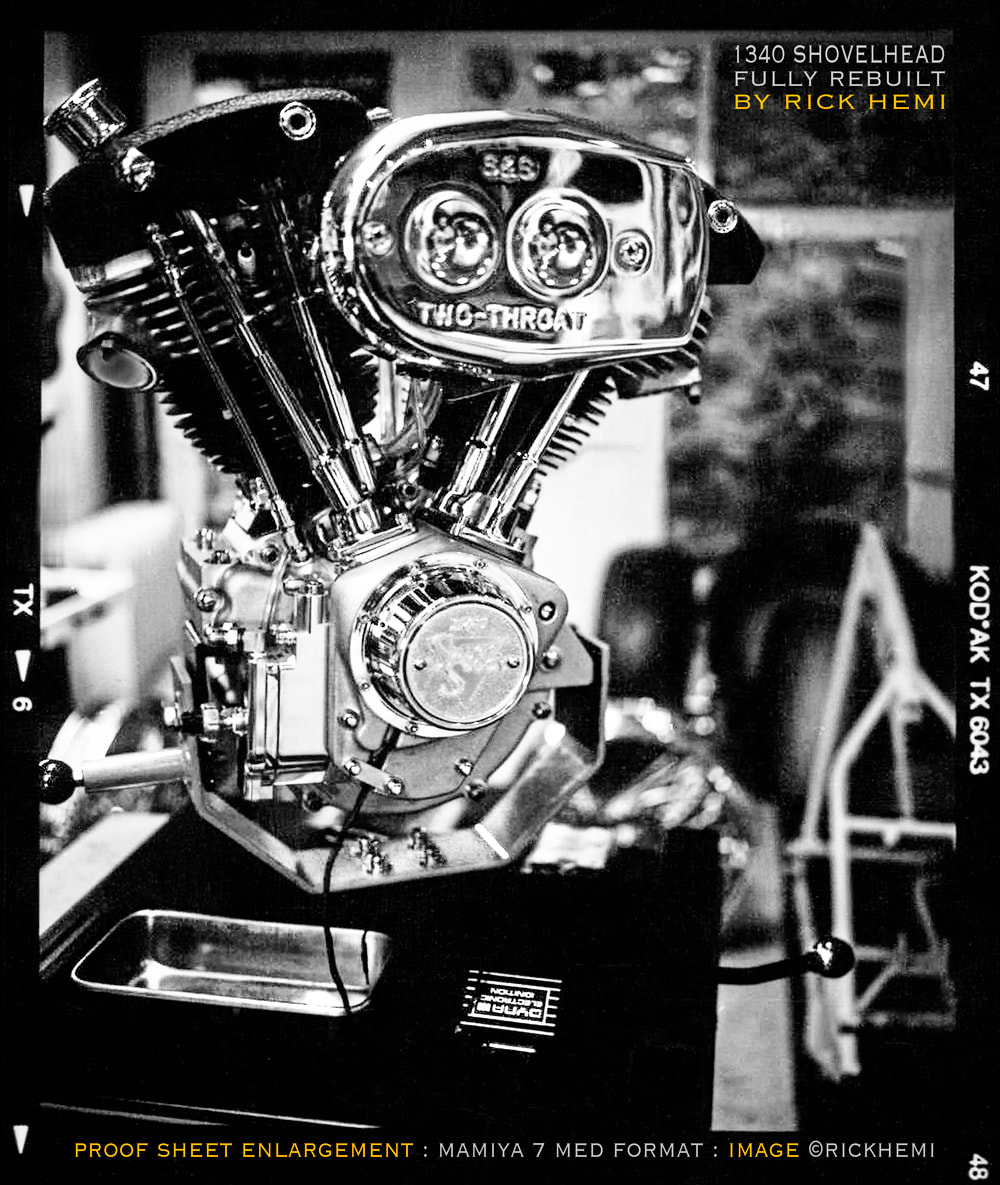
Above, the days of medium format roll film. No, this isn't a negative digital image, it's only an enlargement taken from a proof sheet. It was normal to have negative medium format roll film images placed together on proof sheets before choosing whatever images were worth enlarging before using original negatives. I had used a Mamiya 7 for some years, and honestly regretted selling it. The classic Shovelhead above received a full rebuild, including an aftermarket S&S crankcase.
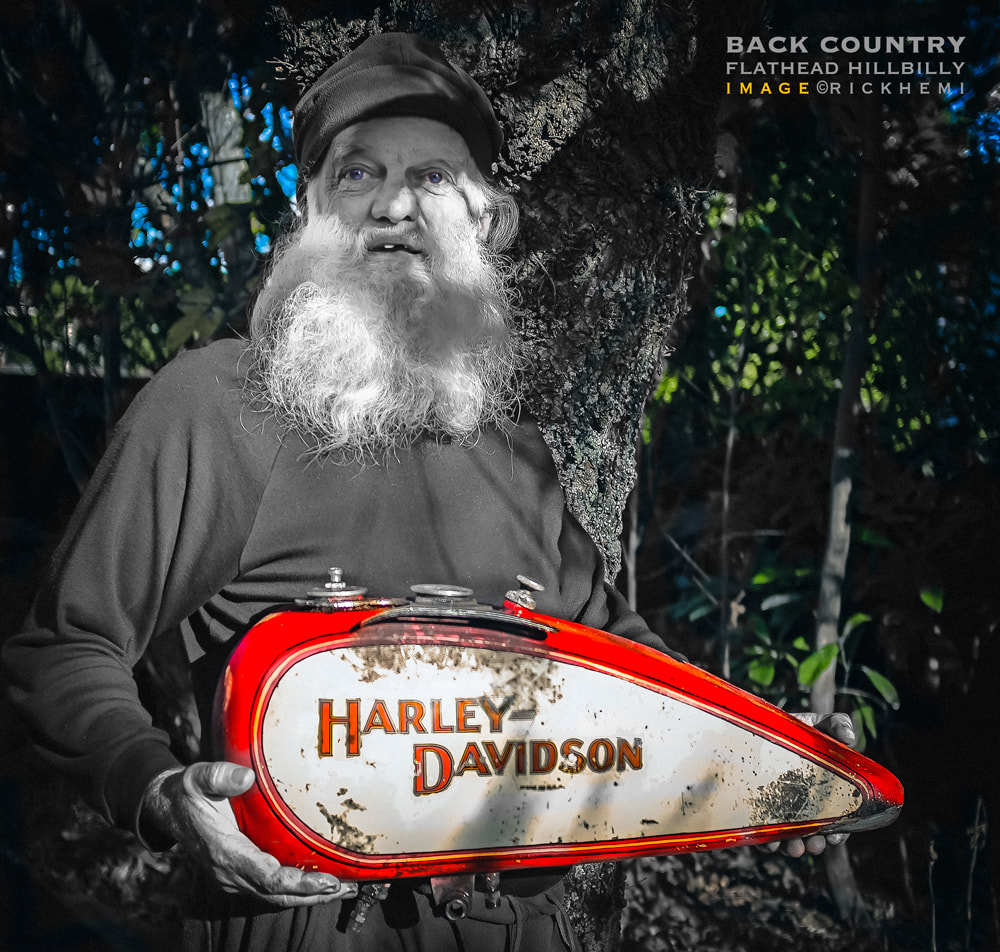
An old timer dedicated to WLC flathead Big Twins taken with a rangefinder. Below, mid 1990's hand held closeup snap using a Mamiya RB 67 medium format camera with a 90mm f/3.5 lens @ f/3.5

There's still a soft spot for medium format roll film in the 2020s, a mid-90s snap taken with a Mamiya RB 6x7 with a 90mm lens.
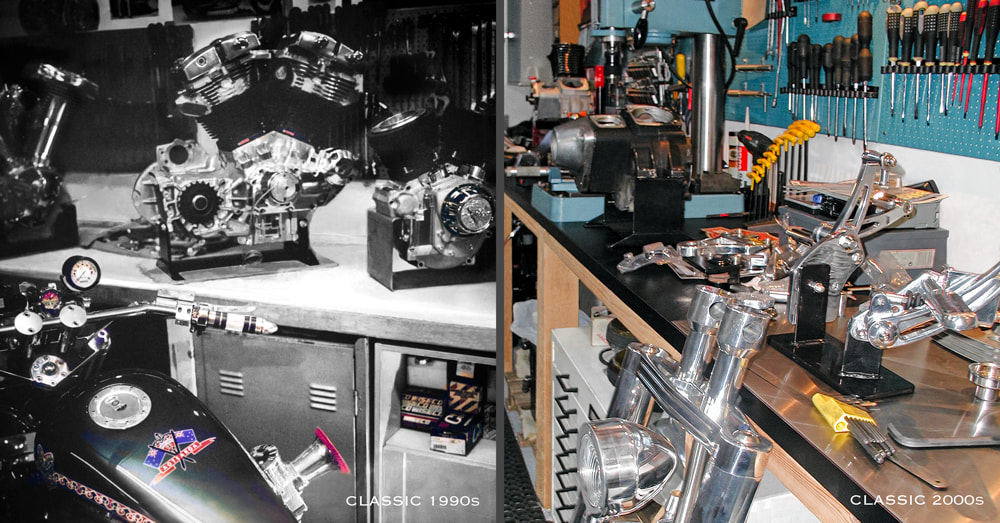
Classic garage workshop snaps taken with anything available at the time before smartphones kicked in. The regret is, I didn't take enough images of biker garage stuff. There was no importance when big twins and engines were in your face day in day out.

This is what happens when not using 6x7 120 medium roll film cameras — crappy subpar point & shoot mid-1990s garage snap.
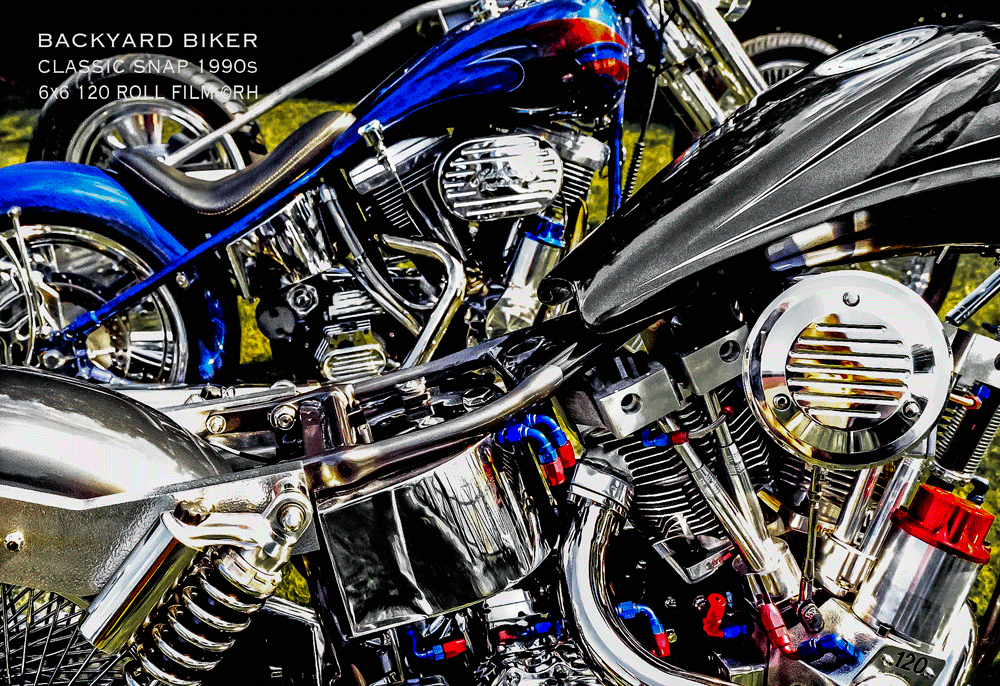
Copy from a copy of a 25+ year old print film image. If the original 6x6cm negative was used, it would look pristine for its age. But then the above is just one of those backyard snaps — Hasselblad medium format 120 roll film 1990s.

Most original roll film negatives through the 1990s were either discarded, lost, or trashed. These snaps were fortunate making it here. The above image is from a small proof sheet enlargement. If the original negative was used, it would match the same quality finish of most high end cameras being used today. Mamiya 7 medium format 120 roll film.
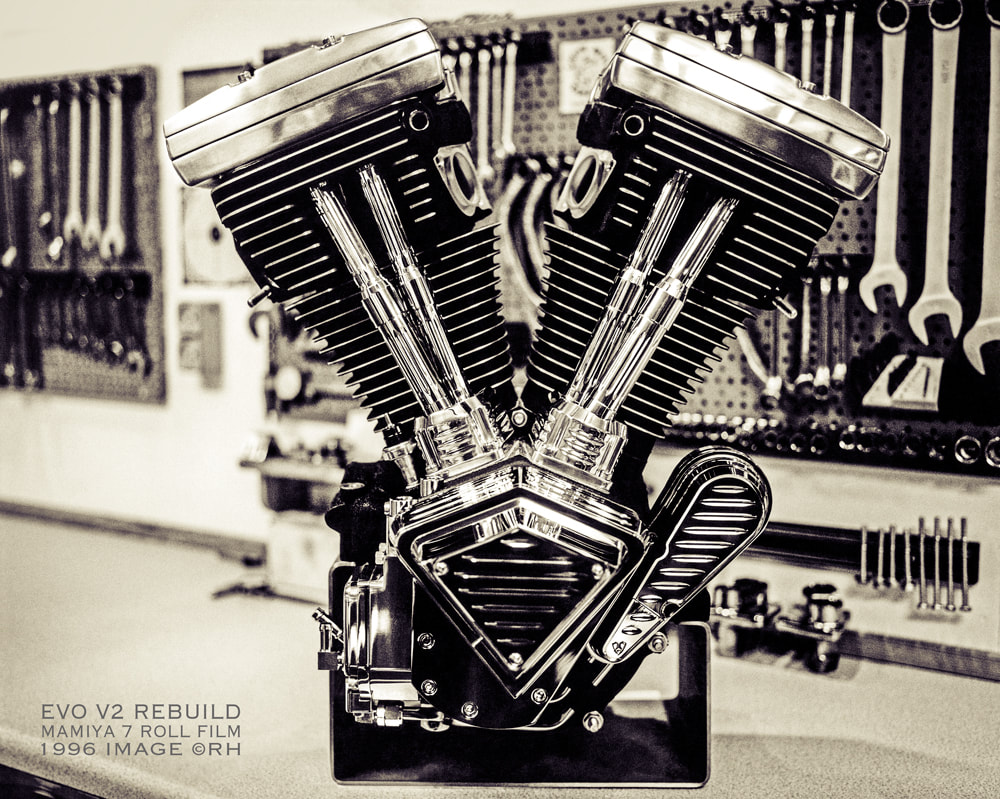
A rebuilt modified Evo V2 with Arlen Ness cosmetics, image was taken with a Mamiya 7 medium format roll film camera, mid-1990s.
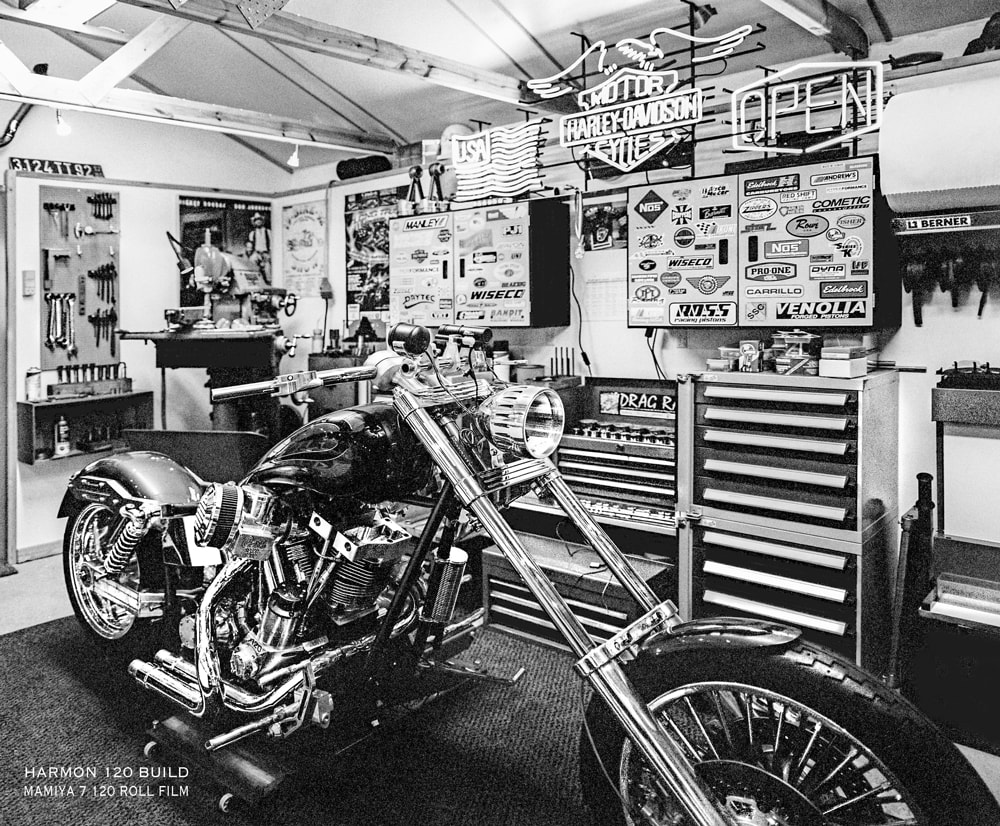
Have you ever experienced what it's like to have all your freedoms taken away from you? By 2027 most who cannot think for themselves, who rely on government, will eventually become desperate in one way or another bowing to their puppet globalist masters. The grey area of freedom we've all been accustomed to, is vanishing into thin air as I write this. By 2030, global depopulation will have already kicked in. The globalist want to control all your freedoms, all your thoughts treating everyone as slaves. No one will be able to leave 15 minute smart cities. Everyone will become under the control within the beast system if the globalists get their way. Cash will have vanished, replaced with personalized CBDC and digital swiping by 2029. This is not me saying this — the globalist are saying this.
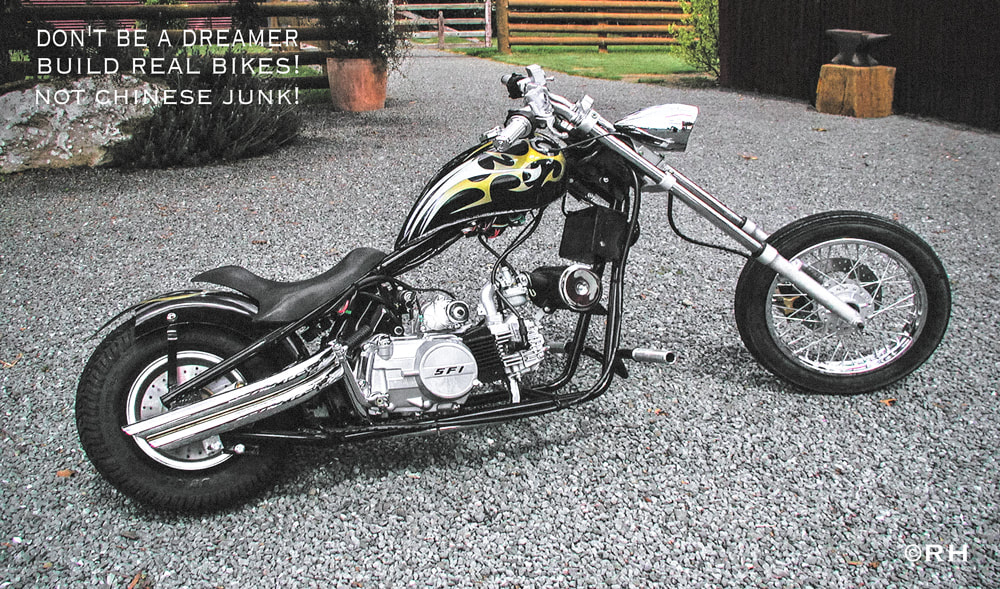
We now live in a world smothered in Chinese cheap made junk. The Western world have been fast asleep for the last two decades allowing their own manufacturers setup shop in China. Western globalist controlled government is to blame allowing BlackRock and Vanguard to expand their trillion dollar growth seizing power control on everything material, harvested, drunk and eaten. The outcome for many is bleak. Global boiling, BBB, man made viruses, EV and 15 minute smart cities is where it's all going. Only those who are awake, not the dumb down, not those dependent on government benefits can comprehend what's coming at full speed with no brakes.
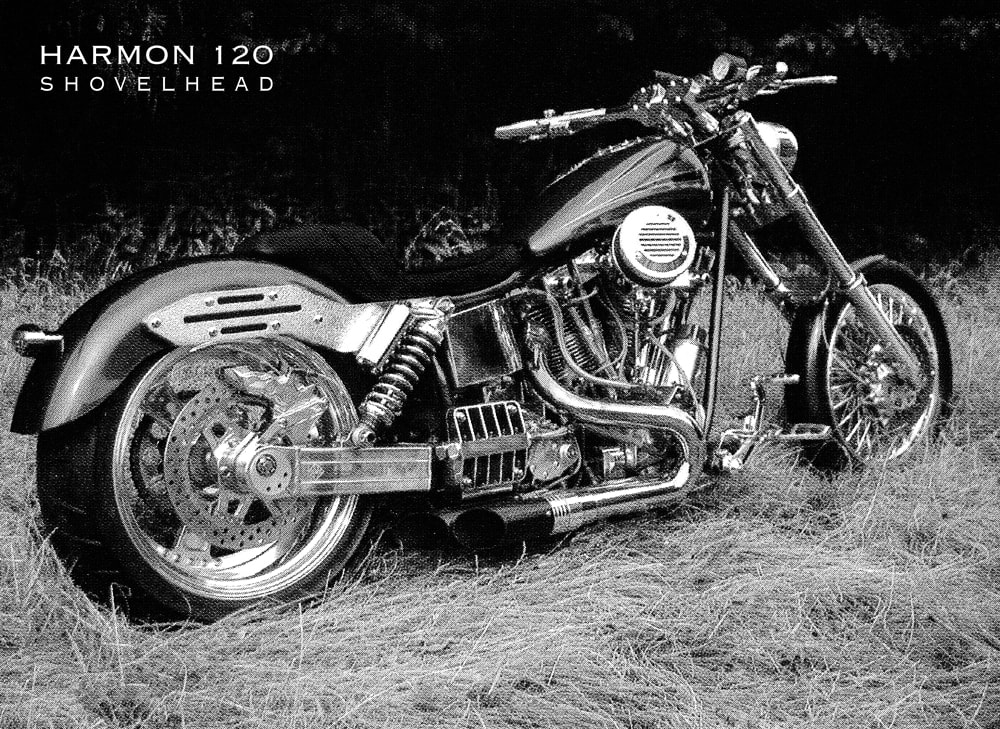
What's one thing we all forget to do? Take as many images of whatever we build and construct from start to finish using camera gear.